

Skills
Sketching You will have to sketch a number of poses from a model or a picture of a model. It is important to learn to mentally 'map' the miniature if you want it to look like your concept art. Think of sketching as 2D sculpting practice. It is cheaper than putty and will keep you amused at boring weddings. Sculpting There is usually only one reason why a figure doesn't work for me, it needs more time to be reworked. Or, to put it another way, I need to learn the correct combinations of pushes, pulls, and smoothings to get the look I want. You will need to plan on a figure taking 2-3 weeks minimum in most cases (although I have done a 3 day marathon). Armature making You will need to be able to make (or purchase) a fully poseable armature to better capture the pose of your figure. 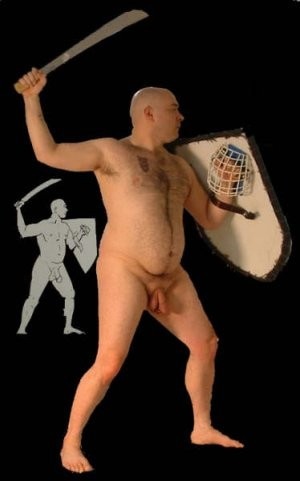
Concept (Art)- a beginning
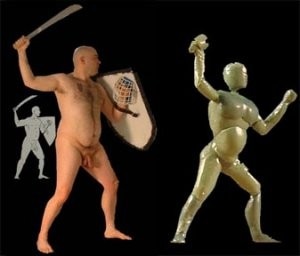
Models A model can be anyone; or it can even be an action figure. You are your best model in most cases. If not pester a spouse, girlfriend, or who ever. They need not pose naked but it should be at least in a bathing suit. The whole point is to see how the human body is shaped in a certain pose. When you look at the pose it should convey a one word 'message' to the viewer. So the pose above could be called 'fighter'; 'ready'; 'portly' etc. Although you could just work directly from this picture for the purposes of this exercise it is important to start with the basics. Knowing the basics gives you a better foundation for your skills at higher levels. So you should sketch a picture of each pose as well. Think of it as a 'dry run' for sculpting the figure. If you know how a figure looks because you had to spend 4 hours sketching him then sculpting him will become second nature, like driving and listening to the radio. 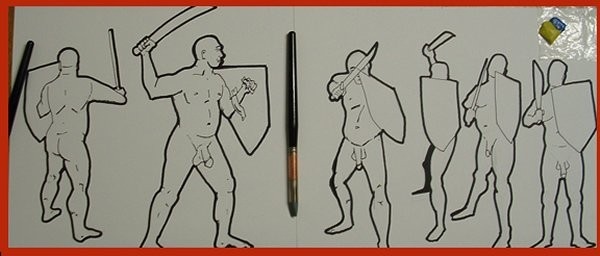
You should know how your model looks from all angles. You should know how wide they are at the hips and at the shoulders. Take a picture of your model at all angles. Pictures are good references to inspire you but the art is the start of your character. When you sketch from pictures you should 'tweak' the character to better fall in line with what you want the sculpt to look like. So Jay obviously needs to lose a few pounds, fix his posture, and learn to take pictures in a warmer room. Sven, on the other hand, is a little more trim, stands a little taller, and is obviously using some sort of enlargement device.
Skelly
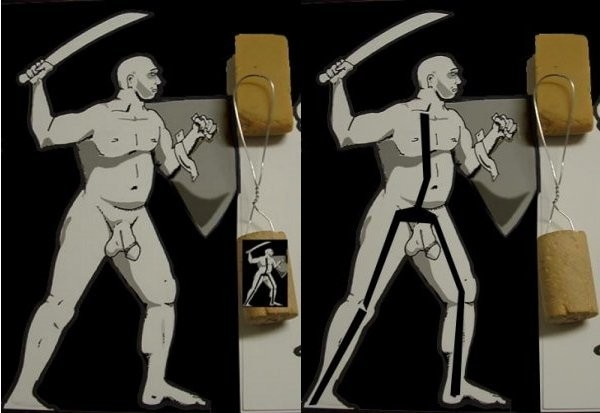
Just like real life a sculpture benefits greatly if it has the right structure to it. What you need to do is draw a stick man over your art and bend the wire armature to match in scale. One trick is to hold it up with one eye closed and eyeball it but I use a digi-cam when I REALLY want to get accurate. 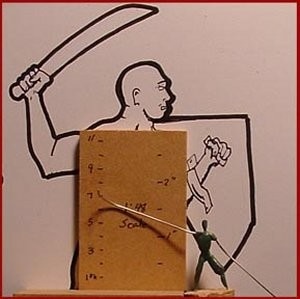
Dolly
The Dolly should be a very thin coating of greens stuff to both bulk the figure up and to 'lock' the wire into the chosen pose. Always remember that less is best when sculpting at this stage. You are merely padding out the wire so that it becomes a thin man/woman/whatever. Notice how I have kept the wires for the arms long and still bare, this is to keep them out of the way while I sculpt. When I have completely finished the legs and torso I'll worry about the arms. Using my scale of 1/48 you can see that this figure comes in around the high 5 to low 6 foot mark if he stands erect. Likewise his head, legs, chest and 'hips' are still a reasonable length. 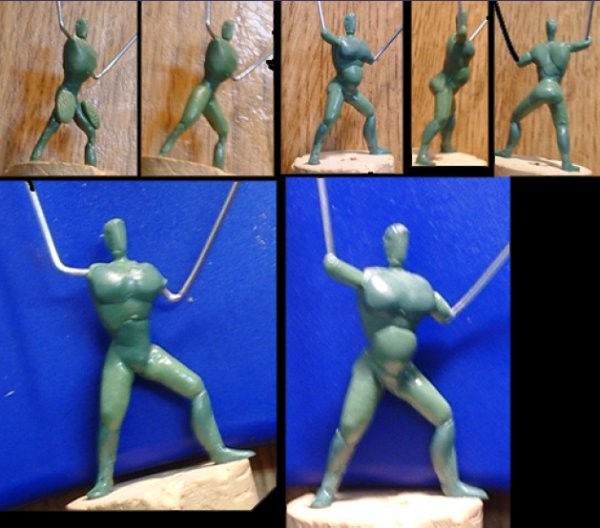
Where's the beef?
The next 'stage' will take me about 2-3 days of slowly adding bulk to the Dolly. I add putty in VERY small amounts.In the first picture you can see the two 'largest' blob size I add for the entire thigh. Using my 'hard tools' I make sure the blobs are firmly affixed to the legs then I use my curved clay shaper to smooth the putty around the limb. In the two enlarged photos with blue backgrounds you can see the difference between a 'thin man' sculpt and the some what more portly Sven. I've also began adding to the upper biceps to firm the limbs in those positions and to blend the chest and shoulder muscles together when they are added. 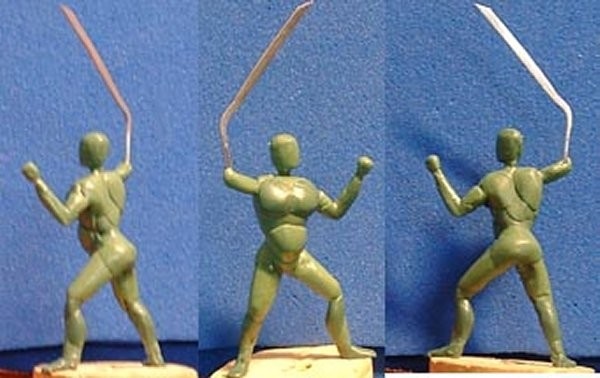
When the Dolly is at this stage, the stage where all the muscles and 'fat' have been added, all he needs is 'skin' to make a little nude man. I've firmed up his left arm and started his sword arm. I generally do the arms last usually because if any limb has to be cast separate it seems to be an arm.
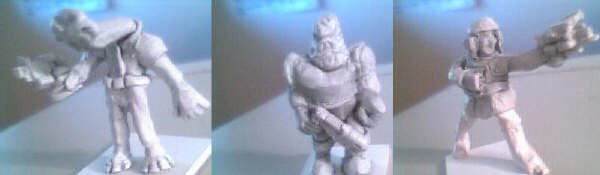
You can see that the pose for the miniature is much more aggressive than the concept art which is more about body structure at this stage. This is how far I usually take my 'dolly stage', right to the 'skin layer' so that now 'dressing them' in clothes, armor etc. is pretty easy as the putty can be easily form fit to the dolly.
Ok, now it is time to 'dress' Sven, no more nude. This character wears a Roman style lorrica. In fact I have sculpted this character in this armor many times... I'd like to think I'm getting better at it too. If I wasn't already familiar with the armor I would search out pictures and photos of it. 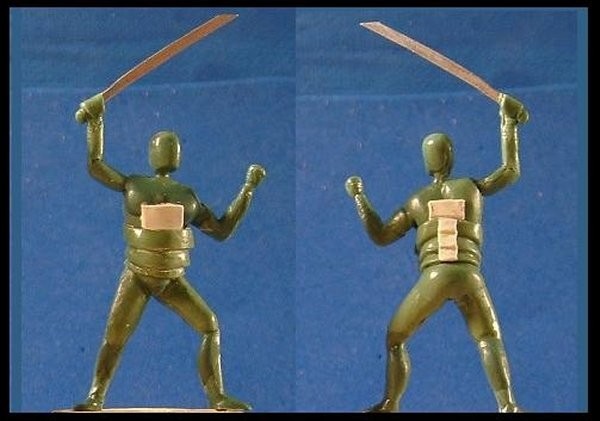
Here you can see how this version of Sven is more 'true scale' than previous versions.
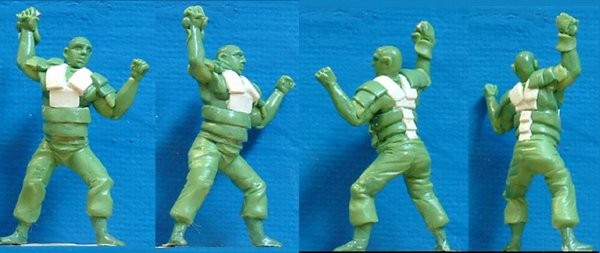
I have added the armored shoulders. I just need to do the Desert Boots and then it it's on to the weapons. I snipped the attached weapon as he will now have a variety of options instead.
|

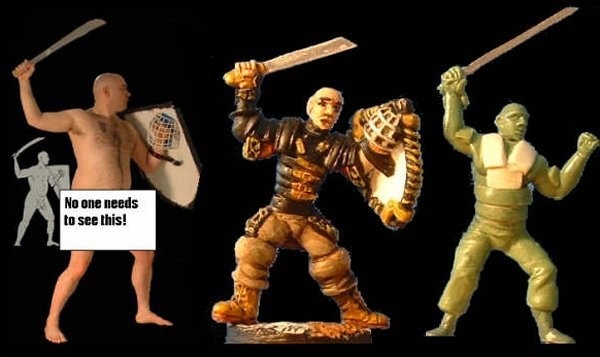
'Vulcanized/ Standard Method'
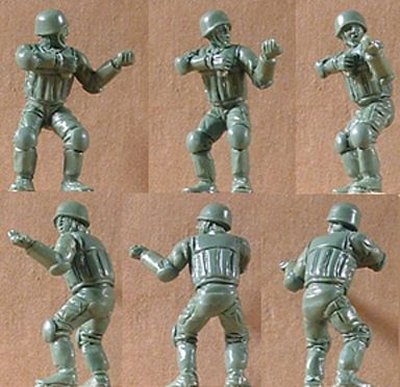
Here we have a blurry pic of a green. 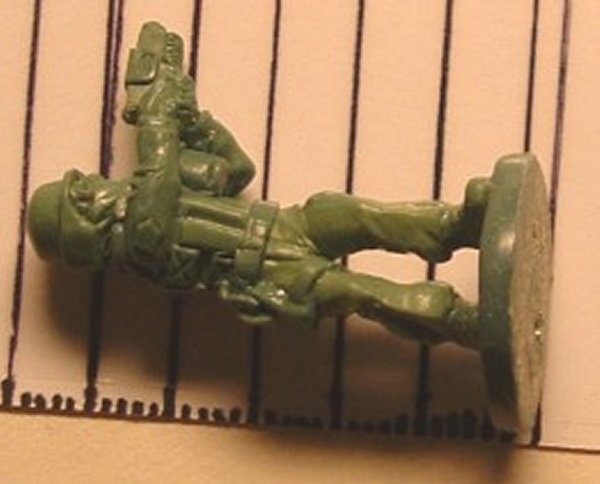

Green, master, master, painted figure (Mega Miniatures SWAT figure).
Vulcanised greens turn brown. This is the most common method in the industry (currently). As you can see the green is literally cooked. As such this method is somewhat limited in the materials you may use in constructing your green. Some things to know: Plastic will melt. Glue may vaporized (and the figure may snap). Green may be destroyed; repeatedly vulcanizing a green will destroy it. Using too much blue in your ratio may leave the green stuff too soft to vulcanize (it will smoosh). Some putty will not survive (usually airbake clays). 
DopplegangerUSA Crewman figure.
Brass masters
Some casters make a Brass Master first, using the wax method (Or using RTV's). Few people do this, citing the extra cost. However it has advantages: Green is unharmed (not cooked). You can use plastic, glue, darn near any medium really. When you are a small company it is sometimes worth the extra cost to have that green unharmed ;)Brass Masters 
How to draw Dummies
No, not how to draw for dummies- how to DRAW DUMMIES. Really anyone can learn to do this even if you can't draw worth a darn. As the examples below show all a dummy really need involve is simple shapes; circles and rectangles and such. The key is to re-create the desired pose for your concept art. Now if you can afford a cheap commercial artists dummy ($10 at WalMart) but if you can find a better one get that instead, Stickfas are even better! You can do many poses. Failing that grab a GI Joe action figure, you know, the ones that are all super-poseable (ooooooh) or get a spider-man toy- they always make his action figures very poseable. If you have no toys and no money for toys then make a stick man out of wire- since you will be using it for sculpting you might as well make it to scale too- make the arms a proper length- the legs the whole bit. If you can get some green stuff and bulk out the separate body parts a bit. Basically you are making a dolly- a blank armature but instead of using it for sculpture you are going to use it to gauge poses. It can also serve as a size guide for all further armatures you create so they are of similar size. Here is the key- pose your dummy into a pose that you yourself can re-create. Chances are if your foot won’t bend a certain way then your dummy shouldn’t be posed that way The key is that you want the figure to convey something. Think "what does it look like he's doing?" Chances are a freaky hunchback dummy that looks like he's crapping himself will sculpt into a freaky hunchback figure that looks like he's crapping himself. When you have the desired pose with your dummy draw a stick figure that corresponds to the dummy. Again ask what the stick figure is 'doing'. Overtop of this stick figure add balls and rectangles. Here's the loose rule: If it bends in anyway it gets a ball, otherwise it gets a rectangle. 
I find it useful to have a collection of various poses sketched out long before any project as they are easy to recreate when you already have one to work from. So start your 'dummy' collection!

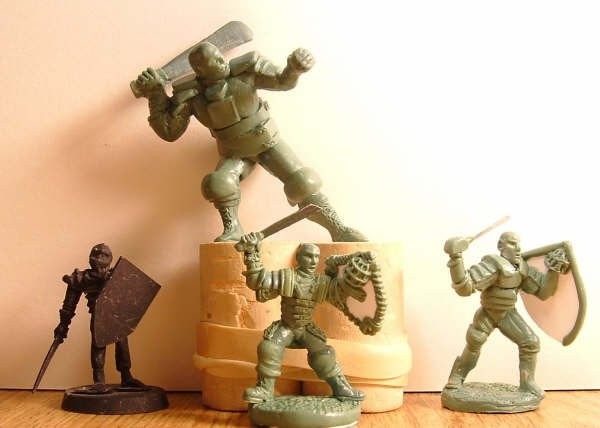
Wire Dolly Measurements
The blanks/Dollies were made with 22ga wire- but rarely do I use Dollies; most times I make a new one... 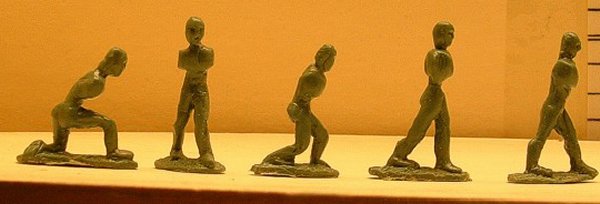
These measurements are from toe to top of head.
I do all my skellys out of a single wire loop that I twist over itself for the torso. Then I take a thin wire and twist it just under the arms on the backside. I find it makes for and excellent spine and neck! I use the extra length in the loop for weapons and stuff that I want to be firmly in the figures hand or else cut it away. Finally- the average person is just that- an average. I see people with longer torsos, shorter legs, longer arms (we call him an ape). The point is that if you want to capture a unique character don't let the concept of average ruin it. 
I remember when I first started I would get VERY FRUSTRATED that my greens were never shiny or even smooth. I'm not talking about a finger print here, but an overall texture to the mini.For example:
Nice, smooth, and heck, you can even see it reflects light or looks somewhat 'shiny'. So how do I do that? Good question. First lets look at the tools I use to smooth:
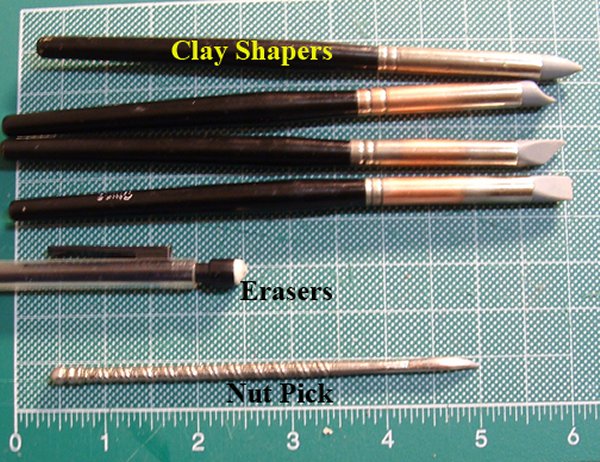
GW Tool: Sold at all Games Workshop stores as well as in a few sculpting sets. Very good for overall shaping and smoothing.
Lobster/nut Pick: Found at any dollar store. Perfect for smoothing in corners and tight areas, good for hiding seams. Burnishing tools: Found in art supply stores. Large ones are good for smoothing, small ones not so much. Crochet hook: found at WalMart. Very good for smoothing around corners (edit- I finally got a clay shaper set at a local store- they were about $5 US each. These work the best for smoothing and shaping- I HAVE found that a pencil eraser does nearly the same thing). Ok so look at the tools above, these all have smooth edges. You guessed it, the way to get those super smooth minis... you have to sit and smooth and re smooth and smooth and smooth etc. I find it best to work in a small gentle circle and slowly crawl my way over the area to be smoothed. Then I let it sit for 20 minutes and come back and do it again. The rounded edges mean that a slip with your tool wont put a gouge into your figure, just a small indent, which is much easier to smooth out. I generally rough out a figure with the GW tool, then smooth it with the GW tool using the flat surface of the tool to skim over the green lightly. Then I use a clay shaper. Can your green be too smooth? YES! In some cases you may want a slight texture to the figure. If you are layering the figure a smooth surface can be difficult to build on. In fact the Green Stuff may slip right off. There are two ways to solve this that I use: Wet brush sanding: when the green is still drying I gently sand it with water/spit and a soft brush cut down to stubble. This gives a soft texture to the figure overall but shouldn't get too shiny. Wet sanding: Green stuff can be filed, it just does so poorly. Get a very fine file. For best results you need to be GENTLE and sand/file in one direction LIGHTLY. I usually use water/spit as it seems to sand smoother. I also find that Green Stuff made with more blue is easier to sand as it is harder. |