|
Davestown by Dave Dezio
My goal is to build a play surface large enough and versatile enough to accommodate a lot of play. Not only that, while I know it’s not going to be “cheap” I’m certainly going to try and get by as cheap as I can. I also want to get this done as quickly as possible, so when the minis arrive, I can start right up on painting those. The main goal is to get a game going before Christmas.
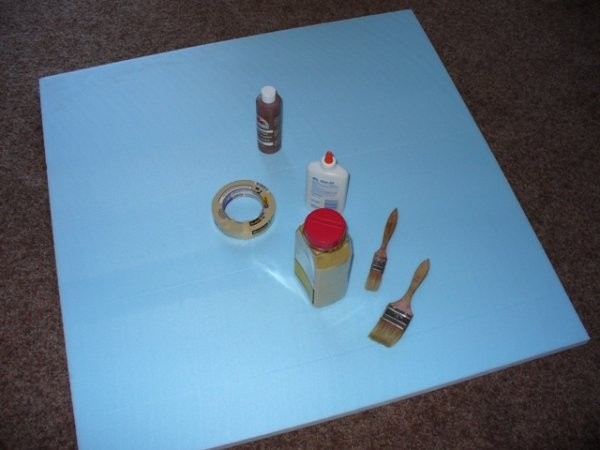
I decided it might be fun to document the entire experience, with pictures of my progress. This’ll be fun and motivating for me, and hopefully some other people will enjoy watching my “table” take shape. While I’m not the most professional level wargamer, painter, or builder, this might help the average beginner see what it takes to create an adequately playable table from scratch. My goal is to make the best table I can in the least amount of time and spending the least amount of cash. If I was willing to spend a lot more, and take a lot more time, I could certainly make a much more impressive spread. So, without further ado…let’s get started Basic Play Area Needless to say, the first thing I need to do is build the base play area. From what I’ve seen and heard, LotOW takes place on a 2x2 to 4x4 area, with 4x4 being the base. Well, to be honest I want a surface that I can transport easily, since I won’t be actually playing at my house often. If I wanted to make the play area 4x4 I would have to cut that in half, or in 4 pieces. I sort of want the consistency of a one piece surface, so I decided on a size of 3x3. This is small enough to be manageable. It fits in my car (a Saturn), and isn’t too bulky and clumsy. Most scenario start with a set up zone that is 6” to 12” anyway, so I’ll simply cut that out or reduce it when I play games that are supposed to take place on a 4x4 area and call it a wash. I feel good about the 3x3 size. The first thing I’ll need to do is get together all the stuff I need to build the base playing surface. I want the table to be light, so I’m going to go with a 1” thick chunk of Styrofoam. This has proven to be a good play surface for me in the past. Going to the friendly local lumber yard, I pick up a 4x8 foot sheet (the standard size) for $10. I get the guys there to cut it down to the right size for me (they have a nice table saw…and I can’t fit the whole thing in my car in one piece anyway). This gives me a spare 3x3 section I can use later, and also give me plenty of “scrap” for hills and such (we’ll make those later).
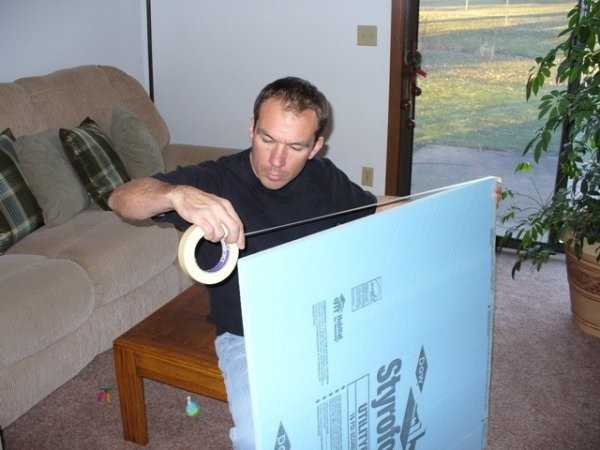
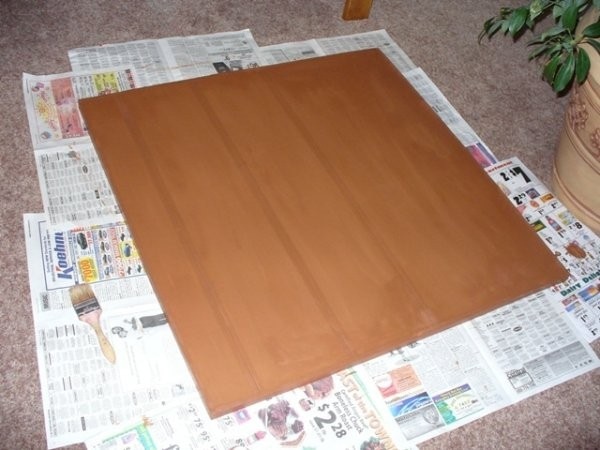
I don’t know if I’m the only guy who does this, but I like to cover the edges of my Styrofoam with masking tape to make it a bit more durable and less prone to breaking, denting, or accidentally ripping of a chunk. Next I give the surface a solid coat of paint. Since I’m going for a dry desert looking surface, I’m going with a dark dirty looking brown. This will offset the bright flock (see below) and give the surface a grungy look (hopefully). Note, if you don’t know this, aerosol cans (spray paint) will eat Styrofoam, so don’t use it!
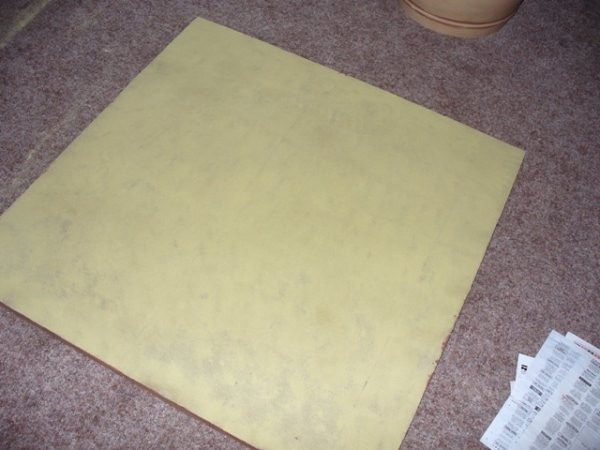
Next we need to glue the flock or sand on. I decided to go with (woodland scenic) yellow grass flock at almost $10 for a shaker can(available in most model train stores). This will give the surface a dry dusty look…but won’t simply be dirt and sand. Other people use sand, and drybrush it to look like desert, and this can look cool…but I wanted a softer, more versatile surface. I think the Yellow grass will work out nicely for giving the play area a southwest look.
There are all kinds of fancy adhesives to attach flock or sand…I simply mix some cheap old Elmer’s glue I have laying around with some warm water. It works like a charm and costs next to nothing. Paint the glue on quickly and shake on the flock (be generous). Make sure to collect the extra flock on something, as there will be a lot of it to recover. Once this dries, I gave it a coat of matt spray sealer (the same I will use for my minis). Note, this will eat Styrofoam too, so make sure that you have completely covered the foam with paint and flock! Once this has dried, the first step of my journey is complete. I’m pretty happy with the end product. Other than a few little odds and ends (glue, masking tape, spray sealer) I already had lying around the house, the project cost me $20. This has also left me with enough Styrofoam for hills, other terrain, and another complete playing surface. I also have enough left over flock for all my other terrain and to base up my minis when they are finished.
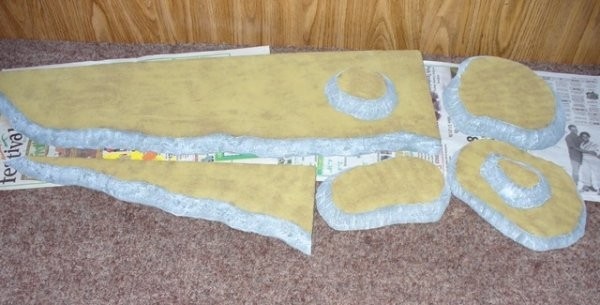
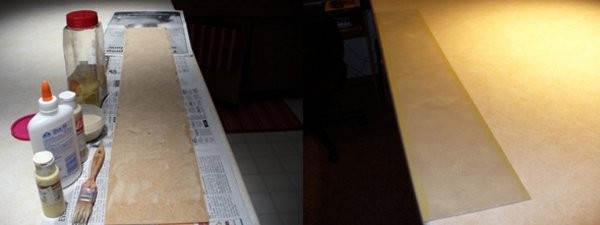
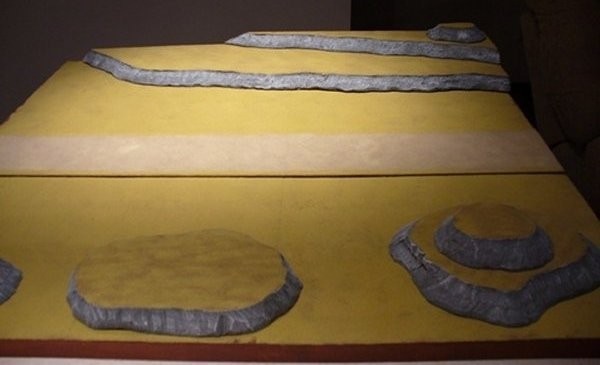
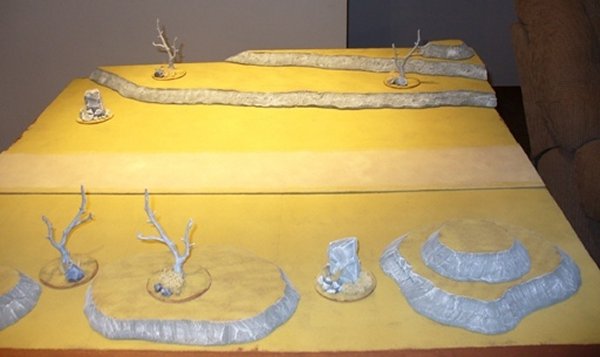
The Great Frontier Now that my play surface is done, but before I begin building the town I want to do a little out of town terrain. I’m not sure If I’ll be able to use all this in the first game, but it’s always a good idea to have plenty of stuff for future games. First off, I know that I’m going to need a road through the center of the play area if my first game is going to include a western town. I decided to make it 6” wide (that would be about 25-35 feet in the real world…not that that really matters) as it seems like a wide enough area for shootouts to take place. I’m choosing to use a scrap of Hard Board I have laying around in my garage. I like Hard Board because it is fairly common, cheap, rarely warps, is thin, and is easy to cut and sand. That said, don’t run out and buy a big sheet unless you have to. Look everywhere, a lot of garbage around the house (or at work) is made out of Hard Board or similar wood. Old clipboards, the back of some cork boards, signs. I simply cut the right size, used Elmer’s glue and some sand as my base. You can buy sand at any department store with a craft section…but I suggest simply going into your neighbor’s sandbox and scooping out a cup of the stuff (cleaning out the dirt, of course!). After the glue dries, I painted it with some sand/dirt colored paint and drybrushed it with a slightly lighter color. I use those cheap 99 cent paints you can buy at Wal-mart. Then I flock a little around the edges of the road so it blends in with the play surface. Next, I’m going to use some of that left over Styrofoam to make some hills. I simply cut them out using a good sharp utility knife. I wanted to get one of those nice Styrofoam cutters you can find in railroad shops…but at a price tag of $40, I decided to pass.
I painted the sides of the hills with gray, and drybrushed it with 2 lighter colors of grey to give it a good rocky appearance. Then I finished by doing the top surface in the same way I did the main play surface. All in all, this step cost me nothing, since I already had the Styrofoam, flock, glue, and stuff from making the play surface and had the paints lying around. If you had to buy the paints, the entire step would probably cost you under $5
The table so far Total cost so far: $25
Trees and Rocks
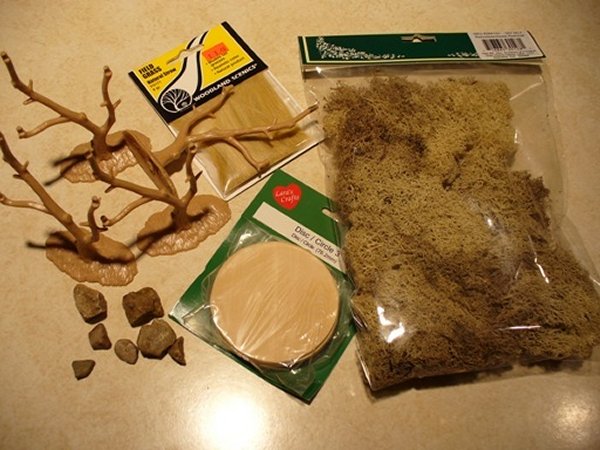
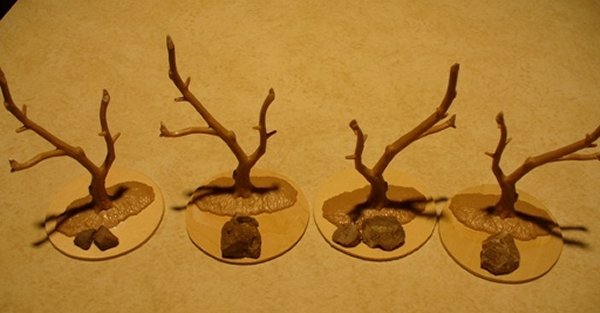
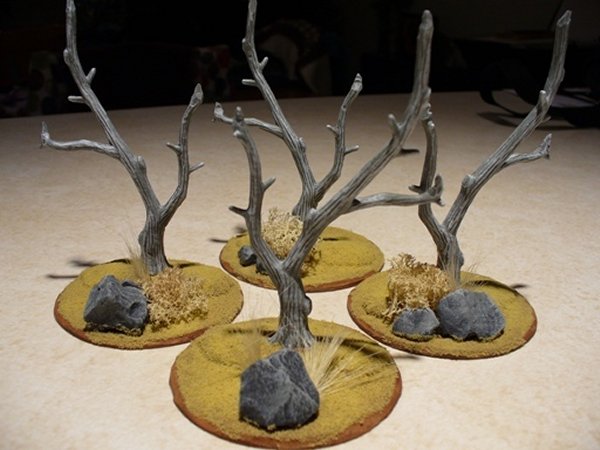
The landscape looks pretty boring so far, so I need to spice it up, by making some trees and rocks. This will make it look a lot cooler, plus it will make the battlefield more interesting and provide cover and obstacles. First I’m going to make some trees. I want them to look old, dry, and dead, like a lot of the stuff in the southwest (I spent 4 years in El Paso TX, and 1 in Roswell NM). I’m avoiding the typical cactus that most people seem to like using in old west mini games because…well, to be honest I never saw any of those when I was out there. I hear they are mainly in Arizona. To make the trees I grabbed a bad of plastic trees I got out of a $1 bag of dinosaurs a few years back. (Let me take a moment to tell the newbie something very important…The $1 store is your friend!!! Frequently walk through there; you never know what you’ll find that you can use to build terrain on the cheap!) I simply cut off the plastic leaf things from the top. I mounted the trees (with trusty Elmer’s glue) on some wooden bases I picked up at a hobby store (hobbies like your moms, not ours), a bag of 6 wooden circles for $3, and glued on some stones from the garden (real stones are great…and free, just make sure you paint them or they look like, well, stones), primed the whole thing, painted it using greys and drybrushing techniques, and flocked the base.
To make them look much cooler and more realistic I added some bits of field grass ($4 from the model train shop) and some Reindeer moss ($5 from your grandmas hobby store…don’t get this from a train shop as it costs twice as much there.)
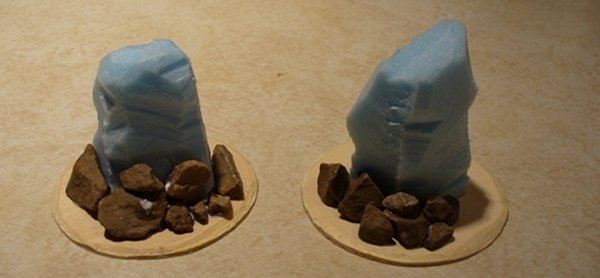
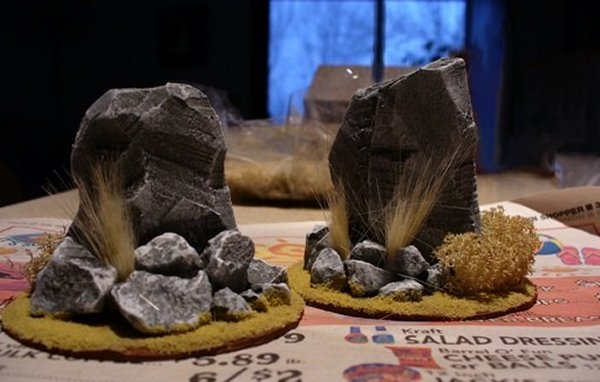
Next I thought some rock outcroppings would be cool. Once again I used stones, but since I wanted a big stone on each, I carved the appropriate shape out of some scrap Styrofoam. Painting, flocking, and spicing up as above I have some more obstacles for the battle field.
Total cost for this step $13
Total Cost so far: $38 The table so far: Covered Wagon
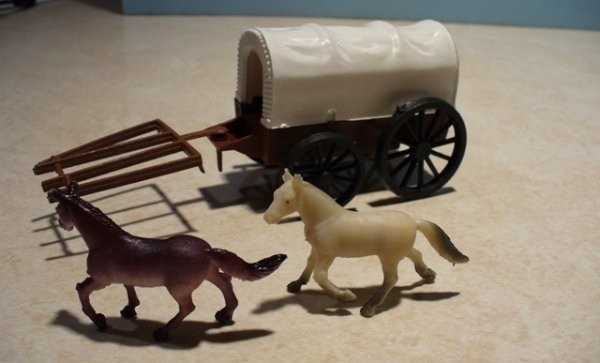
It took me a bit of searching to find a covered wagon in a cheap plastic cowboy set that was about the right size for 28mm mini use. I finally got this one in a $4 set. The horses that went with it were too big and looked dumb anyway, so I used these ones I had left over from another project where I got the 6 horses for $2. I found the wagon at a train/hobby store in Appleton WI (looking for static grass). They had a little rack of plastics. Most of the wagons in the sets were a slightly larger size, and just when I was going to give up I saw this set with a smaller wagon (although everything else was the larger plastic cowboy size). It was the only one, alas. It looked fairly generic. A bit more expensive than the $.99 ones I usually see, but worth it for the wagon. The horses came from Kmart, and I'm pretty sure it is a regular stock item. It was in the section by the other plastics (army men and such). It was a display box full of small square tubes with animal heads on the top (a horse, in this instance). There is also a spider, lizard, Dinosaur, and cow set (although the cow has generic farm animals in it including chickens, a horse, a cow or bull, and a dog...I think. Only the cow, bull, and horse look to be about the right size, the rest are too big.) |
Building Davestown
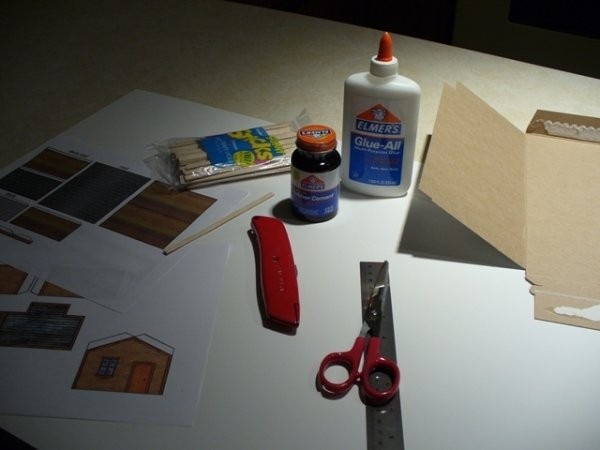
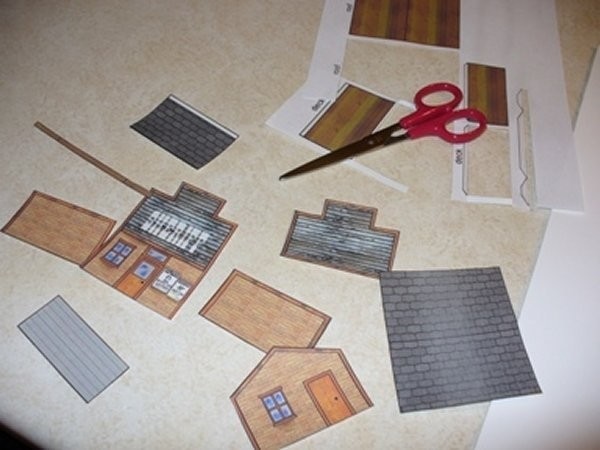
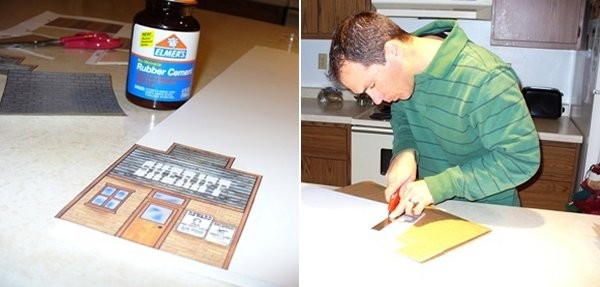
Well what is a western town without any buildings!? The time has come to build Davestown, and I looked around a lot. First I checked out Model Train buildings, but the scales were just wrong (either a bit too big, or a bit to small), and even if they were right they are just too darn expensive to be practical. Then I looked at Whitewash city, which certainly looks like a good option…then, quite by accident, I found a website where I found a bunch of 28mm western building templates FOR FREE! (sadly this website is no longer available). Since going cheep is my main goal, and I do plan on scratch building some real buildings when I have more time, I decided to take advantage of these templates and downloaded them all. To be honest, I think they might be just a bit small for 28mm, but just about right for 25mm…but they should definitely be serviceable till I can build my own. Once again the first thing I have to do is assemble my equipment. For this project I purchased a sheet of foamboard from the local $1 store (for $1, duh!), and some hobby sticks ($2.50) and rubber cement ($2) from Wal-Mart. I printed up the templates; rubber cemented them to the foamboard, and cut them out carefully using a metal ruler.
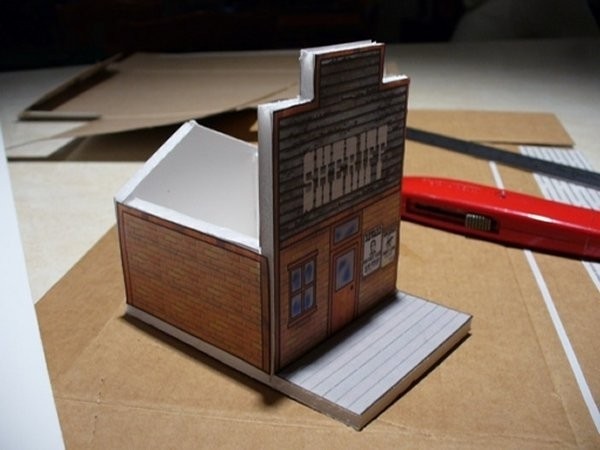
Once this was done, I glued them together with Elmer’s glue and let it dry. Notice that I had to cut the side walls a bit shorter to account for the overlap of the template. This won’t be a problem if you use thin cardboard instead of foamboard. I just wanted my buildings to be a bit sturdier.
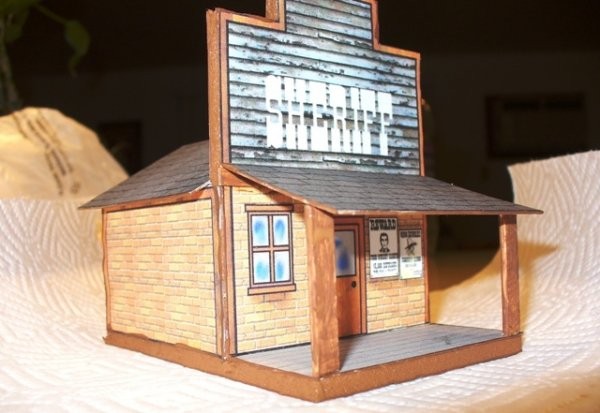
Finally I paint all the exposed white foam, glued on the roofs (I glued them to a thinner card stock, in this case an old shipping envelope) build the porch, and line the top with the hobby sticks to give it that old west look (note: the sticks have not been added to the top yet on the picture). The whole process took about 30 minutes.
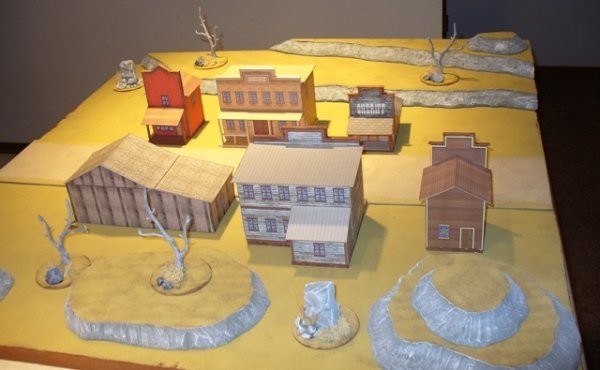
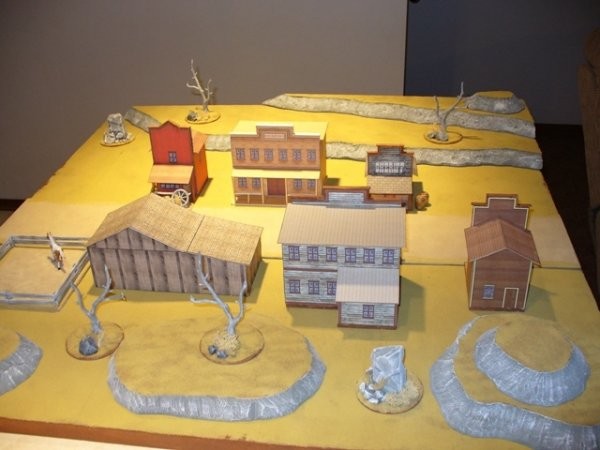
Looking at the size of my table I think 6 building should about fill it up, so I picked the coolest looking ones to build. A few hours later I have a entire old west city, serviceable till I can take the time to build some cooler ones.
Cost for this step: $5.50
Total Cost so far: $43.50 The Table so far: Fleshing out Davestown
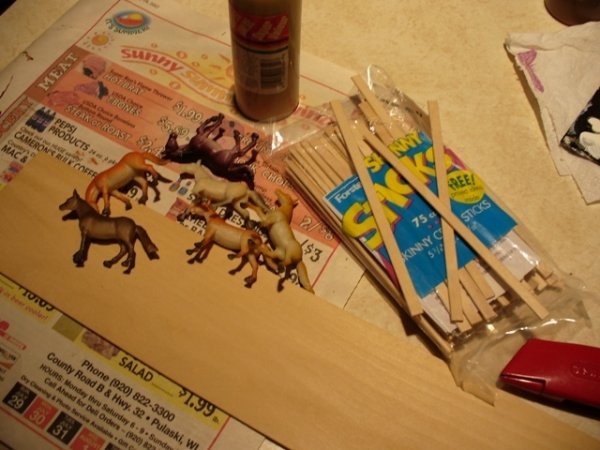
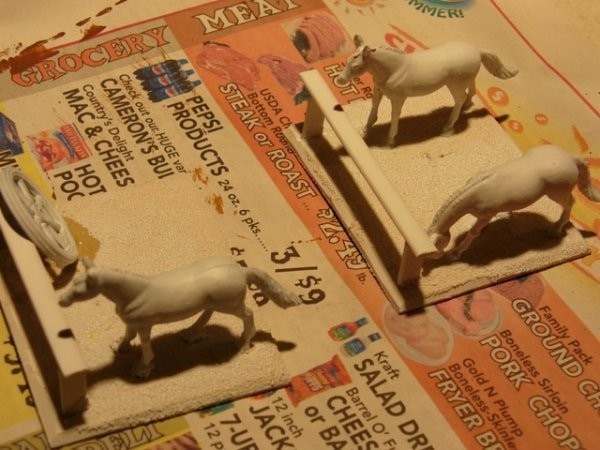
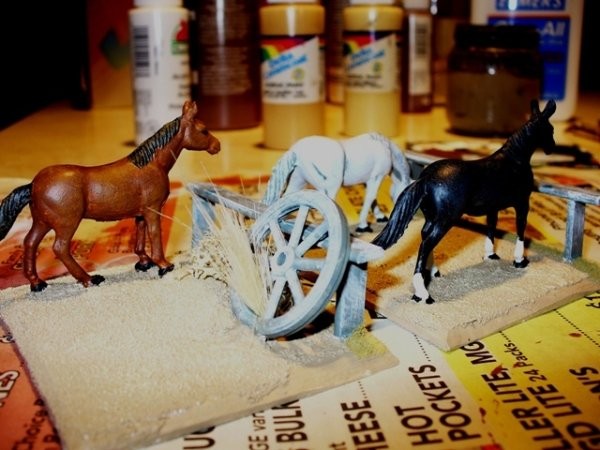
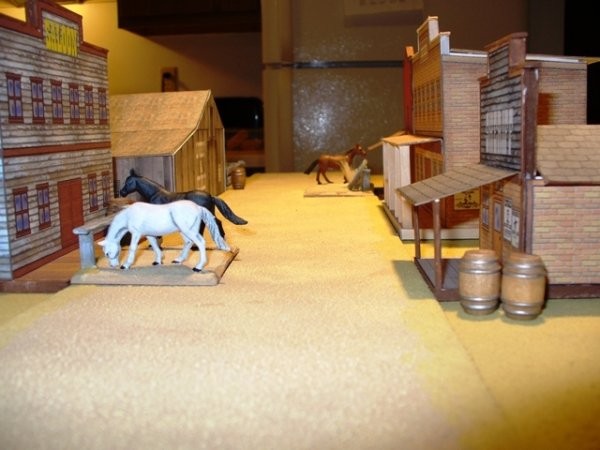
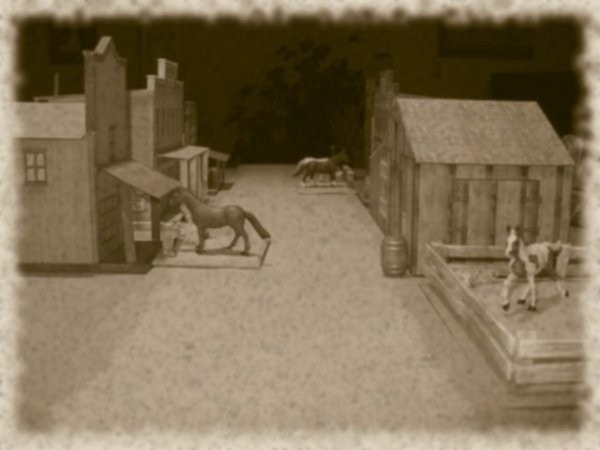
Well, Davestown is just about ready for my first battle. I got the rules last night, so I’m going to start reading that now, build a couple posses and paint them up (but, that’s another thread). I just wanted to add a few more bits to the town before I call it quits on this project and move on to the next step. Perhaps once I read the rules I’ll see a few more things I need to add. While I was shopping yesterday I had pretty good luck. I wanted to find some longhorn steer, but didn’t, but I did find a $1.99 “horse lover” plastic container full of cheap horses. These look to be just a tad big, but beggars can’t be choosers, and they are close enough that one wouldn’t notice unless they really analysed the table. The horses meant I would be able to do some hitching posts, and a corral (even though I wanted to put cattle in the stable, horses would look good too. The only other thing I needed was something to base them up on. I went to grandmas craft store again and picked up a strip of 1/8” x 3” x 24” Bass Wood for $3. I never heard of Bass wood before, but it was cheaper than Balsa Wood, seemed about as light and easy to use, and was sturdier and cheaper. The first project was the hitching posts. I simply cut some bases out of the basswood (using my utility knife) and cut a few of the hobby sticks I had to make the post, and glued the horses in front of them, all using Elmer’s Glue. Against one post I leaned an old wheel from a set of plastic cowboy’s wagon. The wagon itself was way too big, but the wheel was serviceable. That’s another tip; look around the house for junk!
I glued some sand to the base (since I wanted it to match the street) and primed it all. Next I gave it a quick paint job. I’m no 'eavy metal painter, and I take even less time on scenery and terrain bits, but these came out pretty nice. I used greys to make the wood look old and dry. Finally, I added a bit of moss and grass and flocked the very edge (again, to match the street).
I learned something interesting about Basswood…It warps! As I was doing this project, the base started to warp from either the glue or the paint, and warp BAD! I was starting to worry, then I remembered an old trick from when I used to water colour paint about paper absorbing water and warping…so I painted the other side of the Basswood generously with water and allowed it to soak in. After a while the wood warped in the other direction, and by the end of the night it was laying almost flat. Whew!
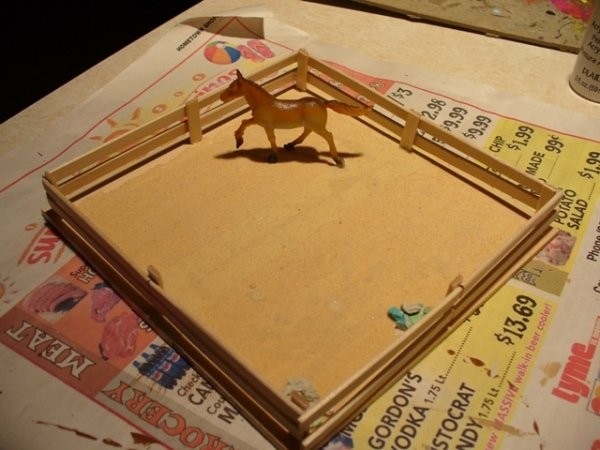
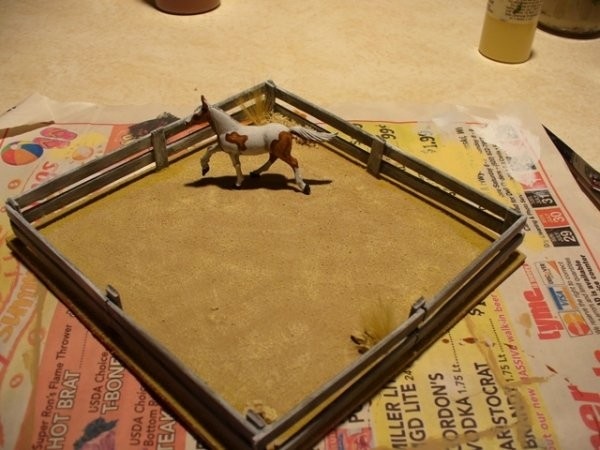
Next I started on the corral. I cut a bunch of fence bits out of those hobby sticks and glued them together. Elmer’s glue dries to wood pretty well and fast, but this was still a bitch. I did the sections separately, and then propped them up with bottles of paint. Every time I accidentally bumped something, the whole thing fell apart. Finally I dot it done though. At first I glued 3 horses in the corral, but it just looked dumb, so I took one out, and then the second. I think the lone horse in this small fenced area looks a lot better, and more “realistic”. I glued sand to the base (which was 2 pieces of the basswood 3” x 6” masking taped together to form a square 6” x 6”) and also glued a bit of kitty litter in areas for added texture and to look like smaller stones in the coral. I went a lot lighter with the glue, and the Basswood didn’t warp this time. I painted the whole thing up, flocked the edges of the fence, and added a bit of moss and grass. I took a little more time on this horse, to see if it would look any better than the other 3. I like how it came out.
The final thing I did was dig out a few wood barrels I had stashed away that I picked up long ago at some granny’s hobby store. I had ink washed them brown already and painted the bands silver. Perhaps I’ll repaint hem and paint boards and all that, but for now they are functional as is, and they were free. I added them to strategic locations to look cool and provide places for additional cover and/or obstacles.
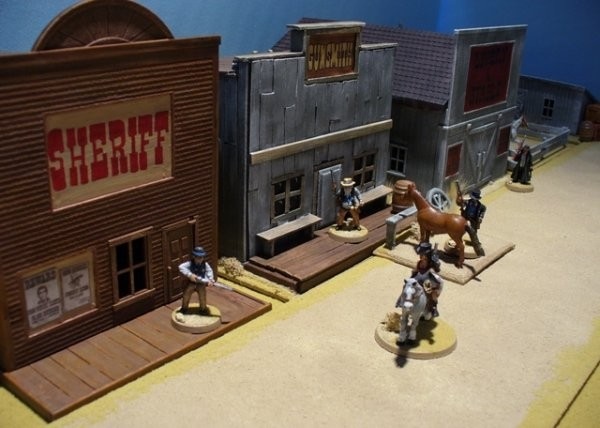
Cost for this step: $5 Total Cost of Davestown: $48.50 So there you have it, Davestown is ready for adventure for under $50. Not bad if I say so myself. I’m sure I’ll add a lot of stuff as I go, but at least I have a good foundation to start with. The Final view of Davestown: Changing the buildings
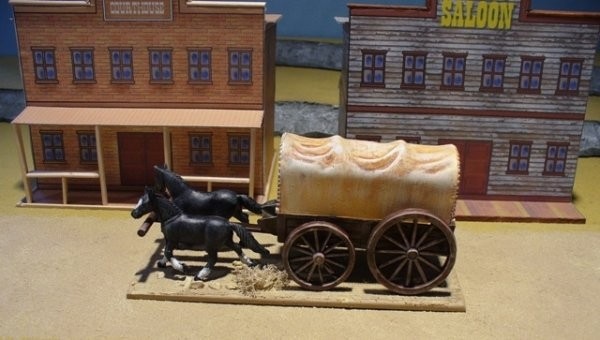
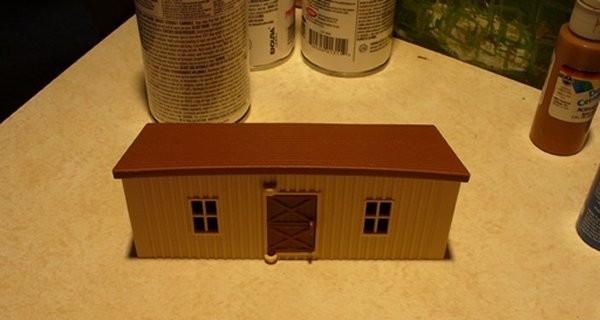
I got my Ertl Cowtown Ranch in the mail today..I gotta admit I'm a bit disappointed, mainly because of the size. Everyone said it was the same scale as 28mm, but it actually all looks smaller than 25mm to me...and since I'm using the semi-larger Black Scorpion minis, most of the stuff just looks way to small (the chairs and tables for the bar look like kiddie tables). Other than the buildings, windmill, cattle, and maybe the stagecoach, I'm not going to be able to make much use of the other stuff. Oh well. The buildings are the best, but they are going to require some painting before they look decent. My main problem is they look really bad with the ones I already made. This puts me in the position of having to play with a mishmash table, just use what I already made, or scratch build some cool buildings asap (and with the holidays upon us that's pretty much out of the question right now). The steer are just a tad on the small side, but they are nice little figures, and one of the main reasons I purchased the set, so I’m going to use them. They don’t look that bad unless you really analyse the size difference. I’m torn on the windmill. It looks decent, but it doesn’t have any wood grain on it (probably because they use it with all their sets), so it won’t paint up too impressive looking. It doesn’t look like it would be too hard to scratch build something similar, and that would have a more rugged look…but of course, that would take more time and money. I’ll probably hold off till I get some play time in and see just how much I’m going to be playing. I’m hoping to get a regular campaign going, but if I have to pull teeth to get people to play…well… The stagecoach is small, and the wheels are put on terribly cheap (the other wagon is way too small, it looks like a child’s toy next to the figs). Since the horses are also too small, if you add those to the stagecoach it looks bad. This was one of the main reasons I purchased the set, so it was a huge disappointment. Now I think all this stuff would look good with 25mm scale, if you are using the smaller figs…but for my Black Scorpion ones it just isn’t working. And...here is a go at one of the Ertl cowtown buildings (the simplest one first).
I cut out a piece of hardboard (the kind used on clipboards.) for the base.
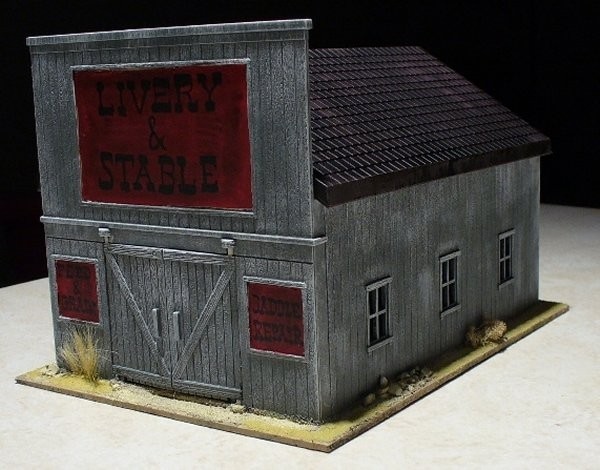
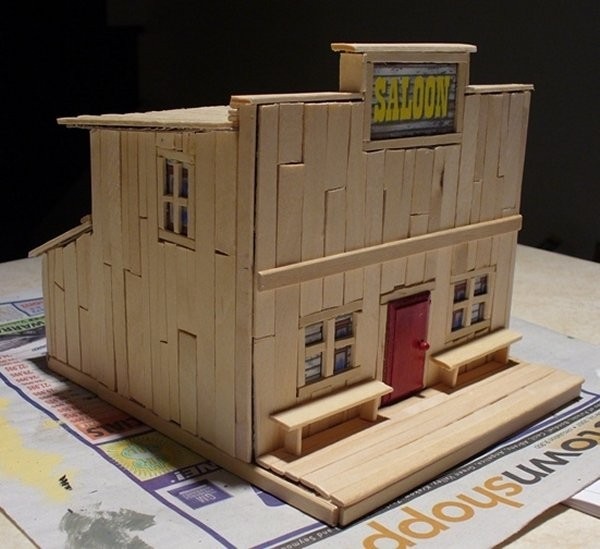
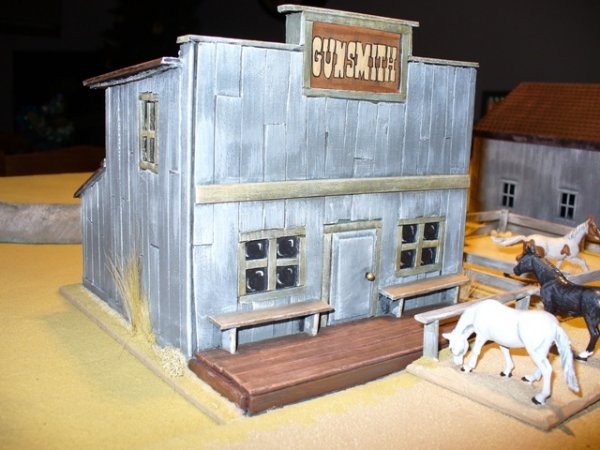
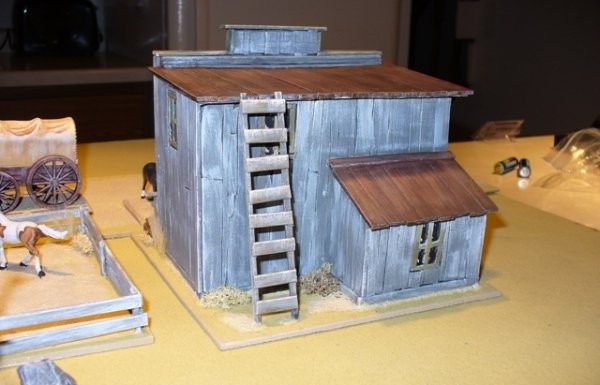
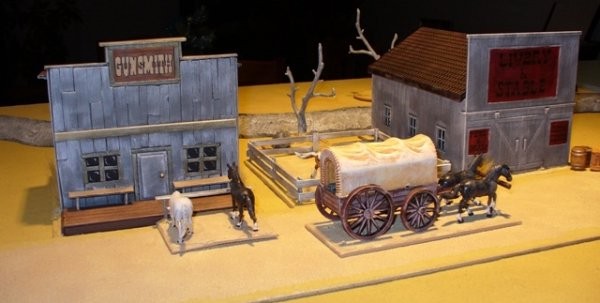
Since I started painting the Ertl Cow Town buildings, I'm really liking the way they look. However, they are just so much larger than the little foamboard ones I made that they just don't look good together. Not only that, but the detailed plastic painted ones look so much more 3-D than the foamboard/printed ones that I just don't feel good about it. So...having a little more time before I play (with the holidays and all) I decided to take a little time and try to put together a scratch built house or two to go along with the Cow Town ones to flesh out Davestown before my first game. I started last night, and it's about half finished (building). I think it’s coming along nicely…but once it’s done and painted will be the real test. I thought this was going to be awful expensive, but, my additional costs amounted to $2! For the base structure I’m using the Saloon foamboard house I already built (one of the larger buildings). For material I’m using a few of the hobby sticks I already have, a pack of popsicle sticks from the dollar store (200 sticks for $1!), and for a door, a cabinet door from a piece of doll house furniture I also found at the dollar store. The first is the Cow Town Stable ready for play. I thought long and hard about how to make the signs and in the end decided that I was going to go with a natural (sloppy) sort of painted by a real person look. Not sure if I'm 100% in love with it, but it'll work for now. The second pic is my scratch built work in progress...the popsicle castle! You can still see the old saloon stuff underneath through the windows and the sign. Once painted I think it will be a gun shop. It has that sort of Jed Clampet look. It looks funny right now, but hopefully after a good coat of paint....well, we'll see, if it looks like shit nothing is lost except a couple hours of work I got my scratch built done today. 3 days of work (well, not constantly, but you know). My hand is sore as hell from chopping popsicle sticks (not near as easy to cut as Balsa wood!).
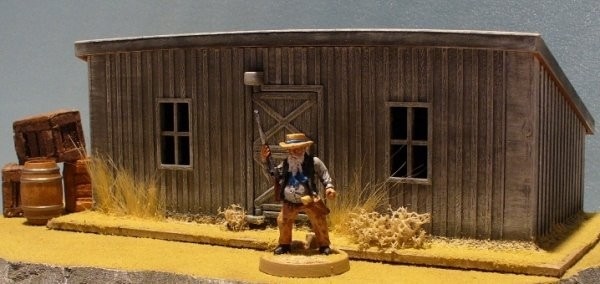
I was really worried about half way through the painting, as it wasn't looking that good, but I kept at it and worked on the weak areas, and by the time I was done I had a building I really liked. I wish I would have thrown some mini figures into the pictures below, but didn't think about it untill too late...oh well. Coments or advice always appreciated. All I have to do is paint up those other two Ertl buildings and the "new" table will be ready to go...a lot better than the original IMHO. The holiday sort of slowed everything down, but I got another cow town building painted, the Sheriffs office. Davestown is starting to look a lot different than the original.
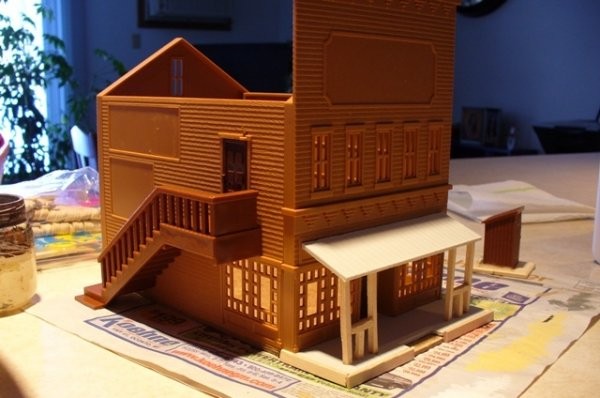
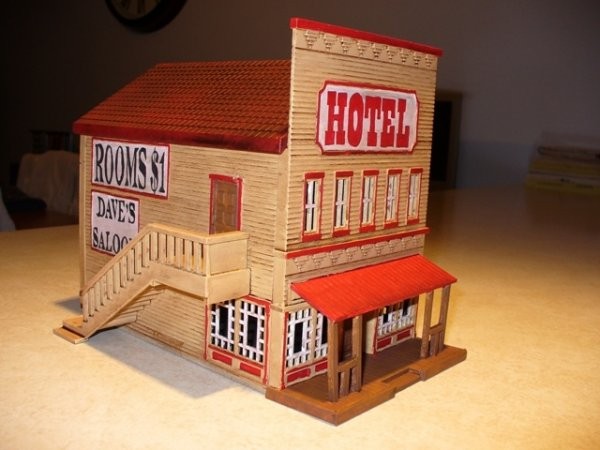
Well OK, the fourth and final cow town building is done! I was saving the most difficult for last, and to make matters worse I cobbled together a porch with roof to make it a little cooler. I had to build a porch anyway (as I did with the Sheriffs office) as the plastic ones just look sort of crappy and fake...but that didn't stop me from carving off pieces to piecemeal this together. I like how it came out...I know it sounds like an excuse, but I have a terrible cold today, and it probably would have been a bit better if I was feeling well. Nothing I did today seemed to work out right (you should have seen me taking down the Christmas lights outside), and my hands were a bit shaky (for the lettering and windows). But hey, I like the end product just fine.
Last night I glued the building together and glued it to the base (I used model glue for the building and Elmers glue in excess to glue it to the base after scoring the plastic) and let it dry overnight.
I built the porch in about a half hour. Carving all the plastic crap off the roof and floor is what took so long, it was at an odd angle. The rest of the building I just sort of picked at in between all the other things I had to do today...which was good because it gave paint time to dry, and me time to relax. I also worked on a few odds and ends inbetween, like the outhouse which I finished, and the windmill, which isn't done. All in all I would say it took about 3-4 hours from start to finish, if you combined it all (painting up the signs took the longest). Buildings are fun because I like to be sort of "sloppy" when I do them. I think they look better, a little more "realistic" if they aren't really perfect. I might be wrong, but I like the way they look. |

