|
Making the Huts
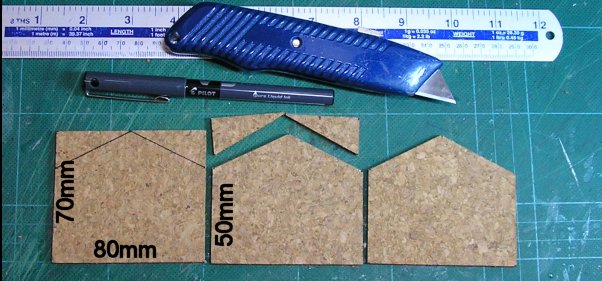
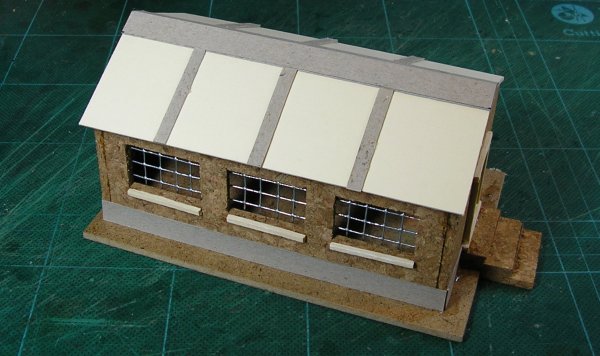
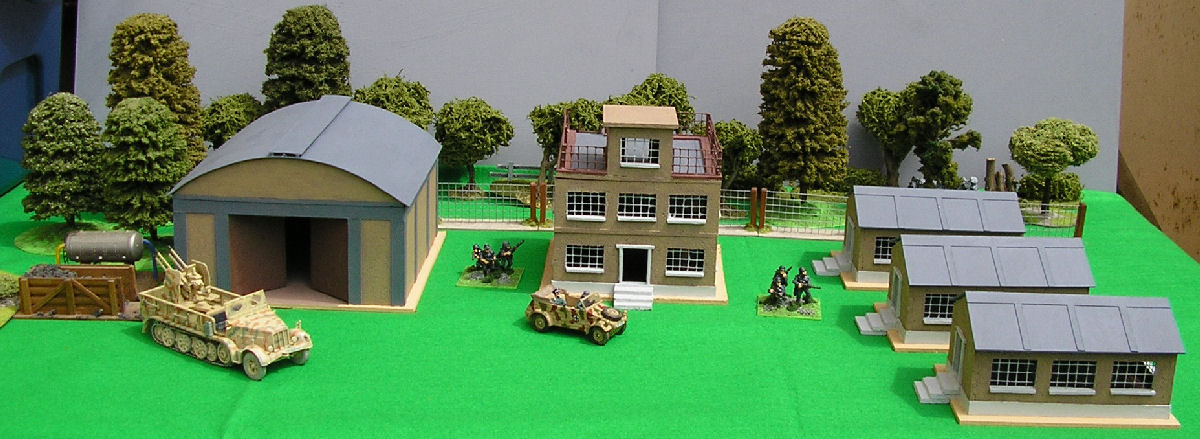
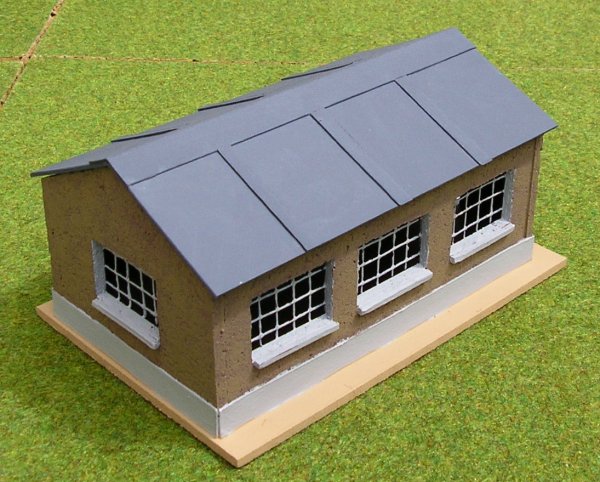
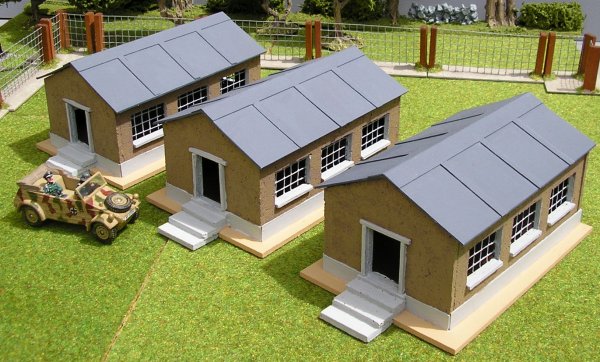
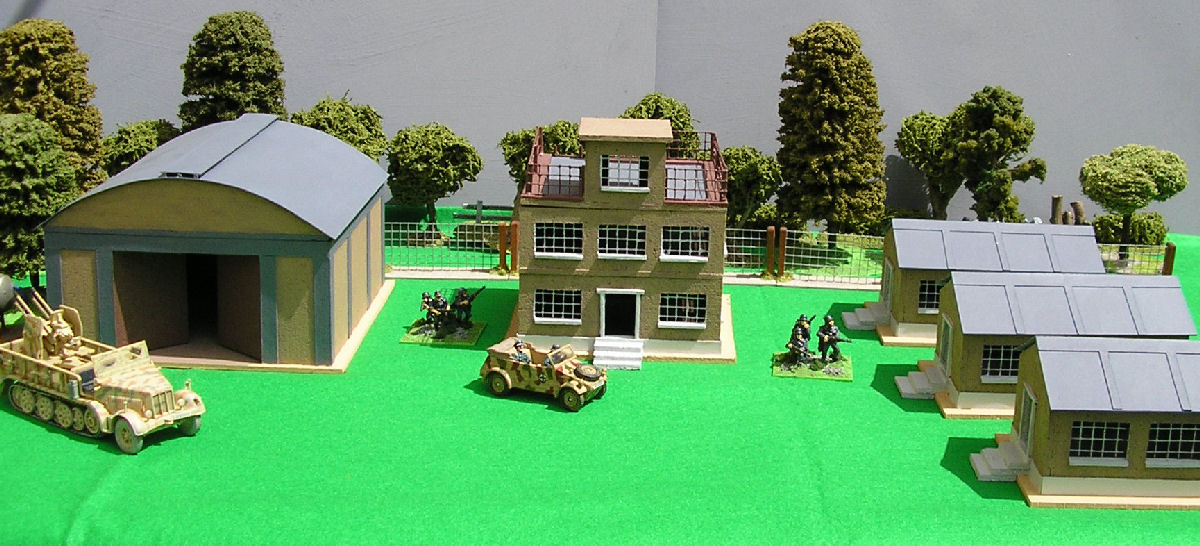
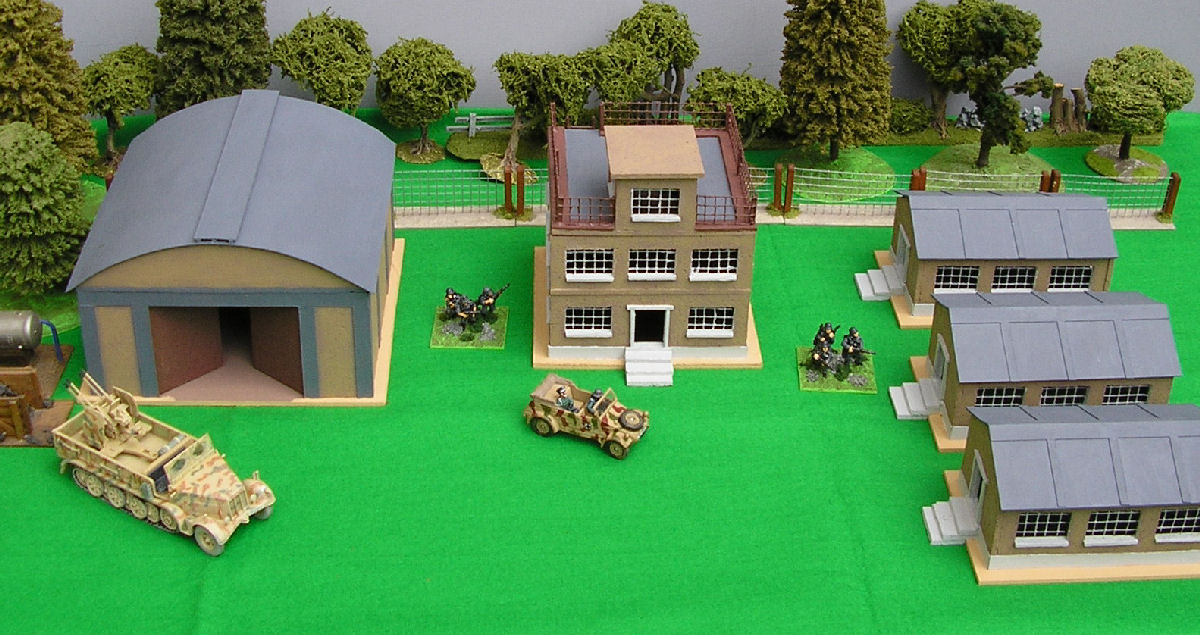
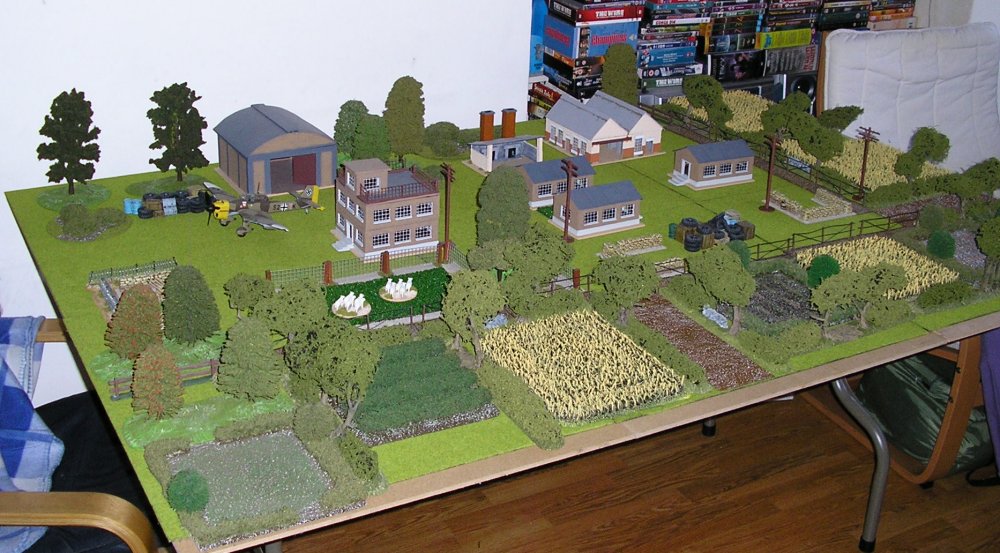
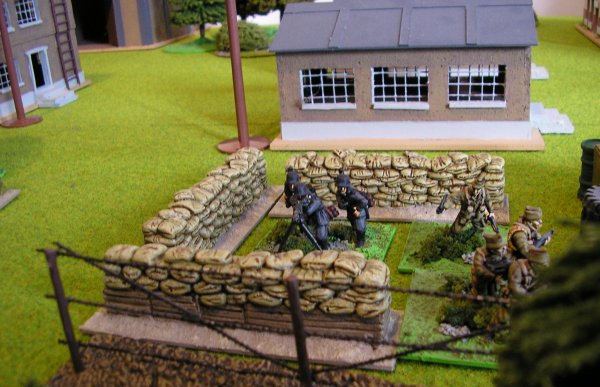
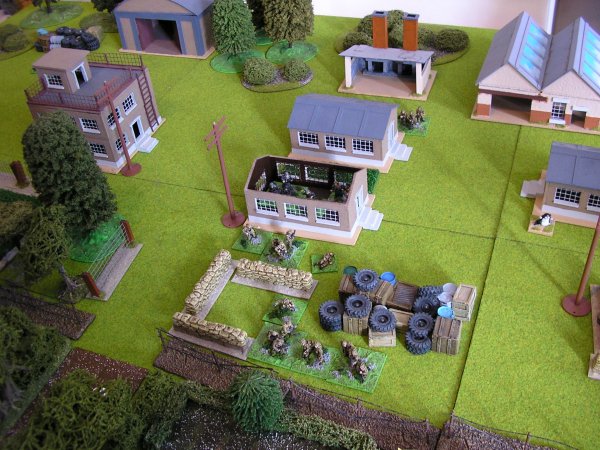
Although I’m calling this a WWII German hut it can be used for many other things. Versatile buildings like this are well worth making because you can use them all the time and get more of a return for your invested time. I made three of these huts at the same time. It’s far quicker to do this than make them one after the other. However, if I’m trying a new technique or I am unsure about something, I will usually make a single prototype building before stating to mass produce the rest. If this is your first attempt at something like this I would recommend you make a single building at first. The first step is to cut out the basic pieces. The hut is made from a hardboard or MDF base and four cork walls. The two end walls need to be cut diagonally to form the angle of the roof.
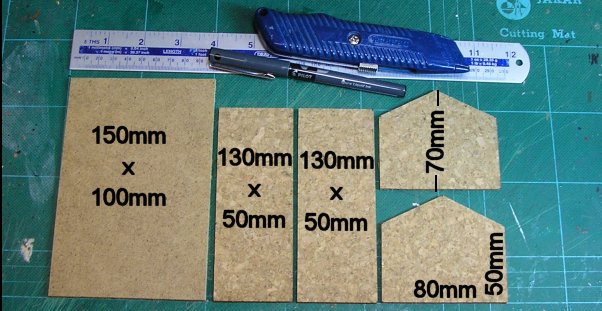
The base should be 150mm x 100mm, the two long walls each measure 130mm x 50mm and the short walls will be 80mm x 70mm at their tallest part but 80mm x 50mm at the sides. Before you cut them out you will need to draw them on your cork tile. Use an ink pen for this not a ballpoint pen because ballpoint ink will bleed through the paint.
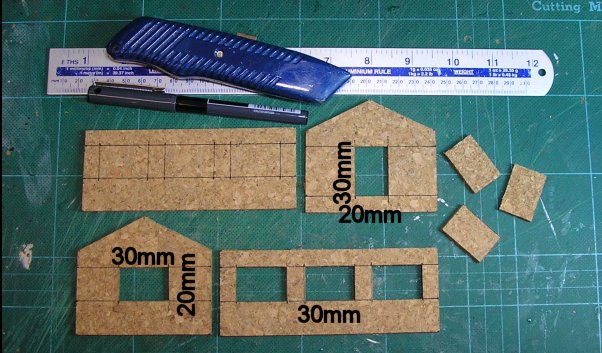
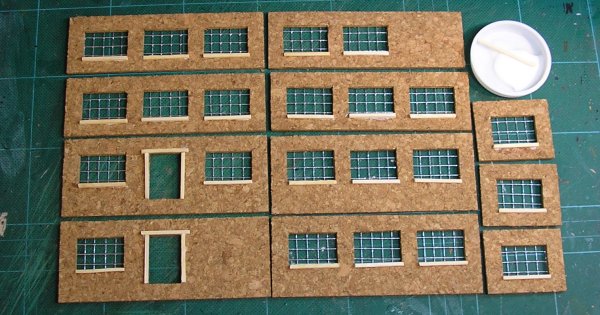
Draw on the smooth side of the cork. You will notice that each cork tile has a smooth side and a slightly rough side; I usually make sure the rough side is the outside of the building because the texture can be drybrushed later during the painting stage. Marking up on the smooth side ensures that any ink that does bleed through the paint will be hidden inside the finished building. Once you have marked up all your pieces cut them out with a heavy duty knife and a metal ruler. Cork tiles will not blunt your blades as quickly as foamcore but a sharp blade is safer than a blunt one so you must keep an eye on this. If you need more than two or three passes to cut the cork you need to change your blade. Don’t press too hard, several light passes are safer than trying to cut all the way through in a single go even though a new blade will easily cut the cork in a single pass if you apply a bit of pressure. Next you need to cut out the apertures for the windows and door. Each window aperture is 30mm wide and 20mm high. The door is 20mm wide and 30mm high. The top of the windows and door should be 10mm down from the top of the walls. For the long walls the widows should start 10mm in from the end and have a 10mm gap between them. The door and the window in the back wall must be placed centrally.
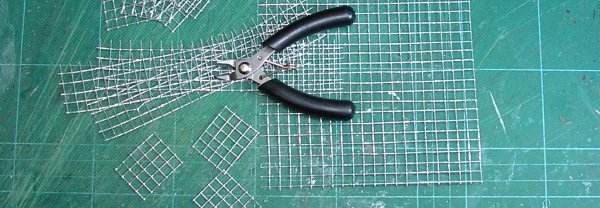
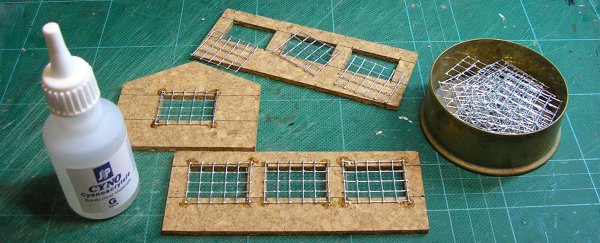
Keep the off-cuts because they are used later. The window detail is cut from 6mm welded steel mesh. You can buy this from pet shops but it comes in large amounts. I usually buy a couple of bird feeders made from it and break them apart to use the wire. This sort of bird feeder only costs one or two pounds. The three huts and the control tower I’ve made used less than two bird feeder’s worth of mesh so it’s still very cheap. Use clippers that cut flat to clip the wire mesh to size. Games Workshop sell them and theirs are about the same price as other brands, typically £5.00 or £6.00 GBP.
For each window you will need to cut a rectangle of mesh measuring 4 squares by five squares. Use a small amount of super glue to stick the wire onto the inside of the windows. A small dab on each corner is enough as it will spread.
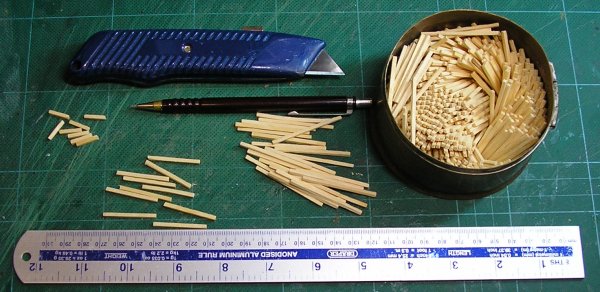
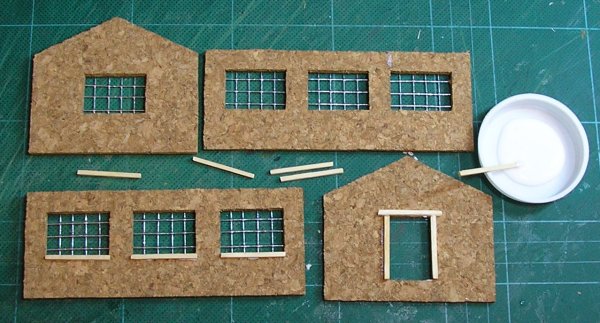
Once all the windows have had their mesh added they will need window sills. These are made from matchsticks which can be bought from most hobby stores. You will need one for each window and three for the door, a total of ten per hut.
Each matchstick must be 30mm long; measure them and cut them with your heavy duty knife. It is quickest to measure them all first, marking them in pencil, and then do the cutting. Stick the matchsticks underneath each window and around the door on the outside of the building. Use wood glue or PVA glue for this so you have time to position them accurately.
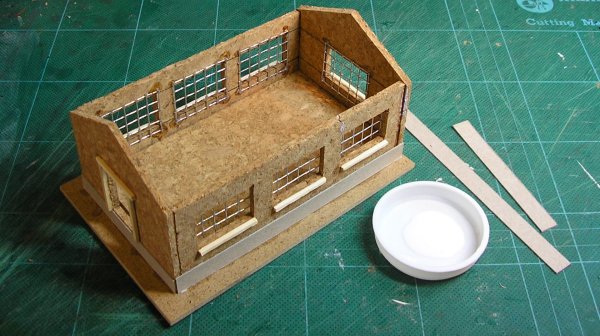
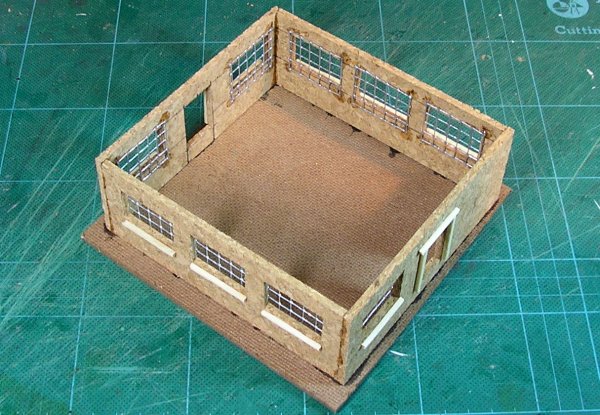
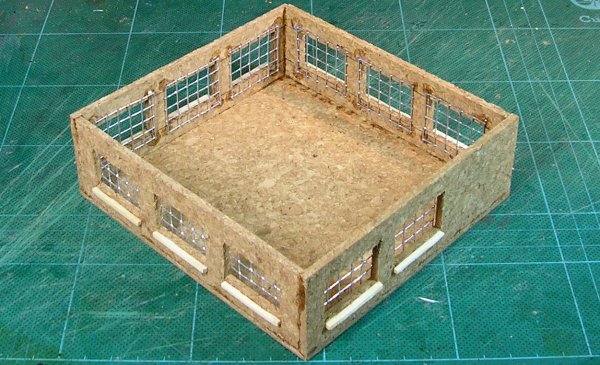
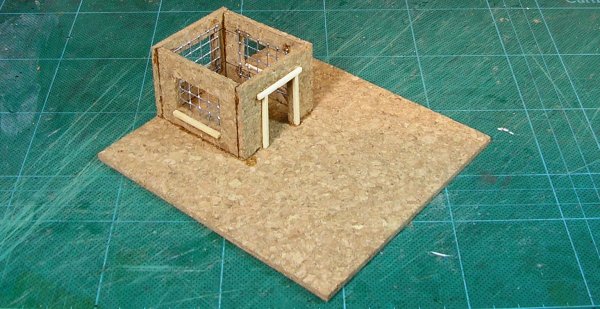
Once these are dry, about ten minutes, it’s time to assemble the hut. Glue the walls with super glue. Ensure that the short end walls cover the edges of the long side walls so that the roof will sit properly. The easiest way to assemble the four walls is to glue the back wall to the base first. Run some superglue along the bottom edge and prop the wall upright with a spare paint pot or similar. Next, glue a side wall to it and the base. This will allow both walls to stand while you glue the second long side wall in place. Finally glue the front wall to the base and both side walls.
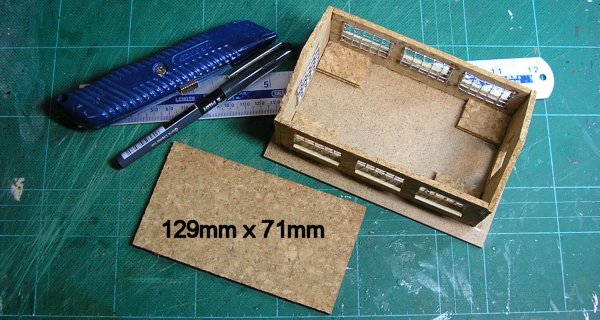
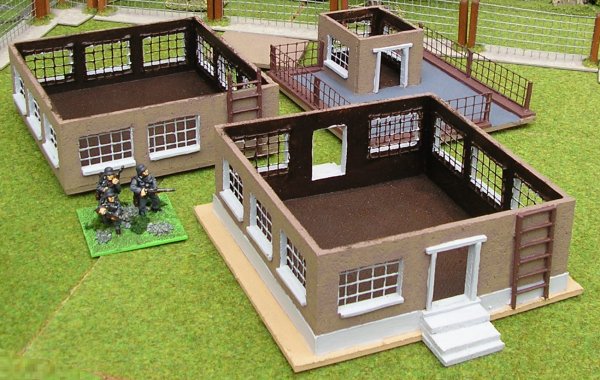
You need to be fast enough to ensure that the other walls are not fully glued before the fourth wall is put in place so that you can adjust the angles of the corners and make sure the building looks nice. The more glue you use, the slower it will dry so be liberal with it. Allow the walls to dry and then glue two of the window off-cuts into each corner. These are to support the raised floor. The raised floor is optional and you can leave it out if you wish. The floor itself is a rectangle of cork cut to match the shape of your building. Start with a rectangle measuring 130mm x 72mm and shave it down with your knife until it fits comfortably. My floor ended up 129mm x 71mm. I’ve added some exterior detailing around the bottom of the hut. Cut some 10mm wide strips of thin card from a cereal packet or the back of a note pad that are long enough to fit the walls of your hut. By now each hut will be slightly different so you will need to measure your hut first.
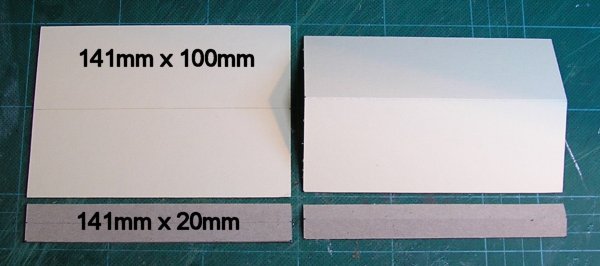
Glue them in place with wood glue or PVA. Now for the roof. The main part of the roof is made from a 141mm x 100mm rectangle of thick card from an art shop. Score this lightly along the centre so that it will fold without cracking. The apex of the roof is covered with a 20mm x 141mm strip of thin card also scored along the centre.
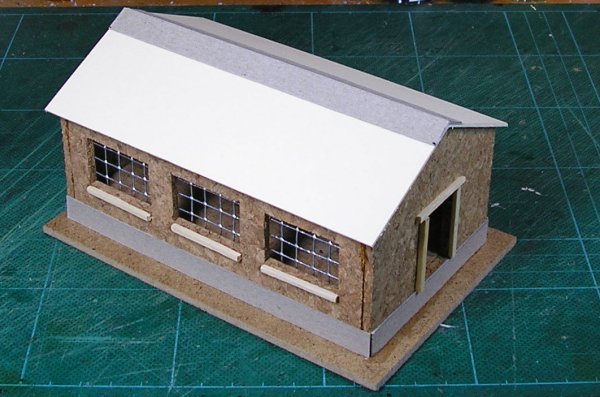
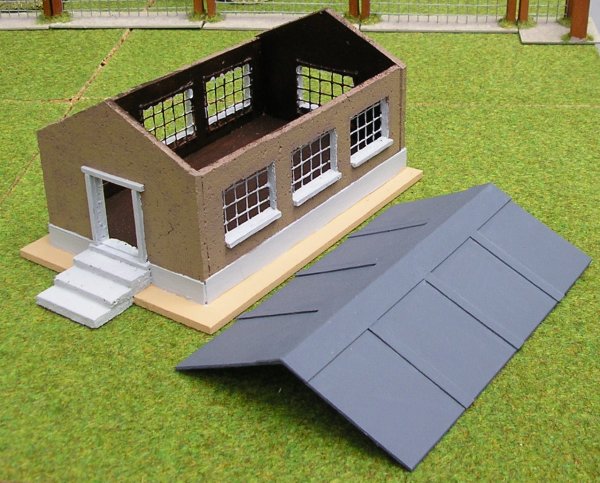
Fold the thick card until it sits comfortably on the hut. Fold the thin card until it matches the angle of the thick card and then glue both pieces of card together with wood glue or PVA. Leave this to dry with the roof in position. Don’t glue the roof to the hut. When it is dry the thin card will keep the roof at the correct angle without needing any more bracing.
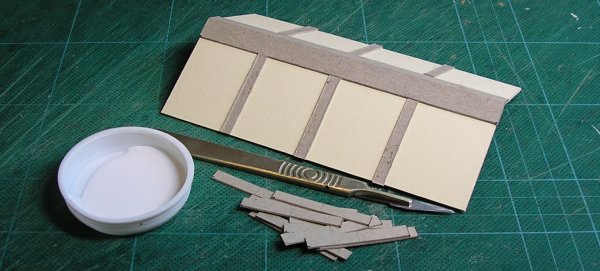
When the roof is completely dry you can add some detail with 5mm strips of thin card. This gives a reasonable look without the need to tile the roof. Glue these in place with wood glue or PVA.
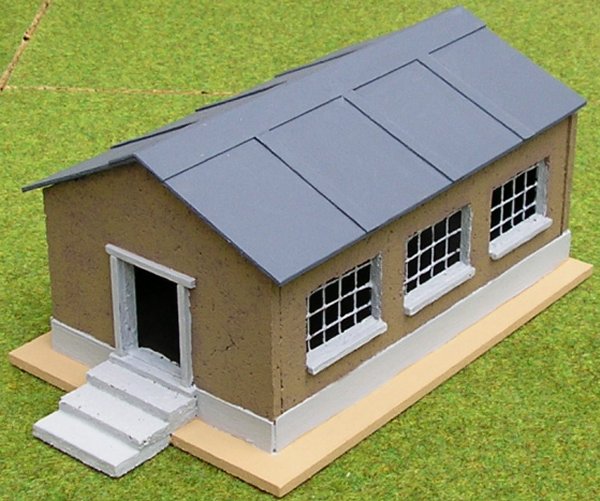
The finishing touch is to make a simple set of steps for the front of the hut from more of the window off-cuts and another 30mm matchstick. Then after a quick paint job your completed building will be ready for use.
Constructing the Control Tower
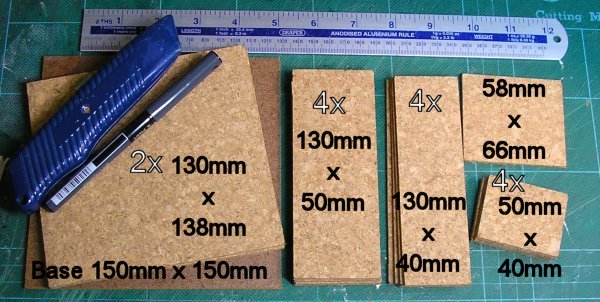
The Control Tower uses the same techniques that were used to build the huts and so, despite looking more complicated at first glance, it is very easy to make. The base for the Control Tower is 150mm x 150mm. There are two other floors, both cut from cork, that measure 130mm x 138mm. The four ground floor walls are 130mm x 50mm, the four upper floor walls are 130mm x 40mm and the four walls for the actual control room are 50mm wide and 40mm tall. The roof for the control room is 58mm x 66mm.
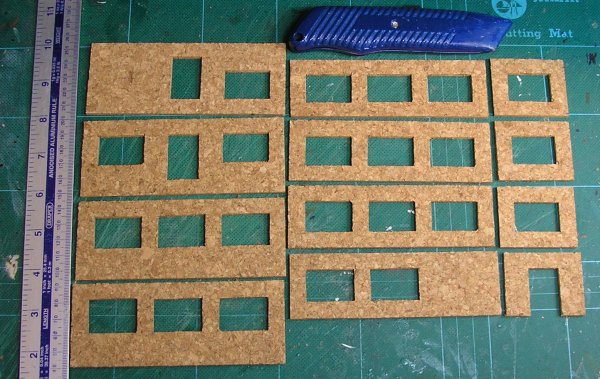
All the window and door apertures are 30mm x 20mm like the ones for the huts. The windows start 10mm in from the side and 10mm down from the top of each wall as before, remember to mark their positions on the inside of the walls so the ink doesn’t show through. The doors are placed centrally. There is going to be a ladder on the rear wall to give direct access to the observation roof so there are no windows in the right hand part of the rear walls.
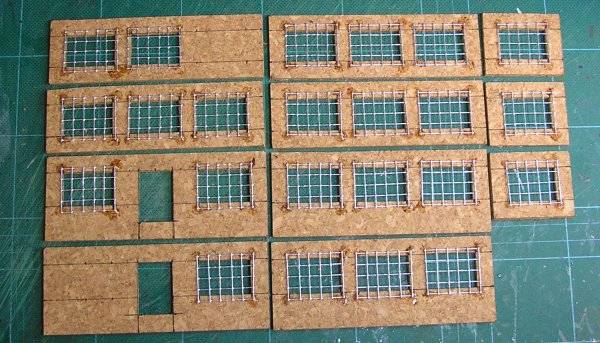
The window mesh is cut out and glued in place exactly as before.
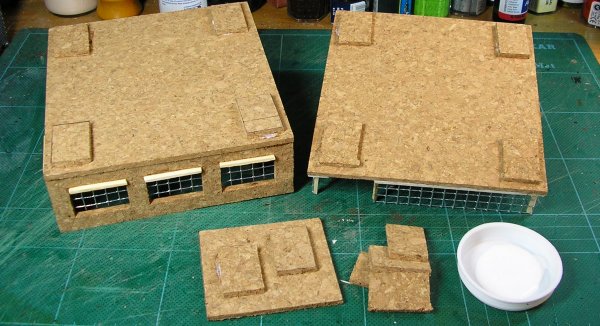
Matchsticks are cut to 30mm lengths and glued in place for window sills and door frames using wood glue or PVA to allow time to position them accurately. The rear wall to the control room with the door in it is missing from the picture for some reason but it looks the same as the other doors.
Once all the glue has dried it’s time to construct the building itself. I chose to put the front and back walls on the outside of the side walls so that you do not see the edges of the side walls when viewing the building from the front. Whether you choose to do this or not make sure you use the same positioning for the upper floor because the building is not square and if you don’t do the same the upper floor will not match the dimensions of the ground floor.
Gluing the walls follows the same procedure as with the huts. Start with the rear wall, sticking it to the base with superglue and propping it up with something such as a paint pot. Next glue the side walls into position and finally the front wall, adjusting everything for a good fit. Using superglue accelerator can sometimes help with this part of the construction. The upper floor is put together in the same way. Make sure the rear wall with the missing window is in the correct place to line up with the missing window on the ground floor. The walls for this floor should be flush with the side of the flooring piece.
The control room is made a little differently. Start with the front wall and make sure the window aligns with the windows on the floors below. You may need to mark the position on the roof. Once this wall is in place the rest is very easy. The wall with the door goes at the back.
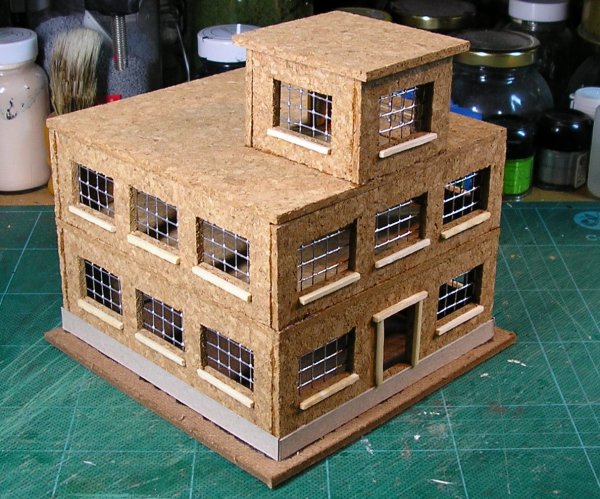
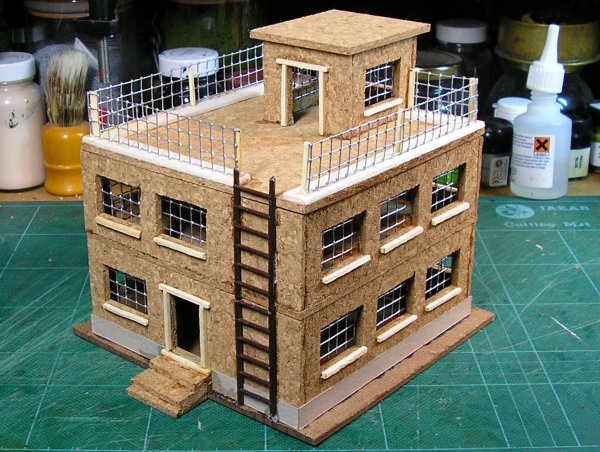
Here’s everything in place. I’ve added detailing to the base of the ground floor walls with 10mm strips of thin card so that it matches the huts.
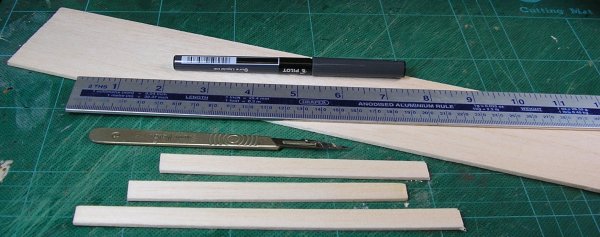
Now for the railings around the roof. The first step is to cut some strips of balsa wood to run along the edge of the roof; mine are 10mm wide. Thin balsa is easy to cut with a scalpel or hobby knife.
Glue the balsa in place with wood glue or PVA. It has a tendency to warp so you will need to clamp it until it dries. Leave a gap where the ladder is going to be.
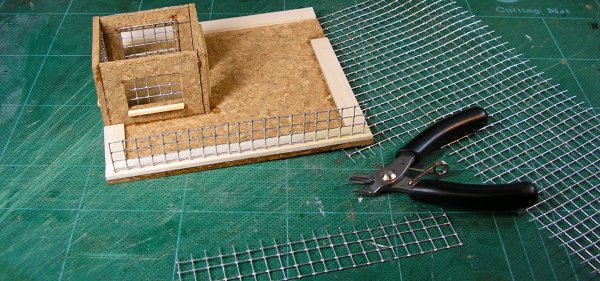
Once the balsa wood is done you can cut lengths of wire mesh for the railings. When you cut them leave wire sticking out along the bottom edge, this will allow you to push the railings directly into the soft balsa wood and then anchor them with glue.
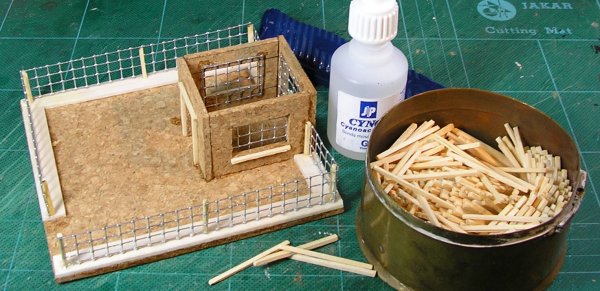
The finishing touch for the railing is some supporting posts made from matchsticks cut to size. I allowed three squares for my railing height which makes it 20mm high. The matchsticks are just glued to the railing and the balsa with superglue.
The next stage is optional. I used window off-cuts to form corner lugs to prevent the different floors of the building moving around during play. Glue these in place with wood glue or PVA because it takes a while to position them accurately. You could also, if you wanted, add a raised floor to the ground section at this point. Although I put raised floors in the huts I didn’t bother for the Control Tower.
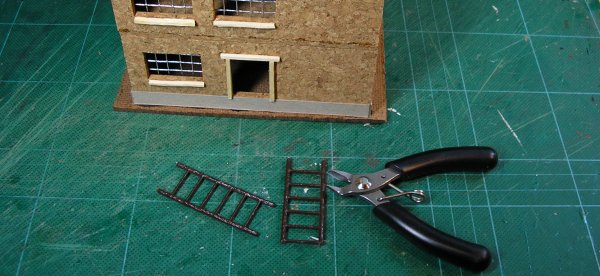
The ladder can be made from anything. Mine is a plastic one from a Games Workshop Mighty Fortress. Since it’s glued directly to the wall it would be easy to make from matchsticks. Cut the ladder into two parts where the floors join so that the upper section can still be removed during play before you glue it in place.
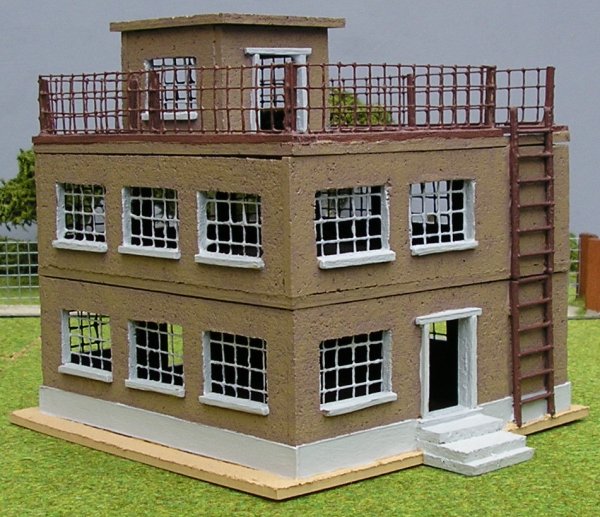
Here’s the completed building from the back showing the ladder in place and the cork off-cut steps to the rear door which are the final things to add.
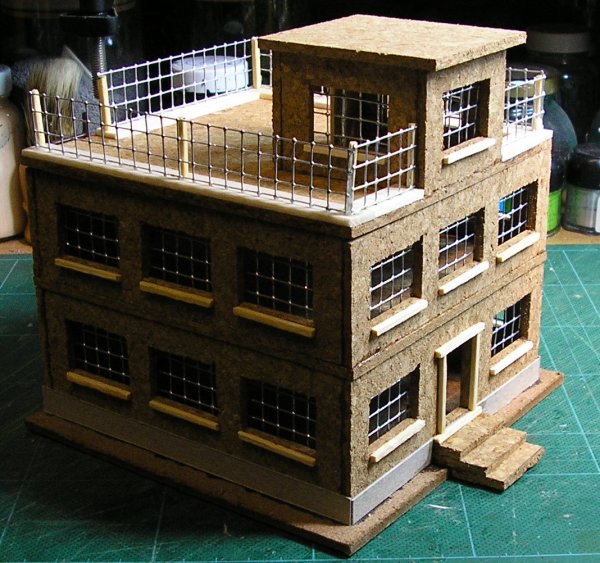
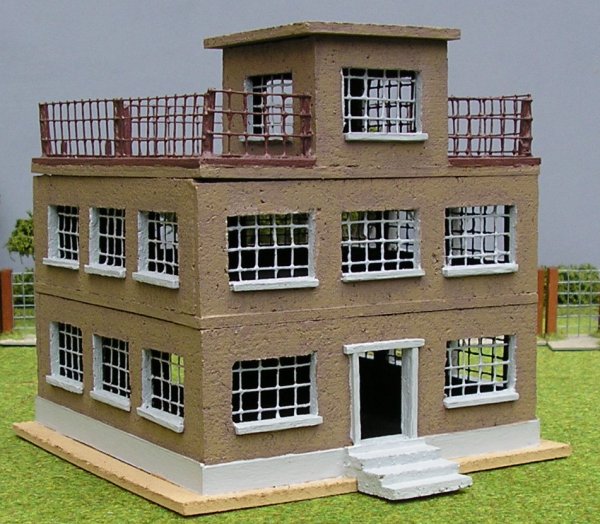
The front view, again with added steps. Now all you need to do is slap on some paint.
Constructing the Hangar
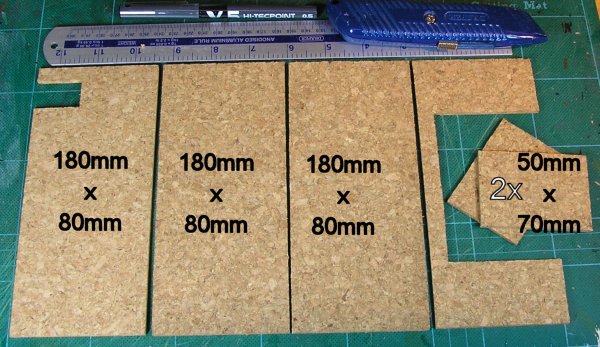
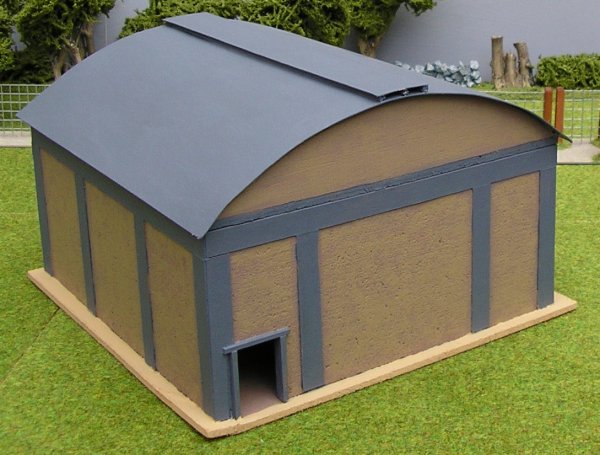
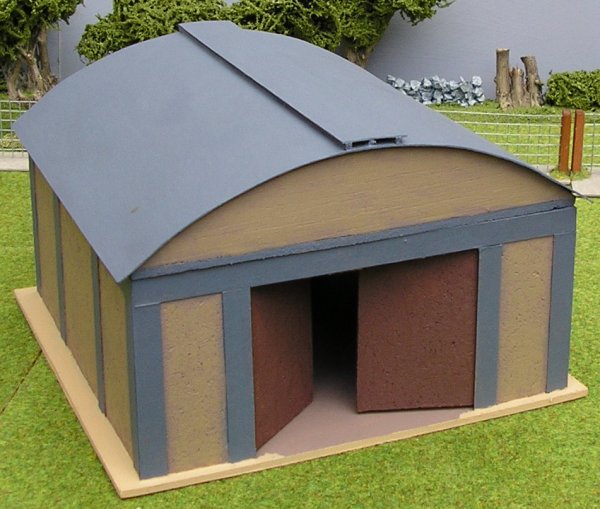
The final building for this set is the Hangar. This is the simplest and quickest building to make yet I think it’s the one that adds the most character to the setting. The Hangar base is 200mm x 200mm and the walls are 180mm x 80mm. The rear wall needs a 30mm x 20mm door cut out wherever you think looks best and the front wall needs a central 100mm x 70mm section removed that you need to cut into a pair of 50mm x 70mm doors.
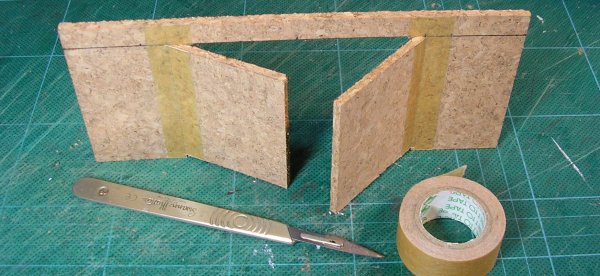
To make the Hangar doors first place the cut out sections back in the wall. If you shave just a millimetre from a single side of each and their top edges they will fit loosely and be easier to open and close during play.
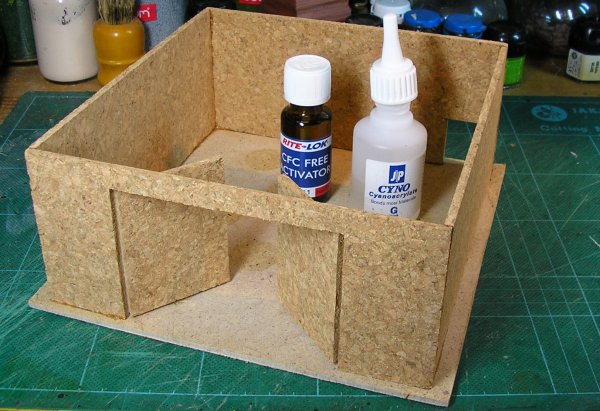
A strip of masking tape makes an excellent hinge and requires very little effort. Put a wooden frame around the rear door using 30mm matchsticks as before and then glue the walls together with super glue. You will find super glue accelerator to be a big help at this stage because the walls are so large. Put the front and back walls outside the side walls so the edges of the side walls are hidden.
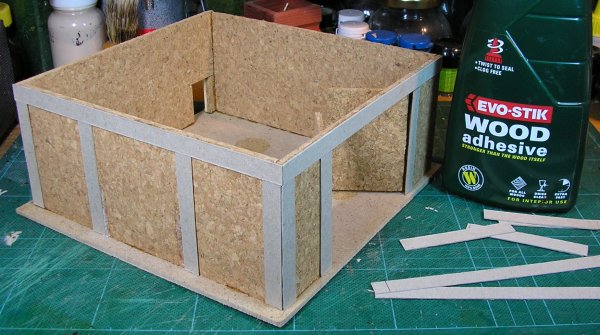
I’ve added detailing to the walls with 10mm wide strips of thin card from a cereal box. Glue this with wood glue or PVA as normal.
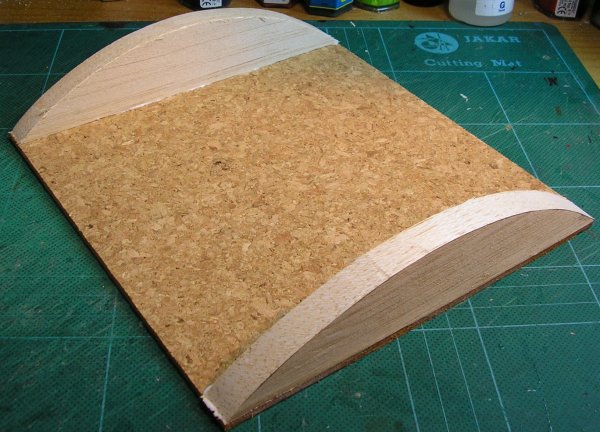
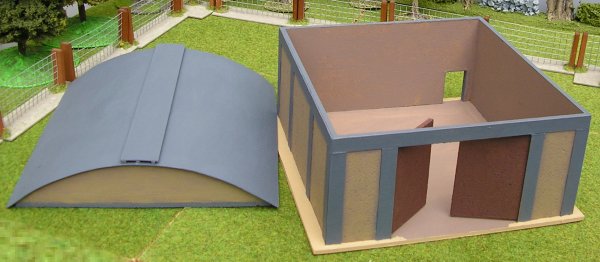
The curved roof is what gives a hangar its character. It’s not too difficult to make but can be time consuming. The easy part is to cut a base section from cork that matches the size of your building; it should be 180mm x 188mm.
The curved end walls are cut from a balsa wood plank. For each wall I marked a 180mm length along the edge of the plank and then positioned a dinner plate so that its rim touched both ends of my line. This allowed me to draw around the plate and gave me the shape of the end wall. You need to do this twice to get two walls. The time consuming part is cutting the curved sections out from the plank. I cut them roughly and used a belt facer to smooth them back which made it a very quick operation. You may need to use sandpaper and do it by hand which will take a lot longer. Once the balsa is the correct shape, glue it to the cork base with wood glue or PVA. The actual roof is just made from thin card. I used the back of a note pad but cereal packet card is just as good. The card needs to be 198mm long to allow an overhang at the front and back of the building. The length of the curve will vary depending on the size of the plate you used to construct the end walls. Hold the card in position along one side of the roof and wrap it around the curve. Mark where you think you should cut it but remember to allow for an overhang along both sides.
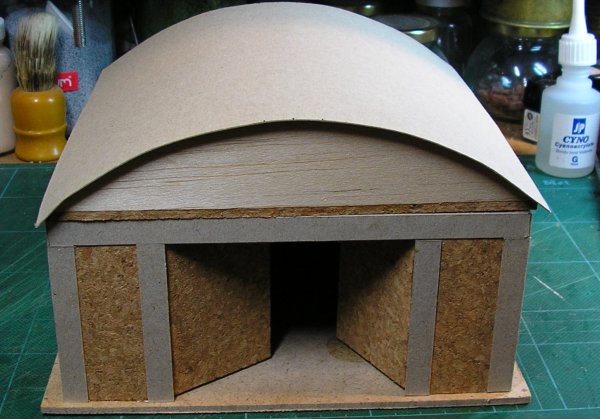
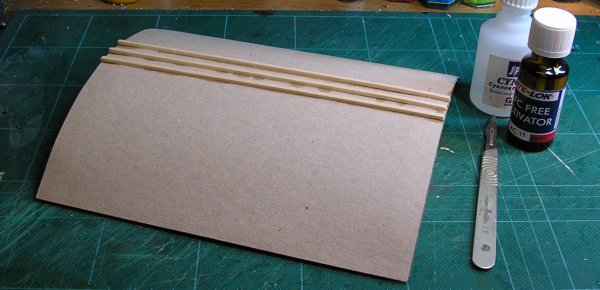
Before you glue the roof in place mark its centre line and 10mm either side with a pencil on both the front and rear edges. You can see my marks in the photograph. Glue the card in place with wood glue or PVA. Do the gluing in sections starting from one side and working across the roof. If you try to do it all at once the cardboard lifts off and the whole process becomes very messy. When the roof has dried thoroughly you can add the final detail. I have glued thin balsa along the centre line of the roof and 10mm to either side. If you don’t have balsa you can use more matchsticks as only the very ends of the wood will be visible. I used superglue to fix the balsa wood in place.
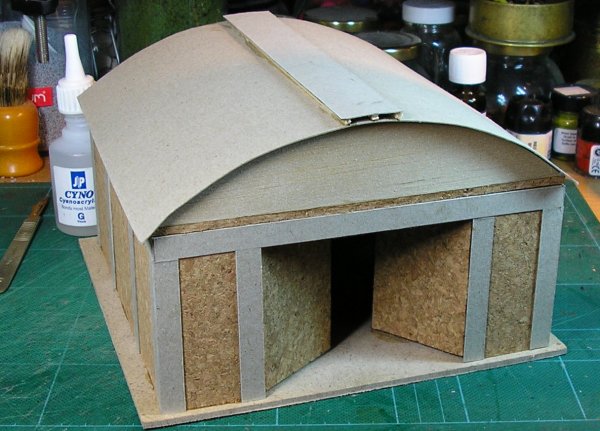
Cut a strip of thin card 25mm wide and 198mm long and glue it to the balsa strips to for a ventilation channel. This breaks up the uniformity of the curved roof just enough and avoids the need to do any additional panelling later.
Your Hangar is complete. |
|

