|
Fantasy buildings in cork
by Robert Provan (Toaster) Having purchased Song of Blades & Heroes I was inspired to make a town setting for games. The crooked alleys and teetering ramshackle buildings of a medieval town have always appealed to my sense of drama and story telling and now I had a suitable set of rules to justify such a project. Step one was to find some pictures to base the buildings on and when I found the Pardulon website I had everything I needed. Pardulon makes a brilliant range of modular medieval buildings that combine wargames functionality with heaps of character, I only two problems. Firstly price; buying enough to build a town was well beyond my means and even buying half what I needed would have annoyed my wife well beyond the safety margins. Secondly size; the footprint of a basic Pardulon module is 110 x 80 mm and that was a little bigger than I wanted if I was to get enough twisty alleys on the table. The solution was to make my own and having made a number of Paul's cork tile buildings before the choice of material was obvious. I settled on a basic size of 85 x 65 mm and started cutting. 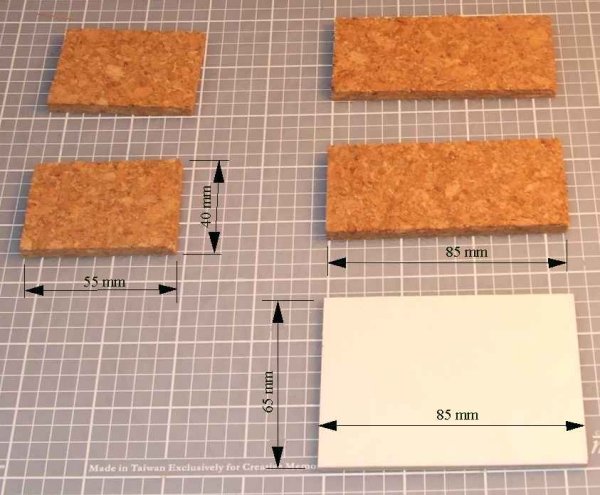
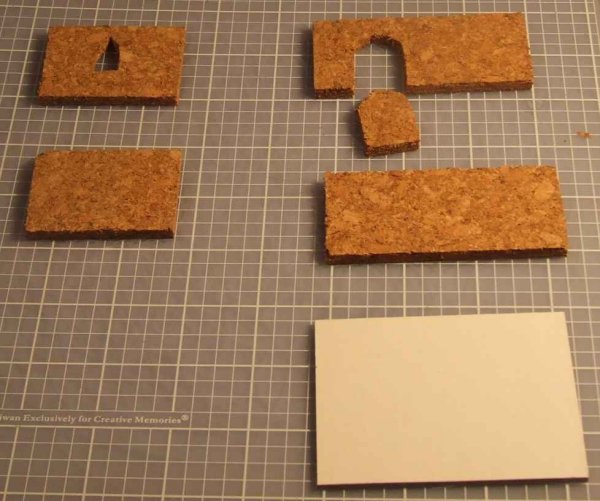
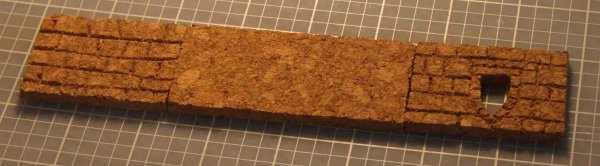
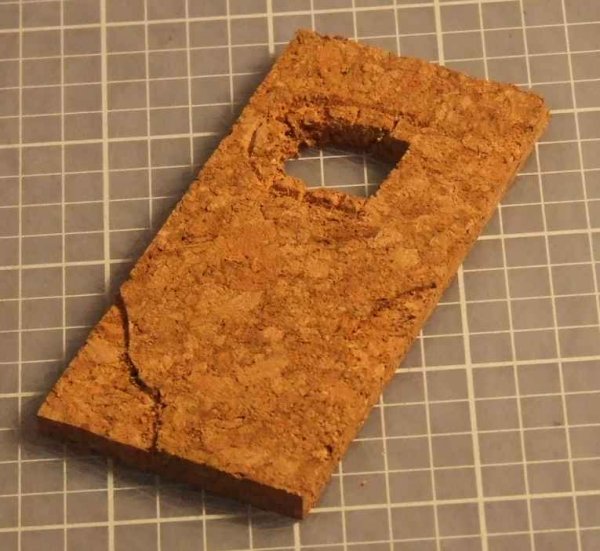
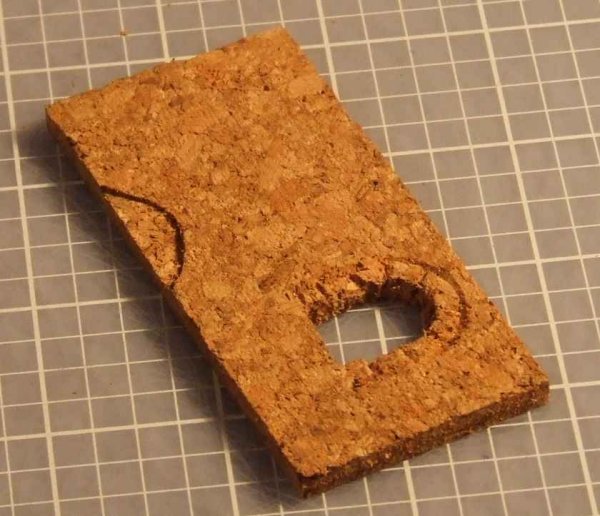
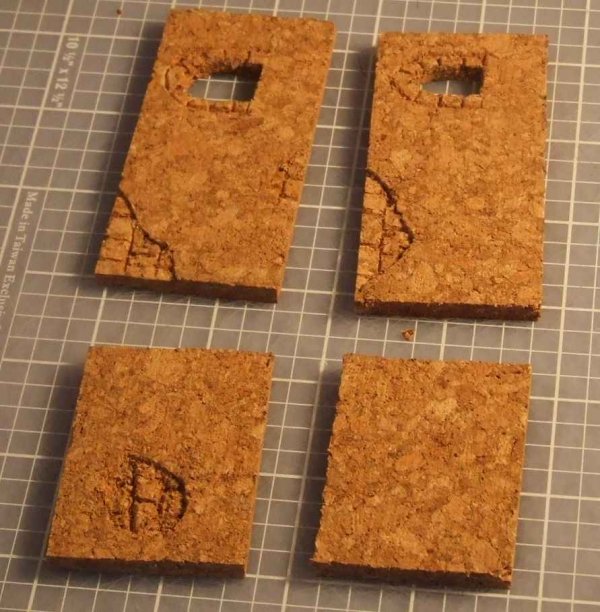
Cut out the doors and windows, doors are 20mm wide by 30mm high and windows are 10mm wide by 17mm high.
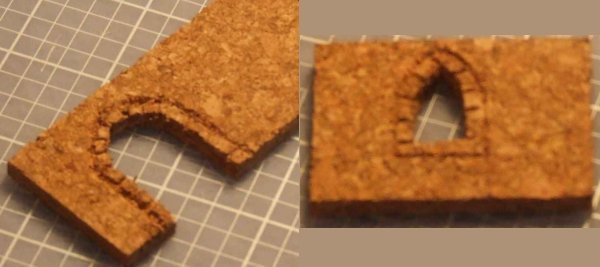
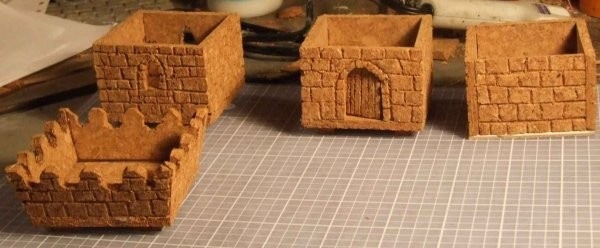
Then came the interesting bit, could I carve the surface detail in the cork easily enough that I wouldn't die of boredom halfway through the project. Carving the stonework proved amazingly easy. Step one is to cut a groove around any doors or windows, make a cut 1-2 mm deep with the knife on a 45 degree angle then lean the knife over the other way and make a second cut parallel to the first to remove a thin strip of cork.
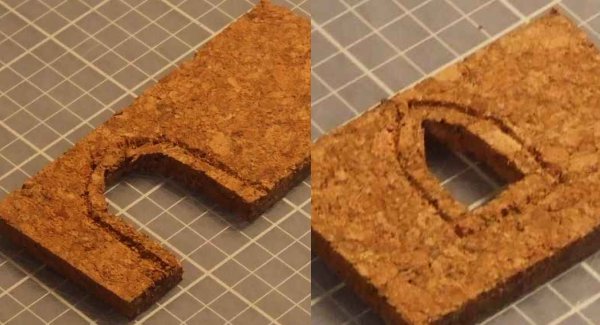
Small notches are then cut across the gap between door and groove to create the look of stone blocks. Remember that an arch needs a keystone so don't make a notch at the apex.
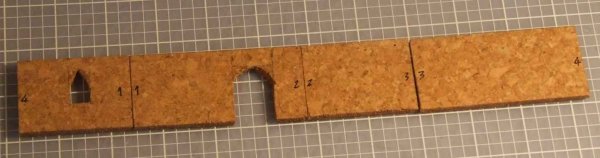
Now lay out the walls as they are going to be assembled and label the joints so that you can match them up while cutting the stone pattern so that it will all line up.
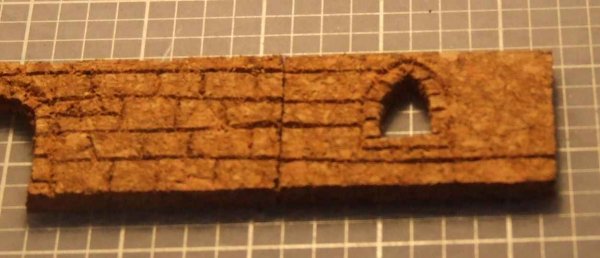
Now go across the wall dividing each horizontal section into a series of blocks. Remember to stagger the rows and make the occasional angled groove for stones that aren't quite square.
Lay the second wall section next to the first and extend the horizontal grooves across it. 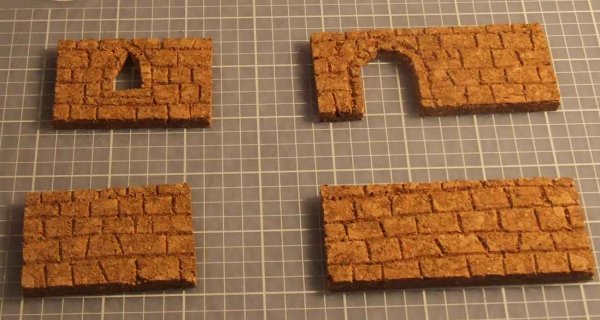
Continue to carve stones on each wall, remember that the last one will require that you match the stones at both ends.
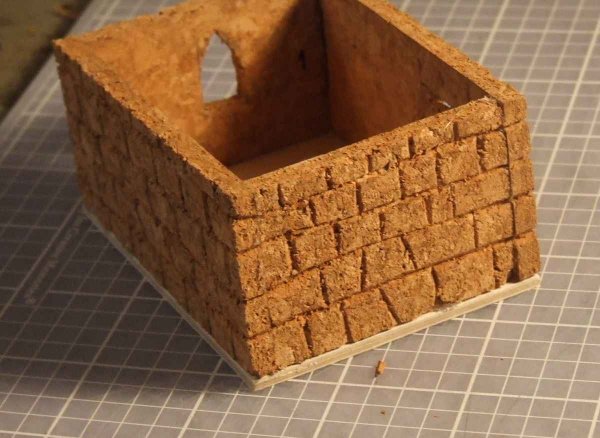
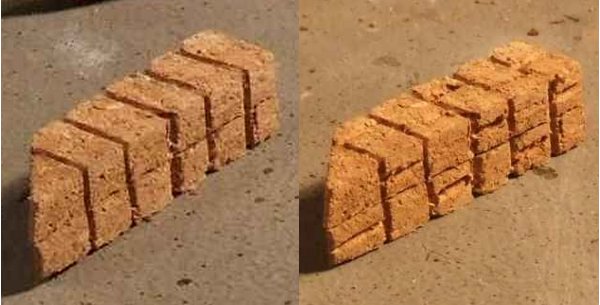
The carved walls.
Take the cut out from the doorway and split it so it is only 2.5mm thick (approximately of course), carve planks in the front of it, trim slightly so it fits easily in its hole and glue to a paper hinge in the doorway.

Glue the walls together, some people like to use PVA but this involves a lot of waiting for it to dry, I find that hot melt glue gives a very good result and allows me to keep working on the building. A base is optional but will make the building much stronger. For my ground floors I used heavy cardboard.
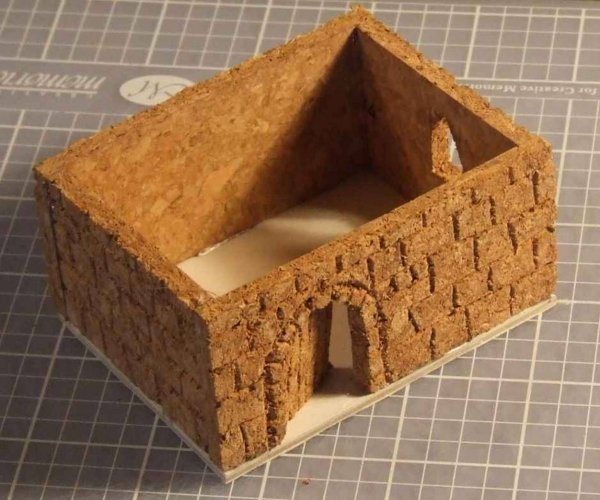
Now carve the connecting grooves across the ends of the long walls.

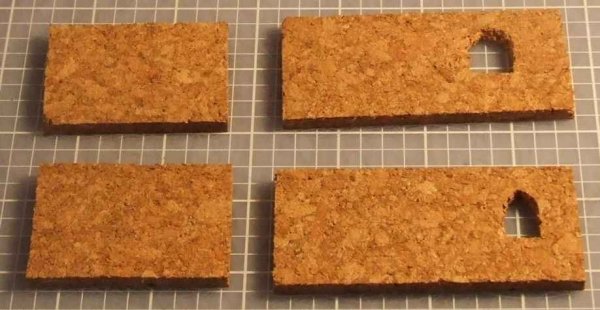
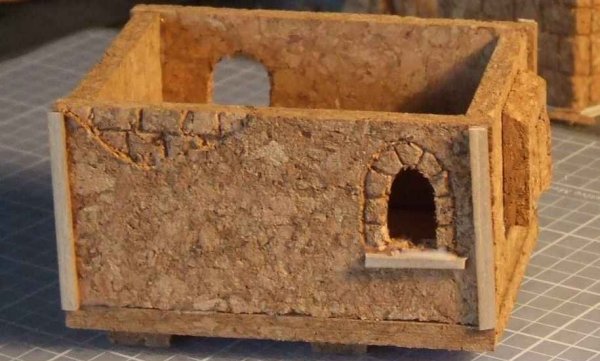
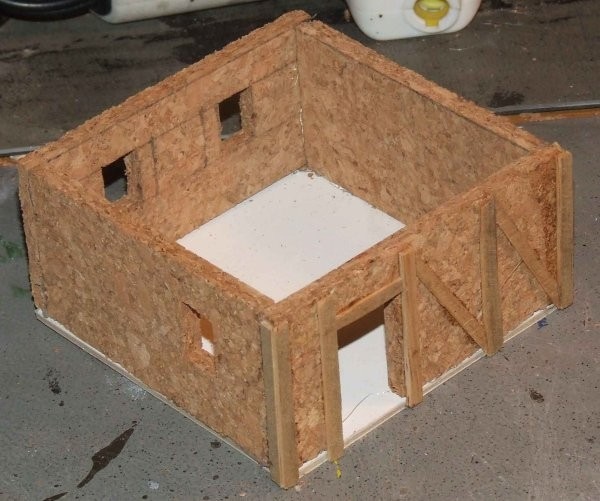
The first floor begins the normal way, wall pieces with widow holes.
The second floor is going to have plastered walls with stonework showing through damaged patches.
I carved the window surrounds as before but this time I left the bottom edge bare as I will glue a lintel across it. 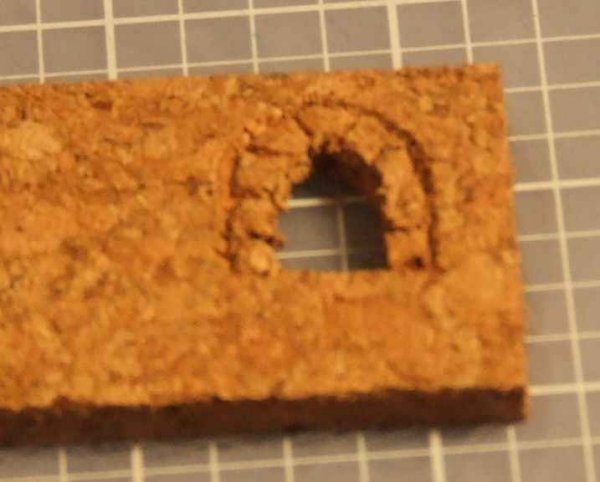
I cut irregular patches approx 1mm deep on a corner or edge of each long wall.
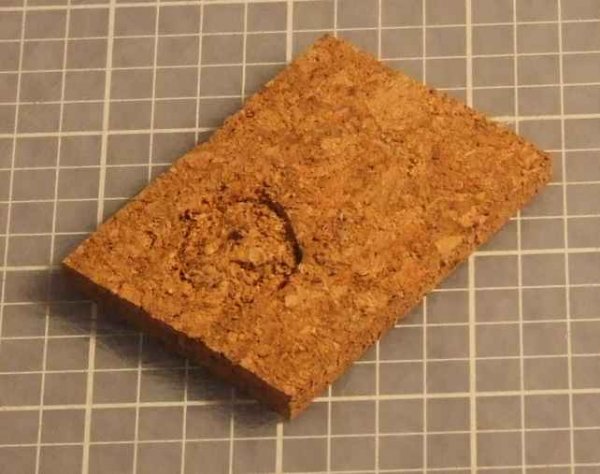
In one of the short walls I cut a central damaged area, this required cutting the outline of the shape 1mm deep and then cutting in on as shallow an angle as possible before cleaning up the middle
Cut the stone work in the dug out areas using the same technique as for the ground level.
For the other short wall I made a shuttered window from an off-cut.
Bevel the top edge. 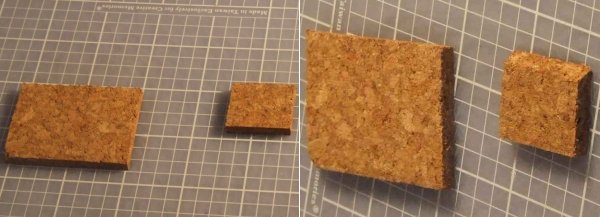
Cut out the centre.
Reduce to 2.5 mm thick as for the door, carve planks into the front and cut in half to form 2 shutters.
Glue the frame to the wall. 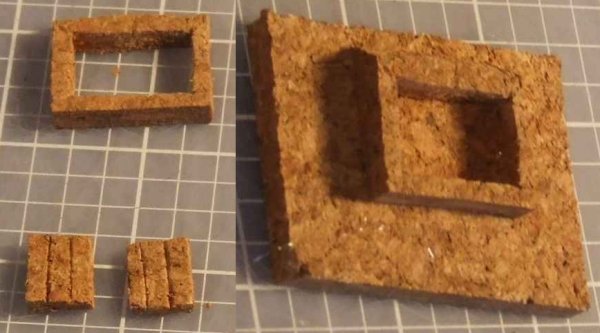
Glue the shutters into the frame in a slightly ajar position.
Add a roof over the shutter from a scrap of cardboard. Hinges can be added from card if desired. 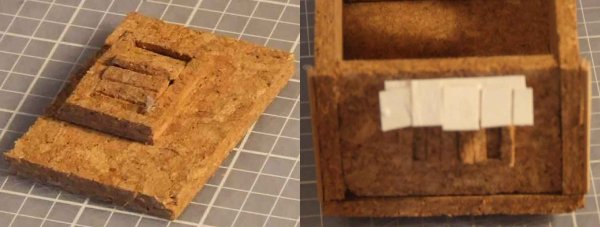
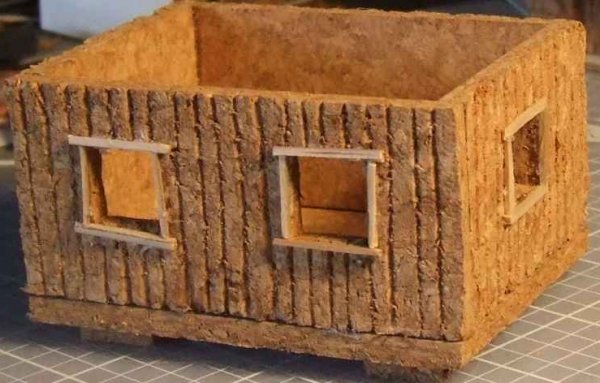
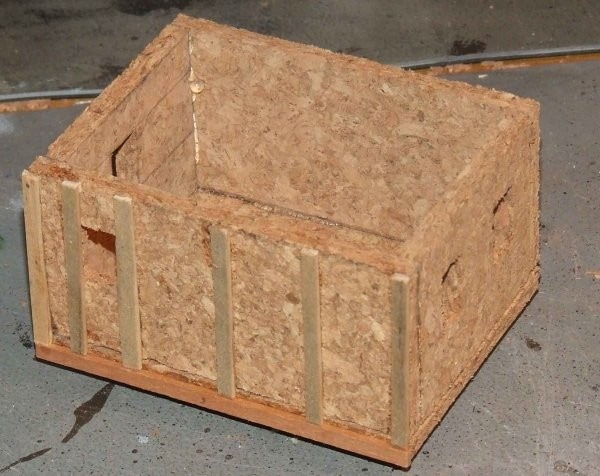
Assemble the walls with the short walls recessed 1mm back from the ends of the long walls, this saves work on the wood framing. Mount the walls on a 85 x 65 cork tile floor.
Glue a length of matchwood or similar under each window. 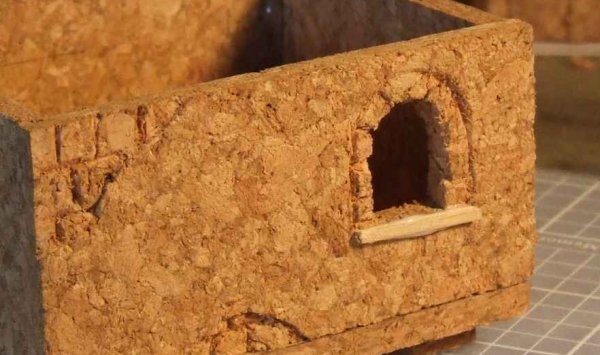
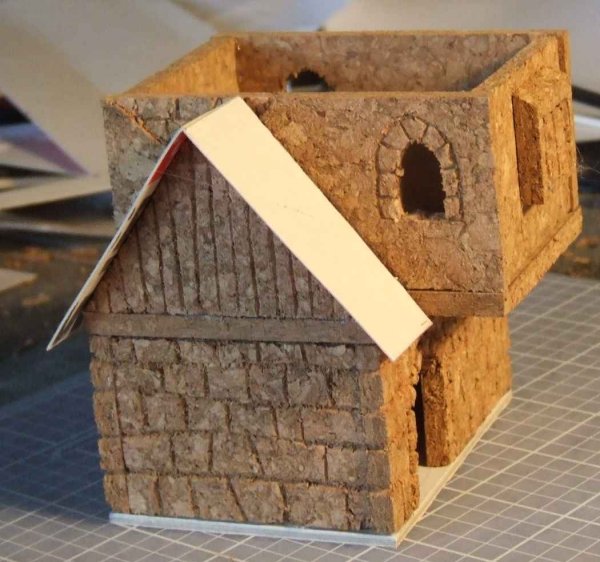
The first floor is to be positioned offset on the ground floor, glue cork scraps to the underside of the floor to act as locating lugs.
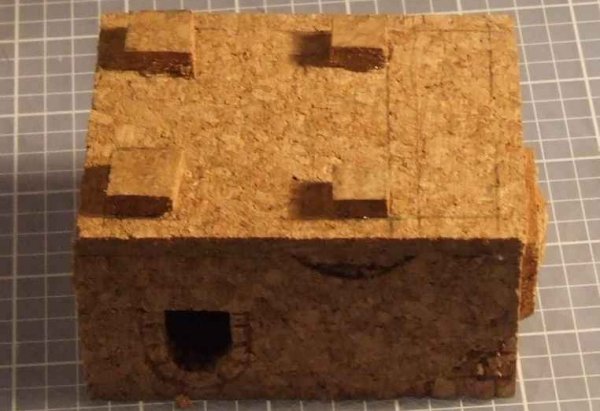
Wood framing was added to the corners of this level with strips cut from a thin off-cut of pine, balsa wood is also an option but I already had the scrap pine and it was free.
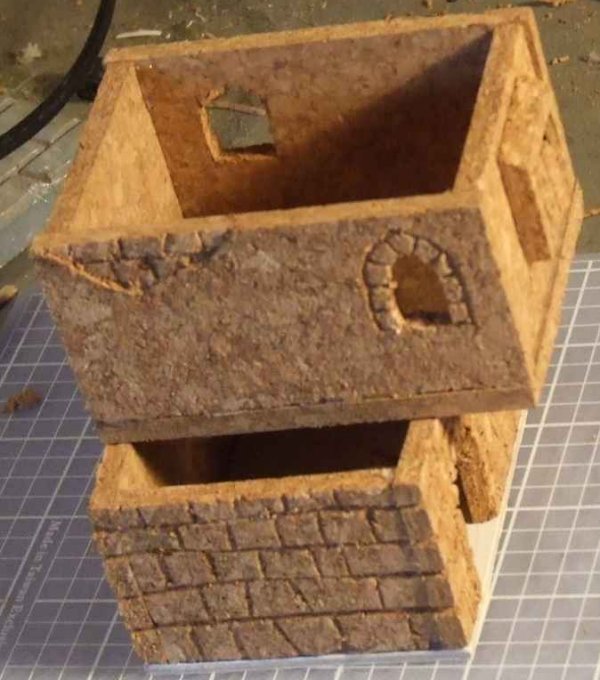
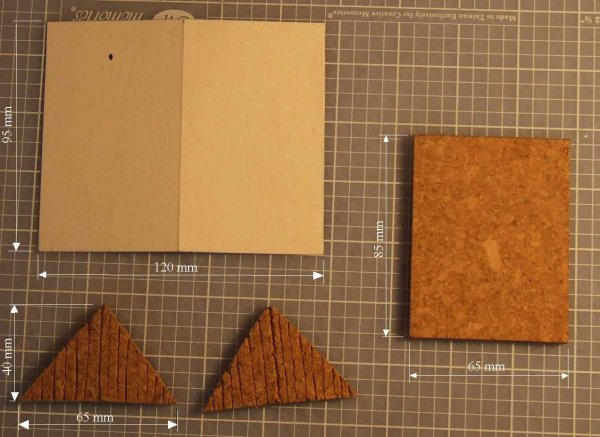
To cover the gap caused by the offset first floor I made a roof extension.
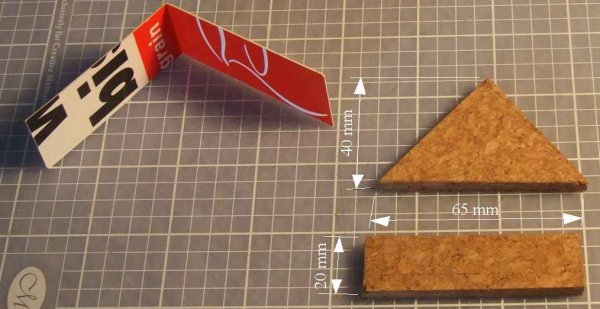
Carve planks in the triangular piece, although they want to be a little neater than the stonework lines a bit of wobble and variation in thickness is still a good thing, it adds to the atmosphere of the piece. In reality these would have all been hand sawn so such variation is normal.
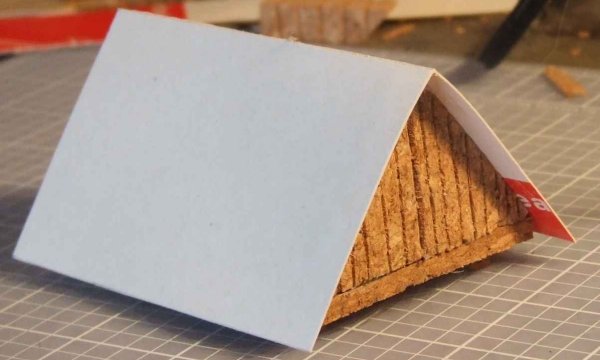
Cut a strip of cereal packet cardboard 120 x 25 mm, a light rub with sandpaper on the printed side of the cardboard will improve the adhesion of hotmelt glue to the glossy surface. Score the card lightly so it can fold for the ridgeline. Glue the cork tile pieces together and glue the roof over it. Add locating lugs and test fit, trim if required. 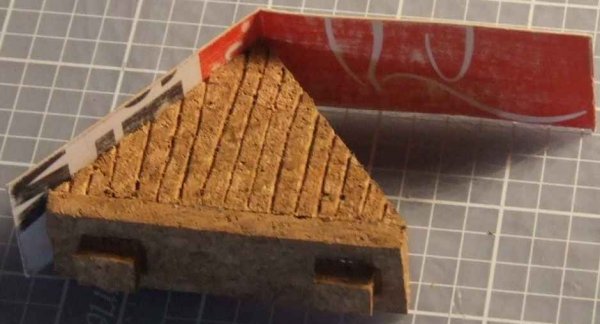
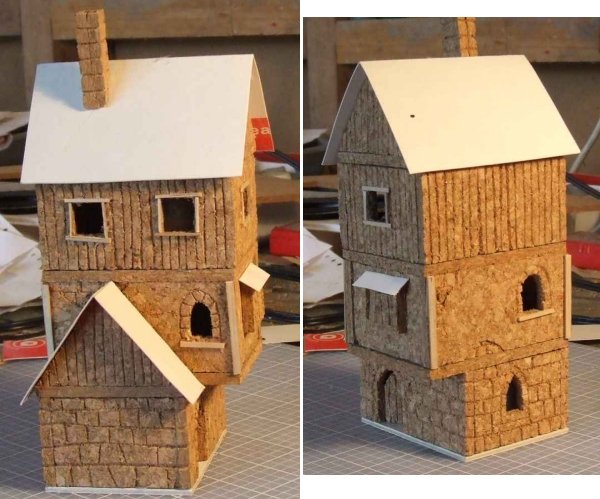
The second story was made with a wood plank finish, this was done simply by carving vertical grooves in the cork at approx 5 mm spacing.
Widows in this level are 15 x 15 mm and square rather than arched, after carving the planks glue matchsticks or balsa framing around the windows (I used thinner strips of that pine off-cut again). 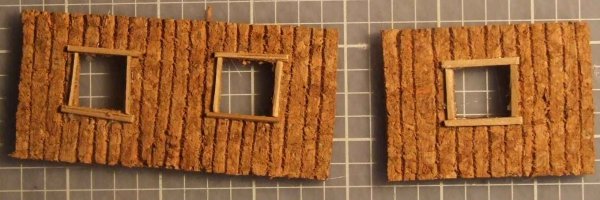
The roof is made in a similar manner to the roof extension, it's simply longer and has two ends.
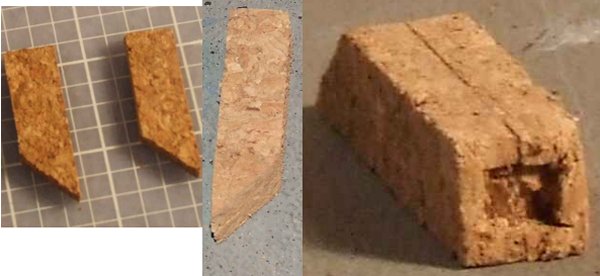
The chimney is made from two cork scraps cut to match the pitch of the roof and glued together. Hollow out the top to a depth 1-2 mm then carve stonework as usual.
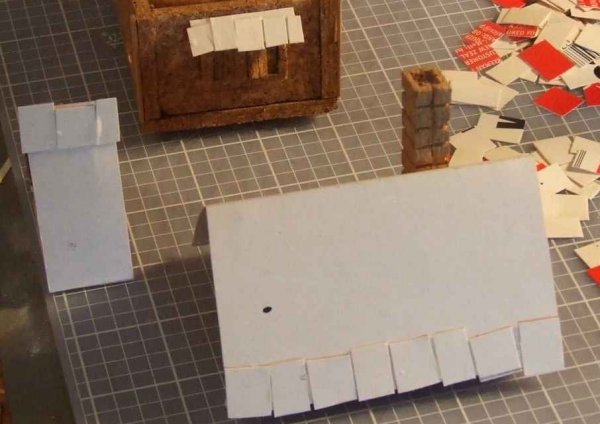
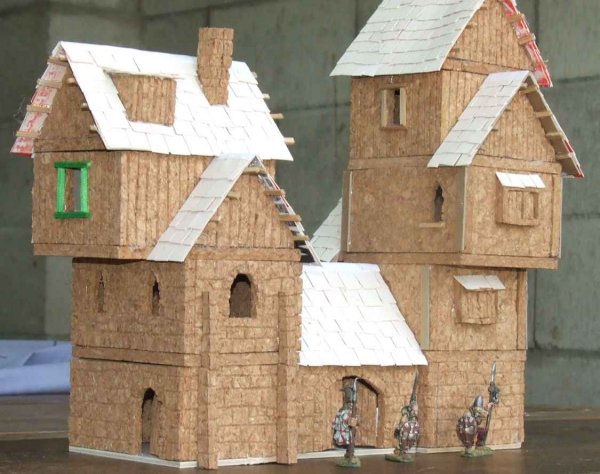
Now for the boring bit; the roof tiles. The only way I know to get a good look to this is individual tiles, the smaller the tiles the better the look, the larger the tiles the easier and quicker the job is. The trick is to find a balance where you can live with the appearance and which doesn't drive you mad. My tiles were approx 12mm x 17mm but there was a lot of variation in keeping with the ramshackle look I wanted to capture. I glued the tiles on with PVA glue, start at the bottom and let each layer dry long enough that it's secure before you add the next. Don't butt the tiles hard up against each other but leave a half mm gap, without the gap the paint can fill in the break between tiles and hide all your hard work.
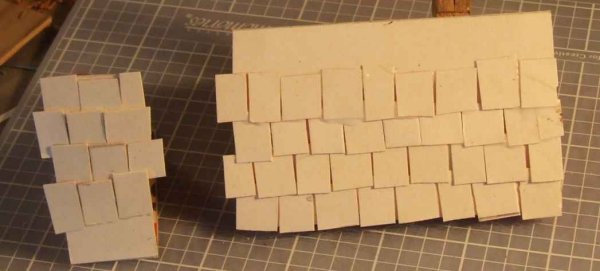
Once all the tiles are done a strip of paper is fitted over the ridge line.
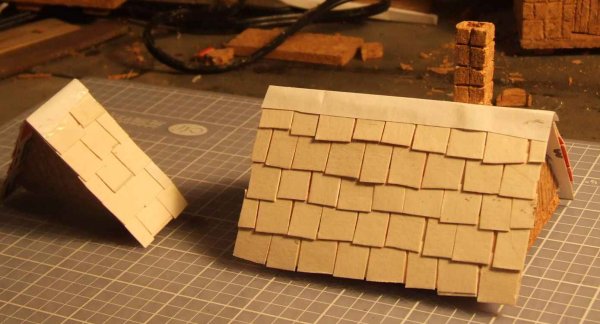
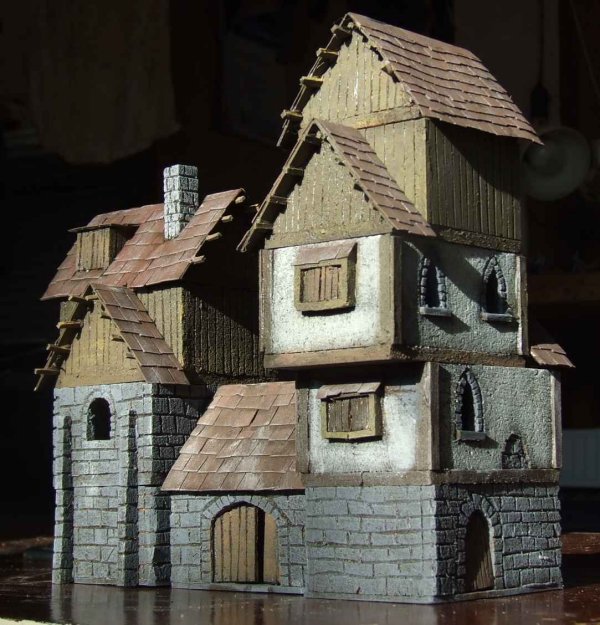
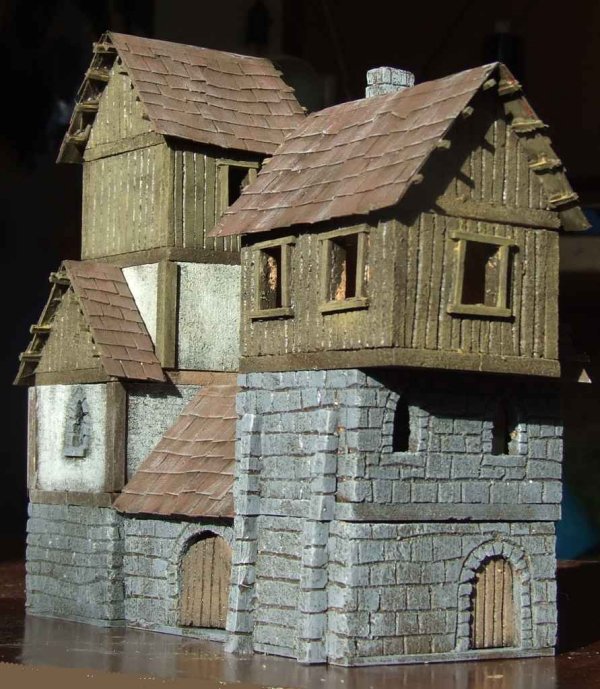
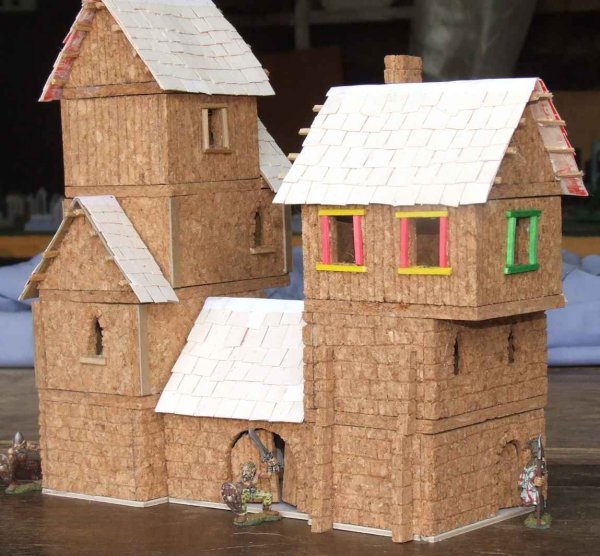
The house is done.
Once I had survived the tiles each section was undercoated with dark brown house paint which the previous owner of my house kindly left behind half a tin of. Make sure to undercoat all the crevices between the stones, planks and tiles.
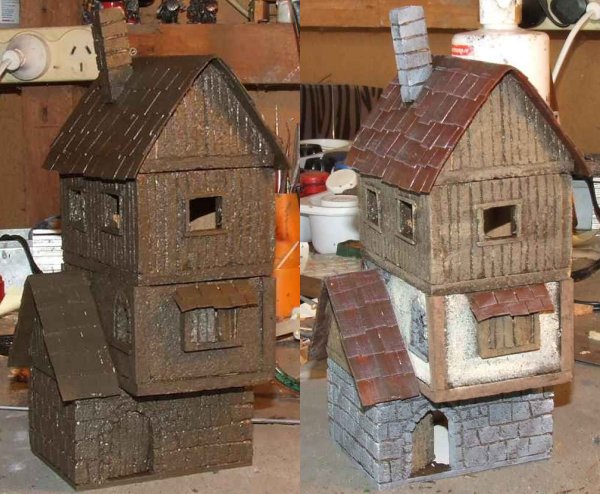
All the rest of the painting uses cheap poster paints from the art section of any major chain store or stationery shop.
Stonework was given a coat of mid grey and drybrushed light grey, this includes the stonework in the damaged sections of plaster. Plaster was given a heavy drybrush of off white. Wood was drybrushed various shades of brown, anything that was lighter than the undercoat will do. Tiles were given a thin coat of red to change the shade of brown to something distinctive from the woodwork and then drybrushed a dirty green/grey to highlight and weather them. Total time is a bit hard to figure since I was working on three buildings at once and I also had a number of interruptions (including my son kicking a ball through the bathroom window and the neighbour's cat stealing the sausages that were defrosting for dinner.) but I'd guess around 3 - 4 hours including painting time and neglecting drying time on the tiles (when I was working on something else anyway). 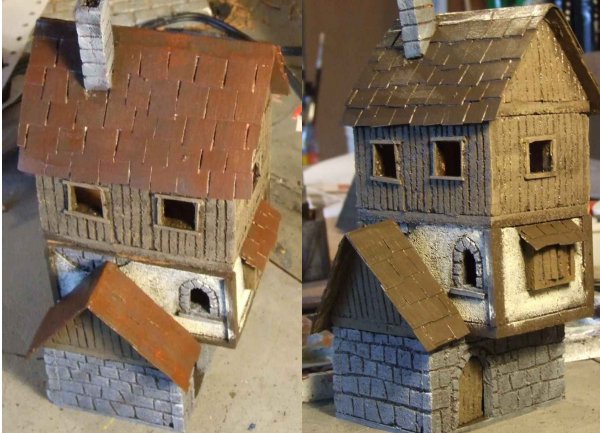
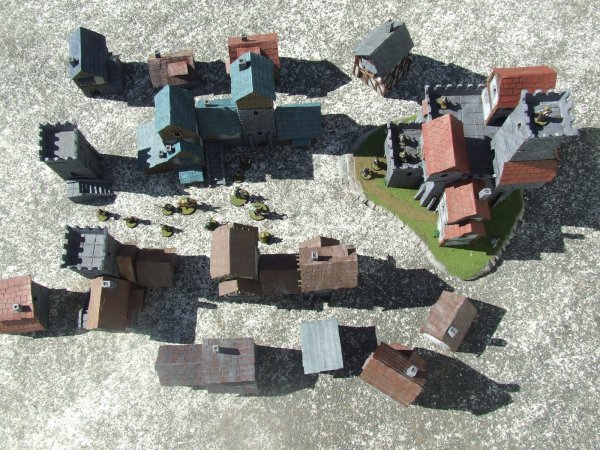
The town as it currently exists
I have also built two each 1 and 2 storey buildings and a second shop allowing a dense urban layout on a 1 metre square skirmish table (or the driveway for photography in natural light). 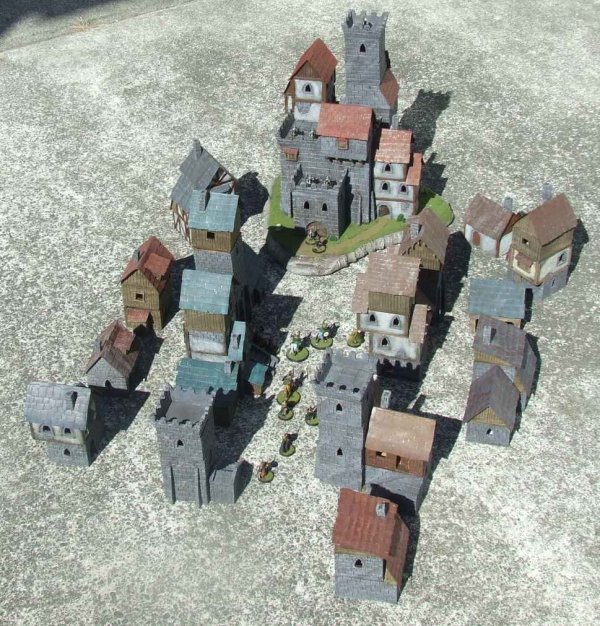

|
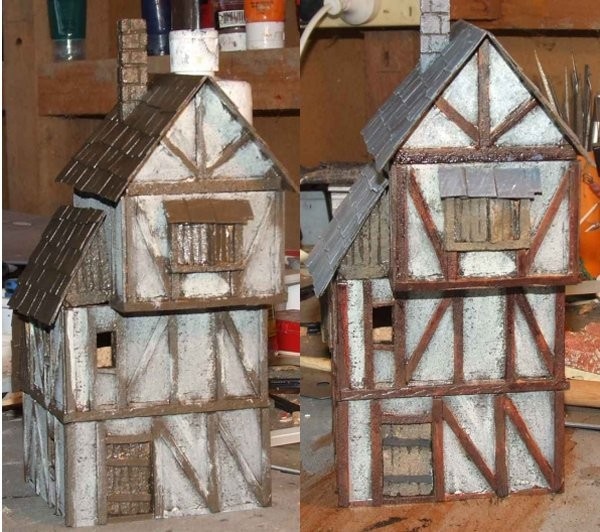
Half timbered house and tower
Here are the next two buildings I won’t go into excessive detail as the basic techniques are the same as before, rather I will just highlight any variations and let the pictures speak for themselves. Half timbered house Basic structure is as for the first house but with an 85mm x 85mm ground floor. Roof extensions are made with a single pitch running parallel to the wall. 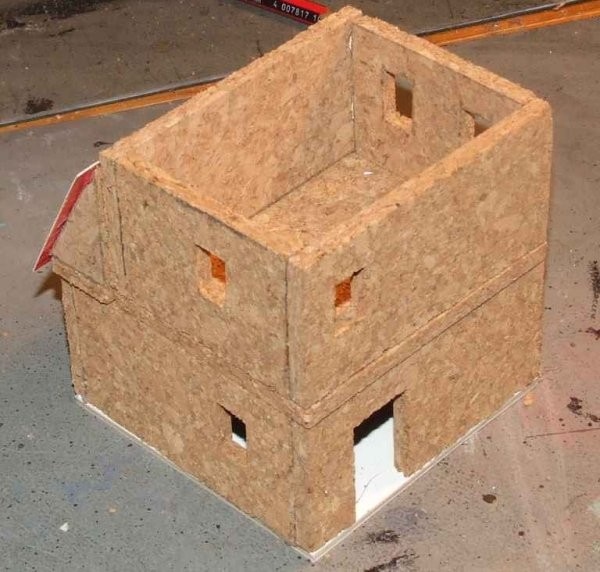
Glue 5mm wide (approx) strips of balsa (or thin pine) to the walls to create the framing.
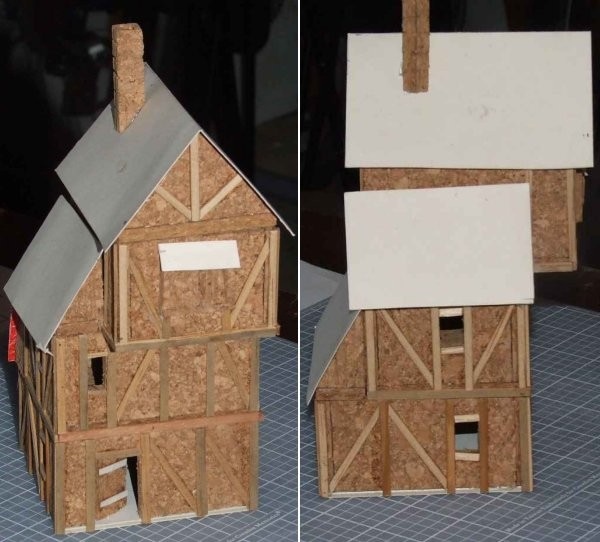
For painting I added a drop of grey to the off white I’d used for the plastered walls then when dry stippled a small amount of white in the centre of each panel.
After painting the timbering a light brown I added a wash of chestnut ink. The roof was painted Grey/green and drybrushed light grey to look like slate tiles. 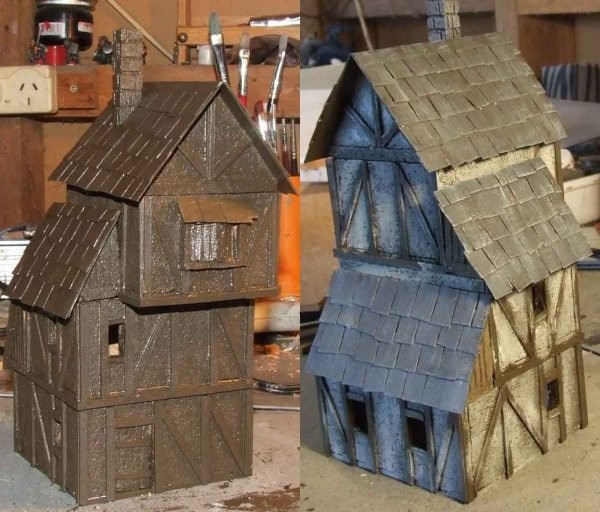
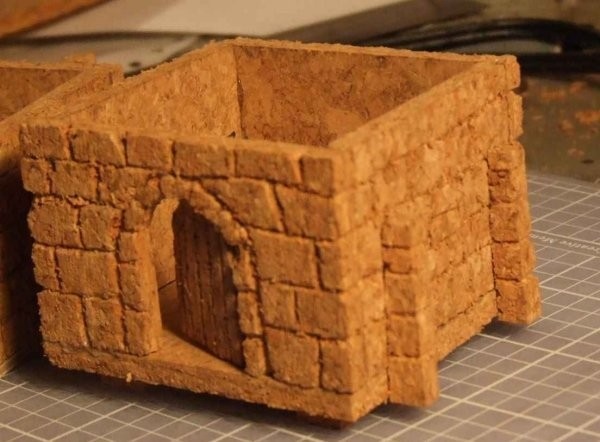
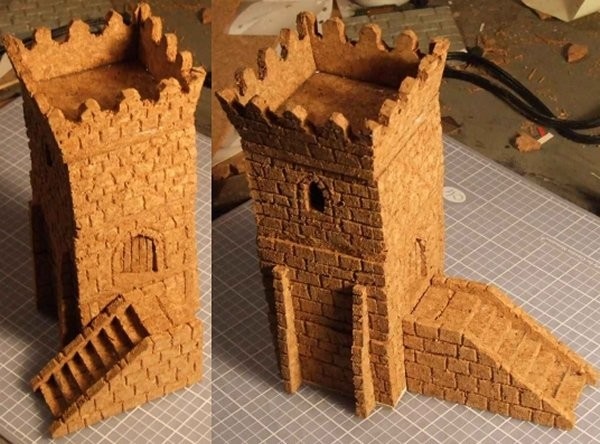
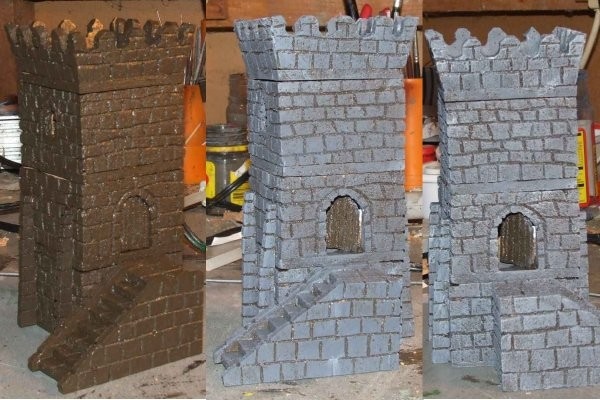
Tower
The tower was built 65mm x 65mm. 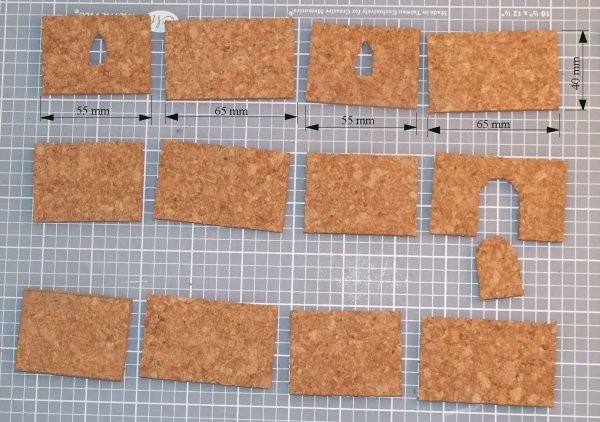
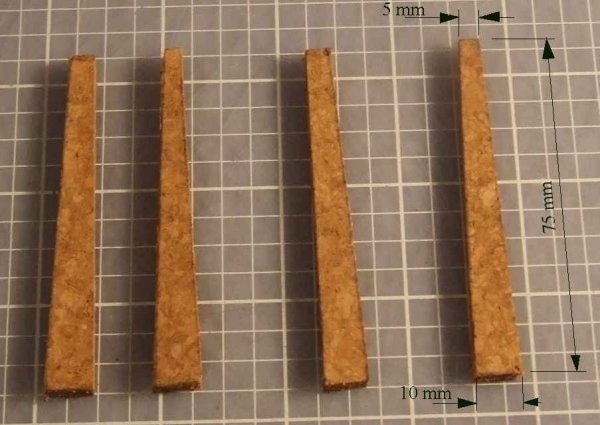
Buttresses were added to the first two levels, 75mm high and tapering from 10mm to 5mm, each was glued in place as a single piece and then cut at the separation point between levels before adding stonework detailing to them.
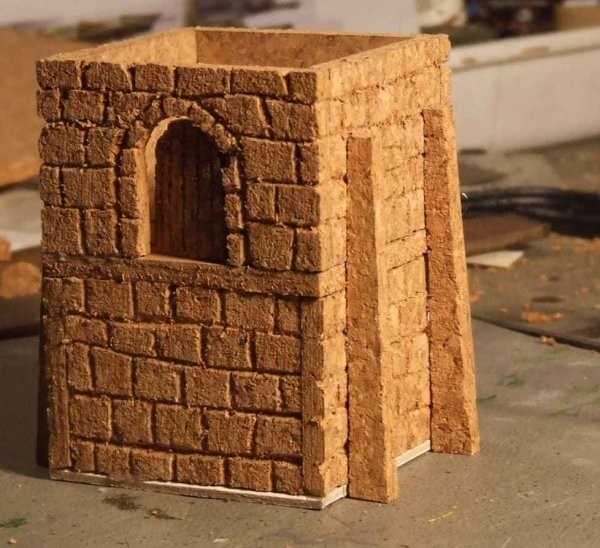
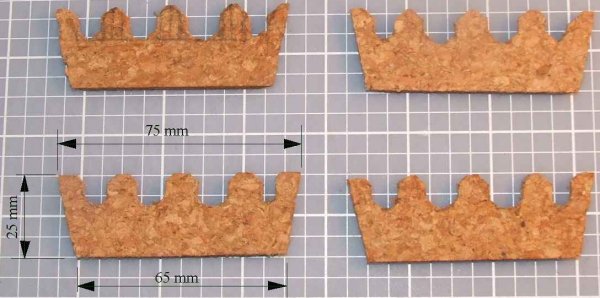
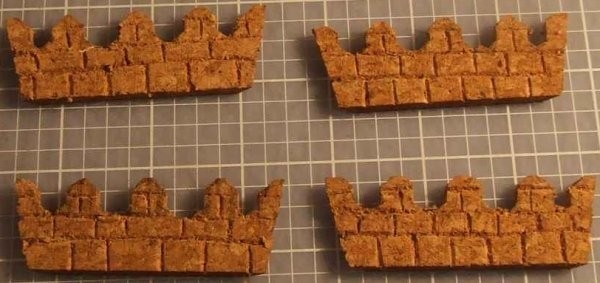
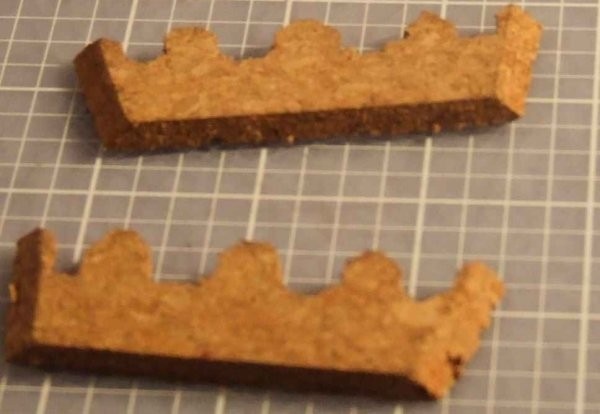
Battlements were 75mm x 15mm x 65mm to produce an outward slope. Instead of cutting two long and two shot pieces all pieces were full length and the inside of each corner was chamfered 45 degrees.
The stair was made from 25mm wide offcuts stacked between two side pieces.
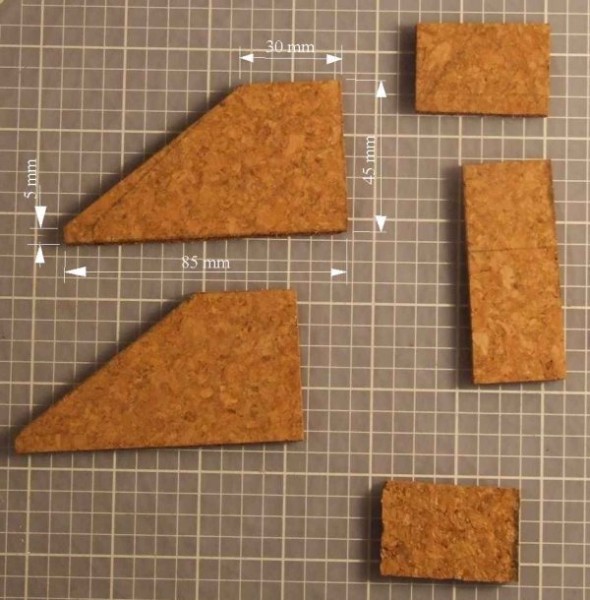
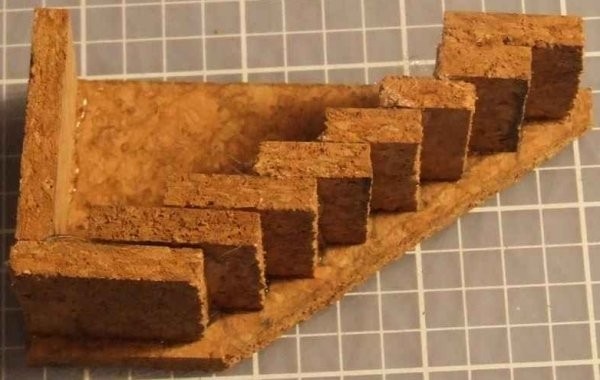
The stair is left separate to be positioned as required.
Larger Buildings
Larger buildings are built up using multiple standard sections, if you plan to go all out on internal detailing you will need to glue the sections together and include internal doors. I find that unnecessary for gaming models and leave each section as stand-alone allowing me to rearrange the models at will. Roof sections will need to be cut flush where they butt up against adjacent walls. If you’re a perfectionist you may want to make alternative roof sections to allow the flexibility of separating sections without sacrificing appearance. I find such points tend to get overlooked in a busy table, once people have seen overhangs on the first couple of houses their brains automatically fill them in on the rest. Once you have enough buildings you can start rearranging them into new designs and when you find something you like either copy the pieces involved to add it to your permanent collection or take a record so you can reproduce it when required for a particular game. When I run a campaign I may photograph each board so it can be revisited if a sequel is called for. The organised people may wish to note on the bottom of each piece its home building and position (I’m guilty of this) those who have a more relaxed approach may be more than happy if no building is ever exactly the same conglomeration of pieces two games in a row. Shop The front wall of the shop was carved in the same manner as the stone or wood buildings, it differs only in the pattern carved. The single pitch roof is built in the usual manner with a height of 20mm. 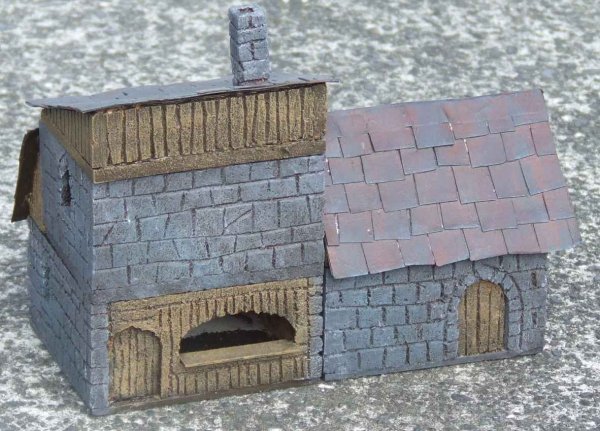
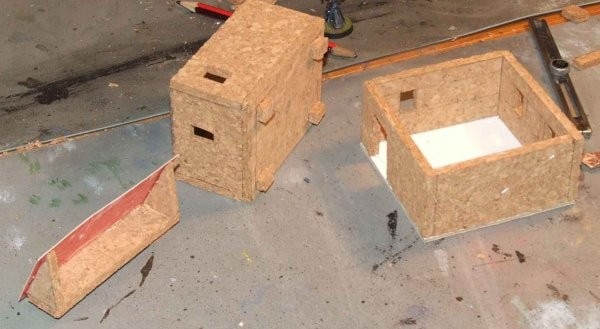
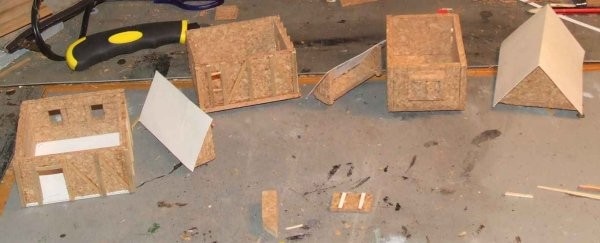
Guild Hall
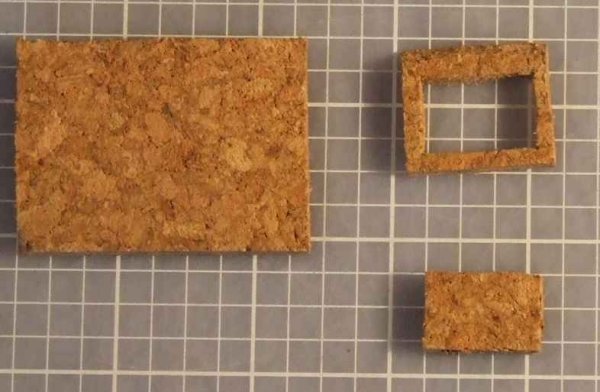
Here is the Guild hall separated into its component parts. This was in fact the first piece I made and the only one I bothered to add the protruding rafters to the roof ends, they look good but tend to catch on cuffs during games, also I got lazy. 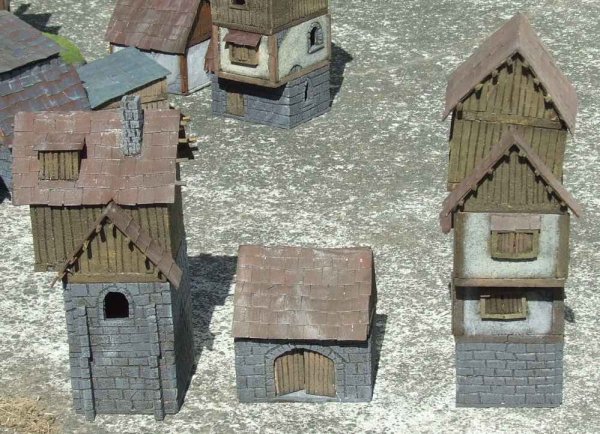
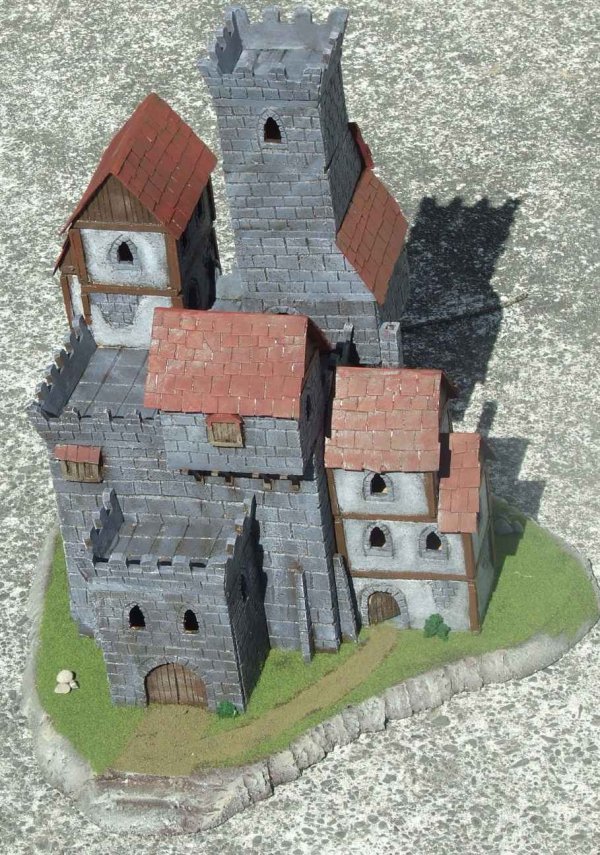
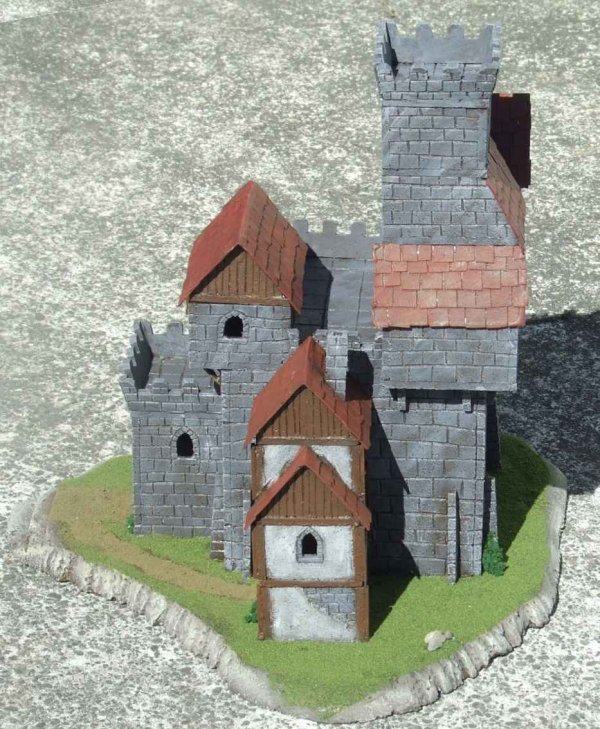
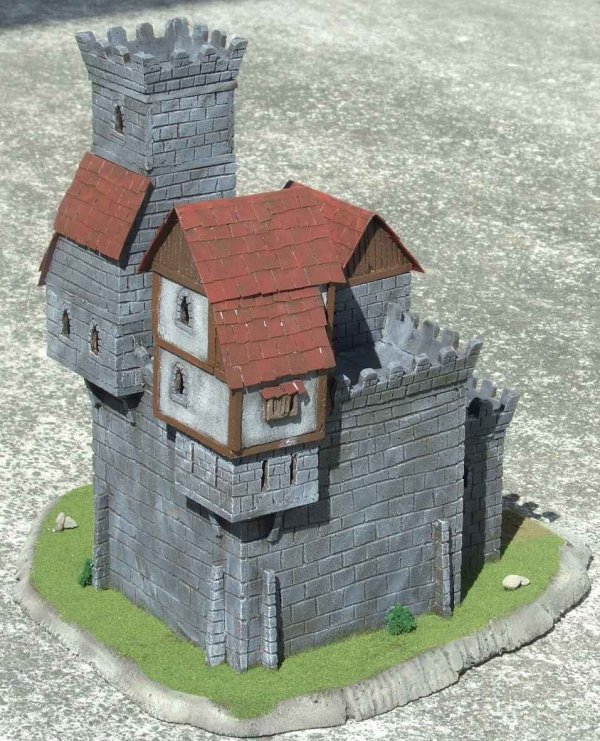
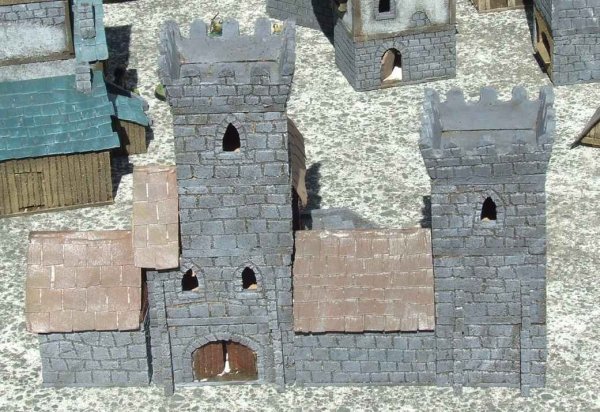
Small Keep
This building is yet another copy from a picture on the Pardulon site. 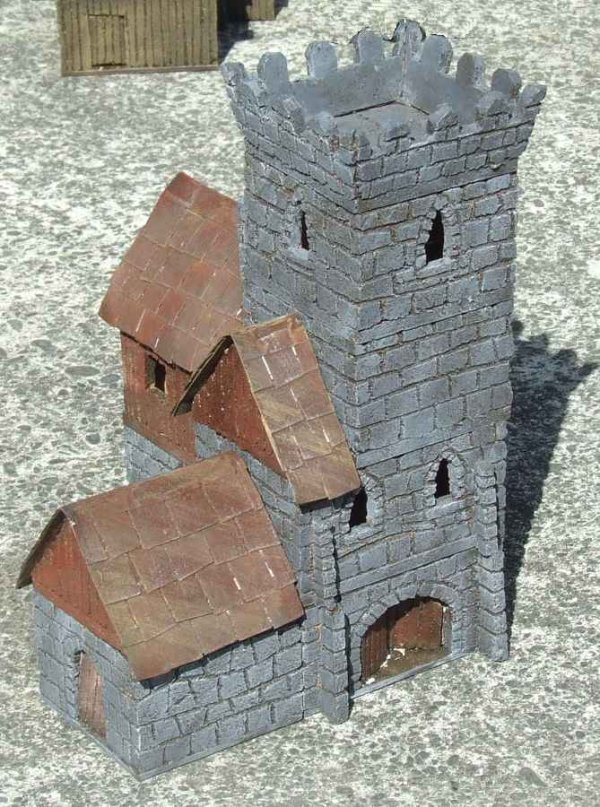
By adding the Guild Hall centre section and the watchtower it expands to a nice little castle.
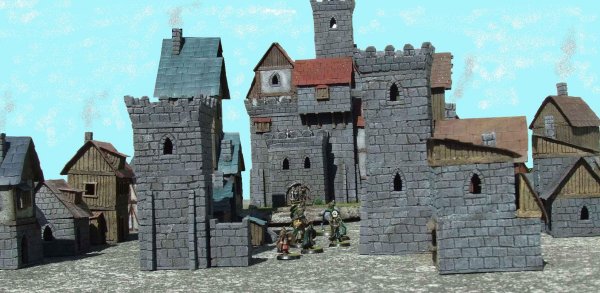
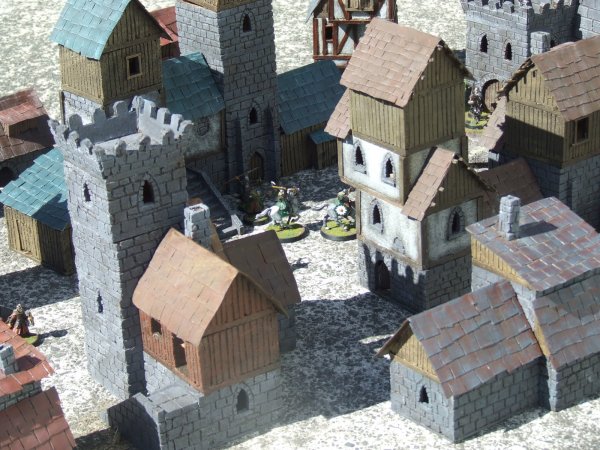
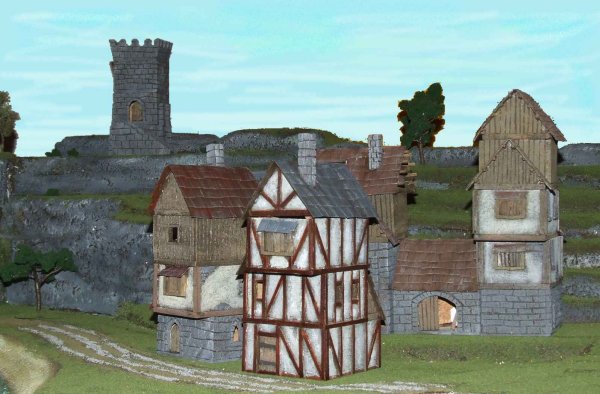
The town so far
Here you can see the results of approximately 1 pack of cork tiles (I started with an opened pack and didn’t keep an exact count) worth of buildings on the table top. Given that I enjoy modelling (the time spent is a plus rather than a negative) that makes for a very cheap village. 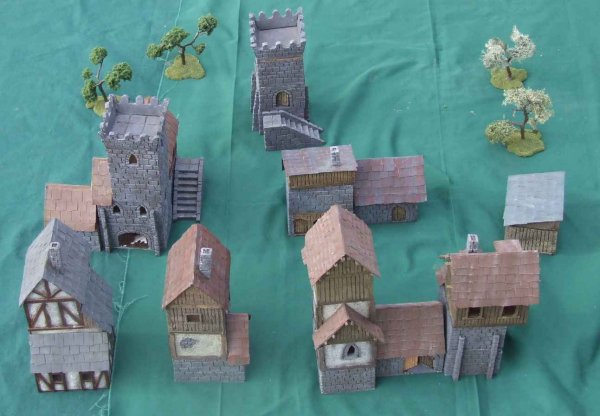
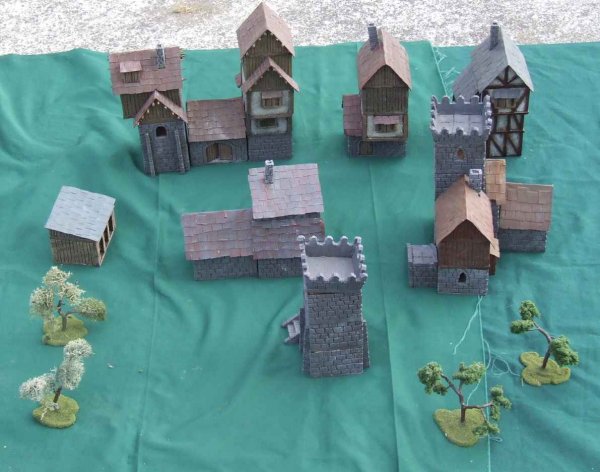
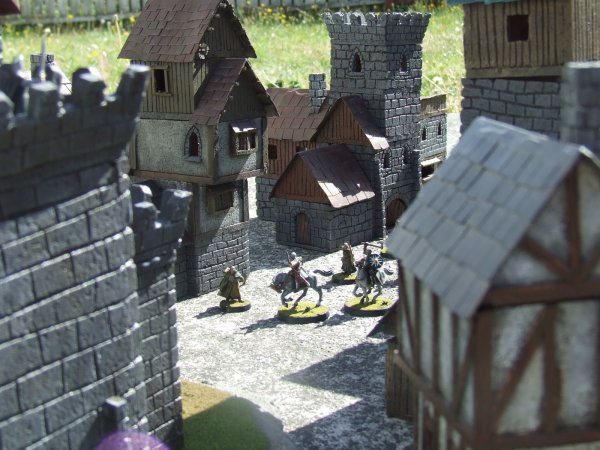
Street
A street where all the buildings are designed to butt up against each other creates more interesting tactical situations by breaking up the grid effect. 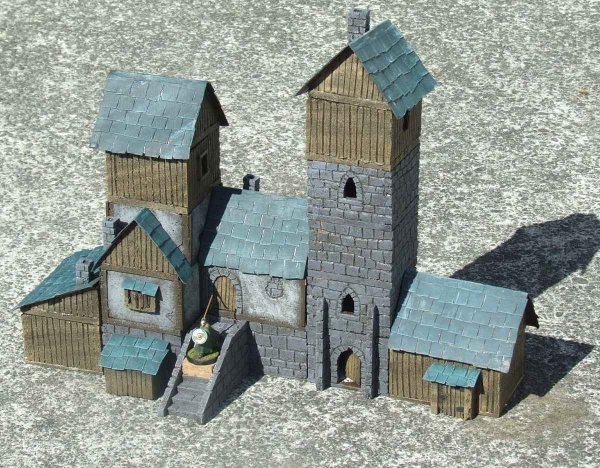
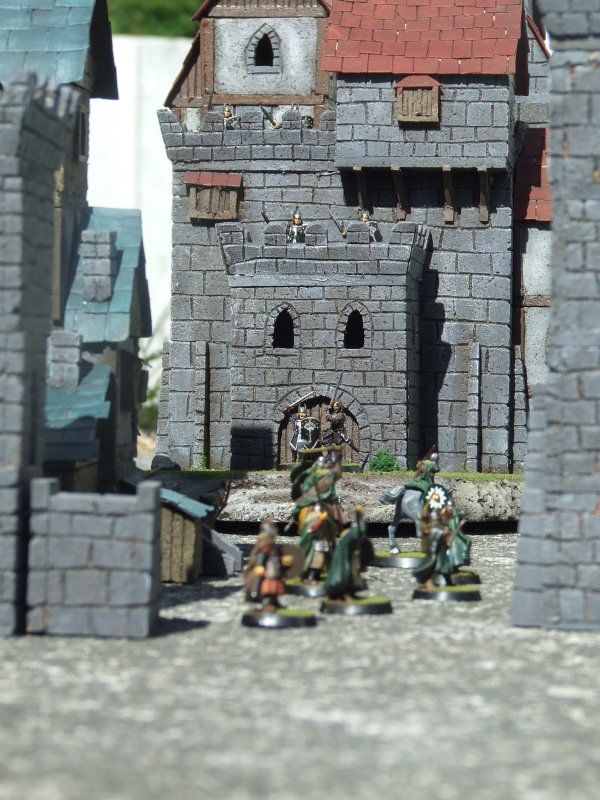
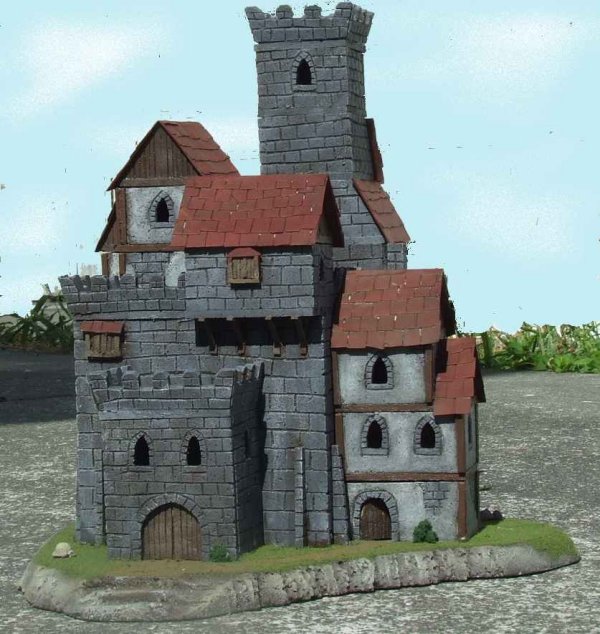
Castle
Every fantasy town needs a castle as a centrepiece. I considered making the castle completely modular but decided that it would be unplayable so built it as a central core with standard modular buildings adding the details, I’ll draw up some maps for the internal floors if required for gaming. Playing on maps also allows for correcting the figure scale vs. ground scale problem that you get with multi room buildings. The castle started with a 170mm square by 150mm high box structure, I braced the internal corners with triangles of scrap cork tile. The roof piece has overlaps were the towers/buildings will go. 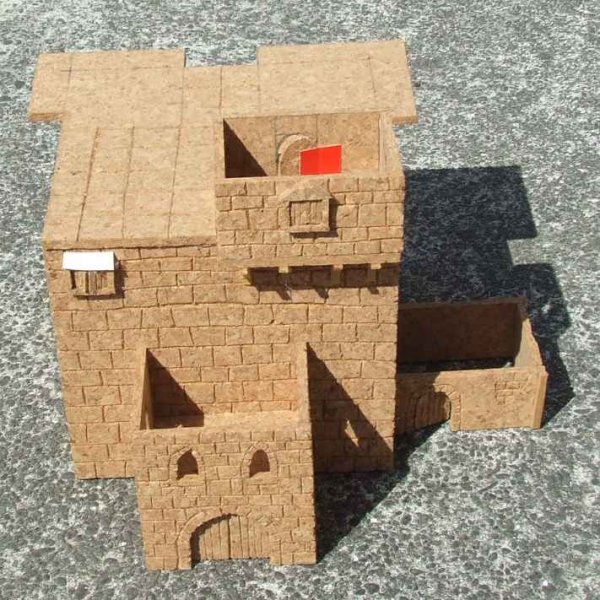
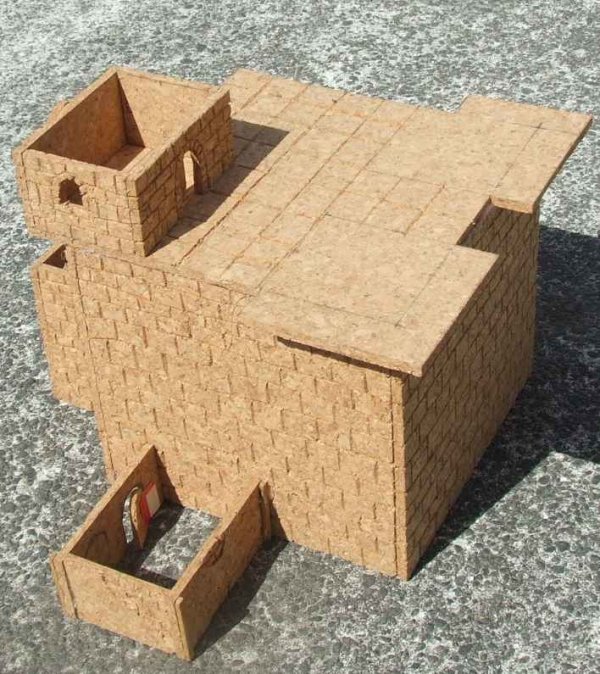
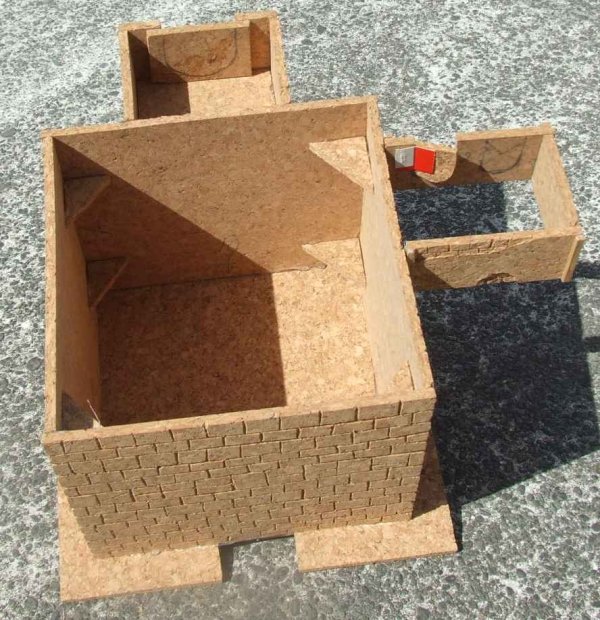
The tower bases are all built on the standard 85x85 or 85x65 pattern and glued to the appropriate point on the castle. The castle is mounted on a base carved from expanded polystyrene sheet.
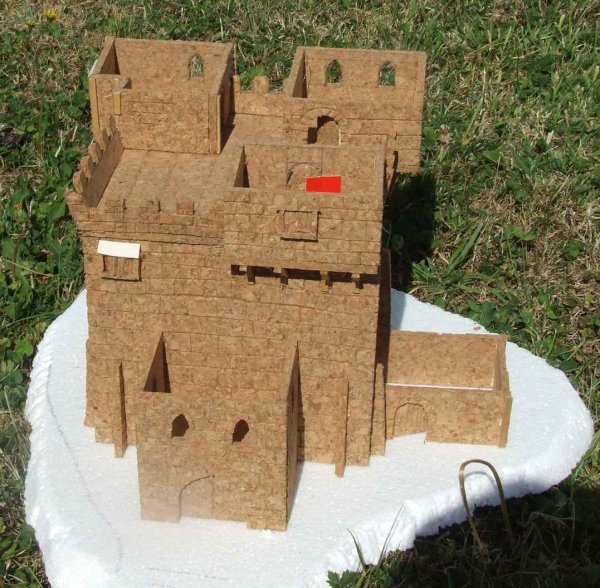
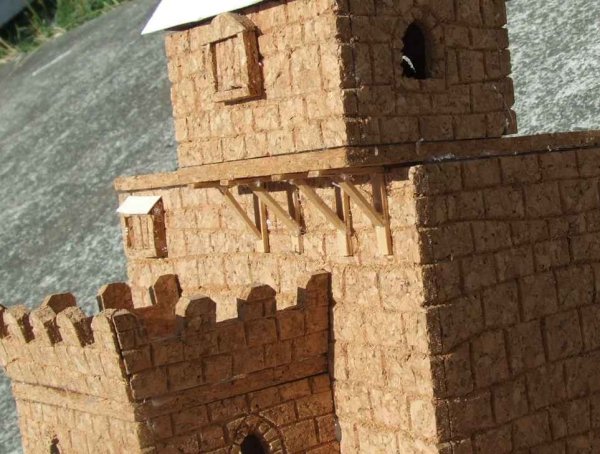
Most of the overhangs are braced with cork stonework buttresses but for the front overhang I made timber bracing from thin scrap wood.
The towers and buildings were all built in exactly the same manner as the simple buildings except that the roof extensions were fixed as this will be a permanent model and not require the flexibility of the other pieces.
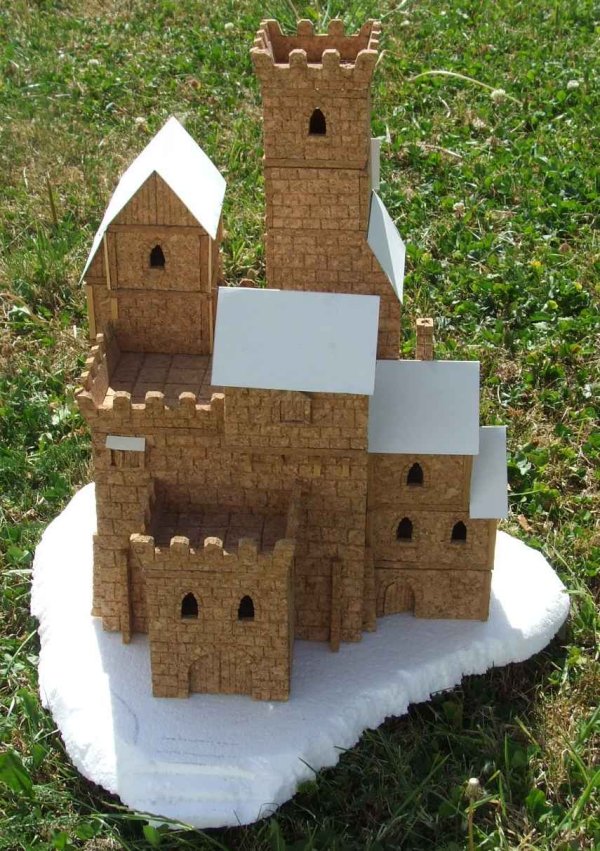
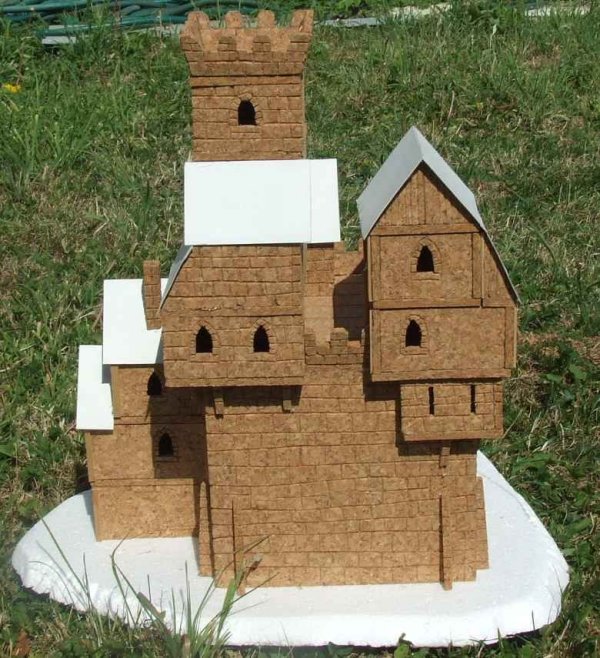


Painting was carried out as normal. The castle took 4 cork tiles and cost approx NZ$10 which equates to about US$5 or GBP3, and was finished over the course of a long weekend while still leaving time for Church, two wargames and all the housekeeping and family activities that normally fill ones time.
Bonus bits
Gaming with my buildings has revealed that the roof extensions have a distressing tendency to fall off every time the table is bumped. The solution, as my son pointed out to me, is to add a tab of scrap cork that extends under the building. 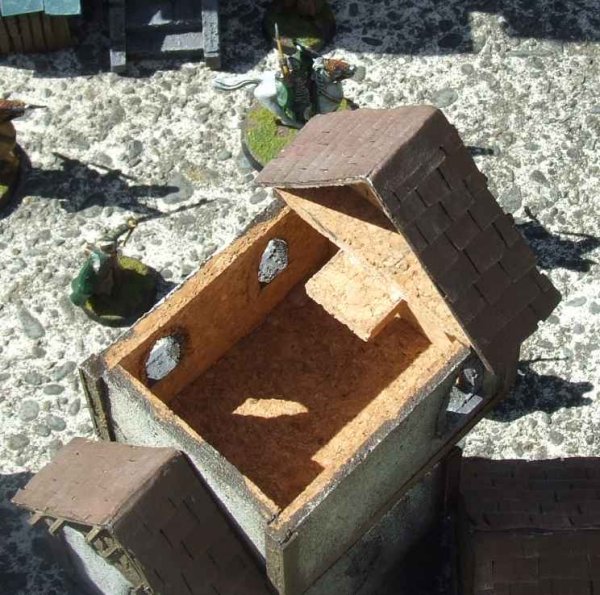
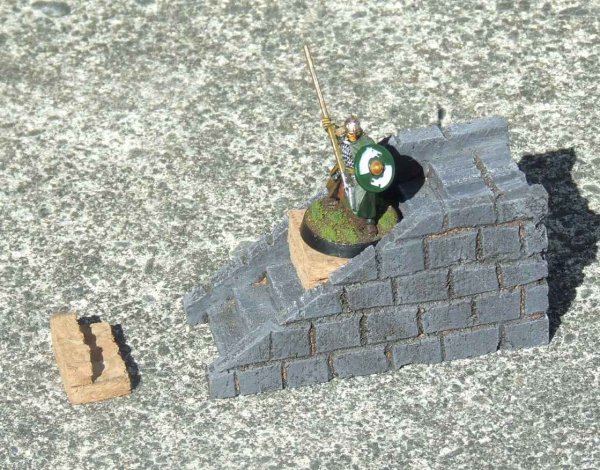
Stairs are a problem when it comes to positioning figures, either you make them unreasonably large or your figures fall off. My thanks to the group on Terra Genesis for the simple trick of making a small step piece that sits over the stairs to give a stable base for figures.
|