|
Materials
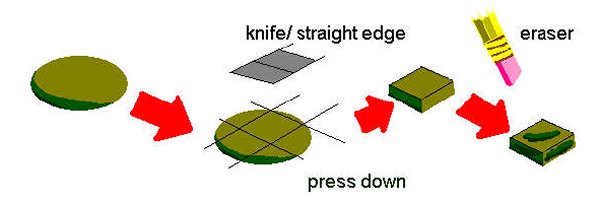
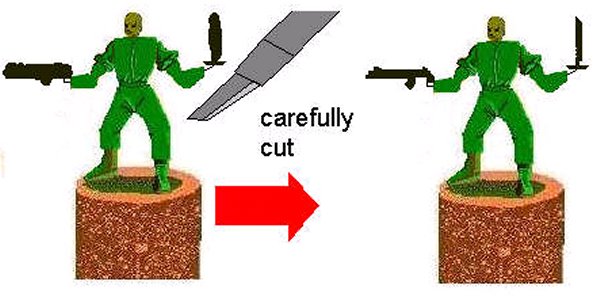
thin knife clay shaper/eraser/small burnisher GW tool or other needle nose pliers hobby knife fine file 320b sandpaper 1500b sandpaper Part I I had been putting lesson four off for awhile now as I was unsure how to best proceed with it; see to add equipment to a figure you really need to know what the figure is. So I can show you how to kit up a 28mm Vietnam type Space Ranger but that wont help you dress an ork. What I have eventually decided on is to show you some quick techniques to get some 'well known' bits of gear with links to some of my tutorials. Be sure to ask for a specific tutorial if I dont cover yours here. Blue/Yellow Ratio By now you have worked with the putty a good bit so you know a little better how the various ratios work for you. Really it is largely a matter of personal taste. I find I use way more blue these days to start with as I need less time to work with the putty to get it right. In addition the blue will sand up nicely with very fine sand papers. For fine detail I use 3 parts yellow to 2 parts blue...still the choice from now on is yours to make. WARNING- although you can use more yellow than blue and still vulcanize a green, you may have difficulties if you use too much blue over yellow as it will be too soft for a pressurized mold maker. I recommend a 50-50 mix as the max for Blue:Yellow, and no more than 66-34 for Yellow:Blue. Subtractive Sculpting Up till now sculpting for us has been the rather tricky task of pushing the epoxy putty into shape. Push one side, push the other, flatten again- repeat. It is very time consuming but really it is one of the few ways of getting a nice smooth green. However there is an easier way to get a similar result- ever see a cookie cutter? Well what we are going to do is the same thing- simply 'cut' the extra putty away. EXAMPLE: Bag First you need a 'blob' of putty- push it directly onto the figure unless you are making the equipment to be added seperate. Using a thin straight tool cut a square shape into the putty then gently tease the excess away- you should be left with a small square 'tile'. Using a clay shaper or an eraser pencil genlty add some folds to the bag. LET IT DRY but be sure to check that it retains its shape and folds as it does so don't hesitate to push along the edges to firm it into shape.
Once the main part of the bag is dry we can add the flap on the front.
Using a smaller blob of putty push it firmly onto the bag. Flatten this blob till it is the desired thickness. Using your thin straight edge cut away in the shape of the flap. Use your clay shaper or a small burnisher to make a smaller fold in the flap. LET THIS DRY. Ok now you have almost finished, just need to add a button or some such. Add a super tiny blob of putty gently cut away a circle shape. If you want CAREFULLY push it into the desired raised shape. LET IT DRY and you are done. This technique works for several items of gear ranging from belts, pouches- pretty much any object.
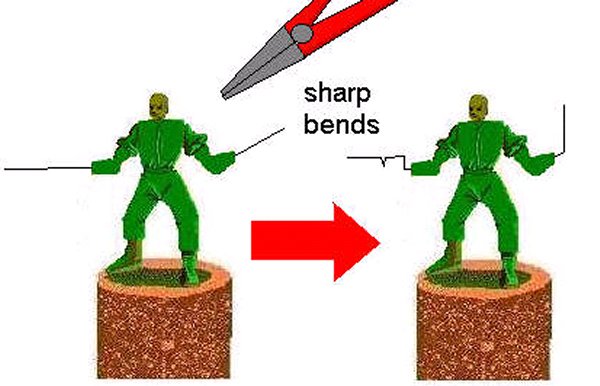
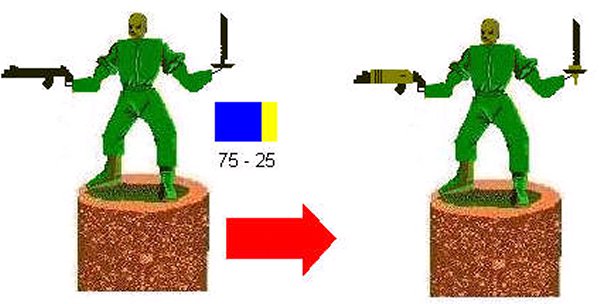
Part II Ok but what about weapons? Guns, swords, knives- I want my figure to kill things... Well to make a weapon there are a few ways to go about it: Sheet Styrene/ kit bash: This is where you use sheet styrene or other materials to cut the basic shape of your weapon. These have the advantage of being able to be filed and you need very little practice to make a nice weapon. Once you have a nice basic shape you can add green stuff detailing or even more shaped/cut styrene. This method is not always advised- if you plan on having your green cast commercially better ask around first- most casting companies will need to vulcanize the green 'as is' and your weapons will melt! If you can find someone who makes a brass master of the green first. I hear Bronze Age Minis provides such a service. Brown Stuff: This is a 2 part epoxy putty that dries much harder than green stuff does. In addition it is easily filed so you can get nice crisp edges for your weapon. Green Stuff : Green stuff CAN make weapons but it is much more difficult due to the somewhat rubber nature of the dried putty. The thing to know is to use a darker mix- far more blue than yellow. In addition if you can get ahold of some Milliput I would add it too- it is another sculptoring putty that makes for a firmer mix. Similar putties such as Brown Stuff, A&B or Tamiya putty can be mixed with green stuff to make a harder mix as well. I'll assume that you are making the weapons out of green stuff as it is what I use. EXAMPLE: Gun & Knife If you plan on using green stuff for your weapons I usually try to leave the hands of my figure unfinished with a good length of wire sticking out- this way the weapon does not become a fragile part of your green. Start by bending the wire into the shapes you want- in this case a gun of some sort and a knife.
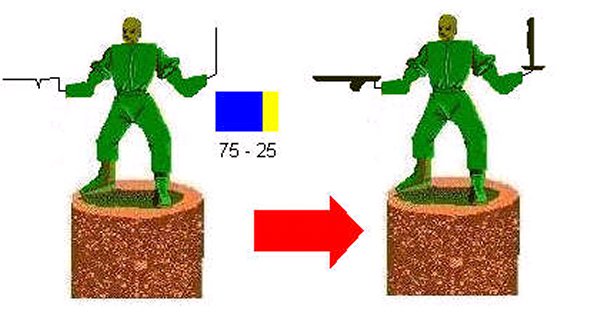
Now taking a very dark mix of green stuff apply a thin layer around the wire- we need something a little firmer to build on. LET THIS DRY.
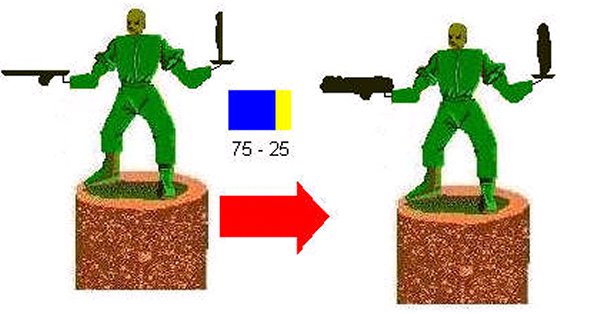
Now add some more dark putty- this time try to sculpt the shape of the weapons you want. If it isn't working out just try for 'good enough'. LET THIS DRY.
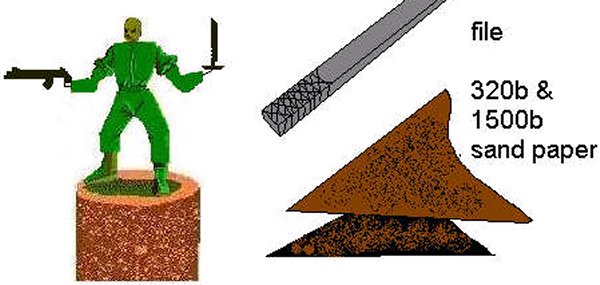
Taking a sharp hobby knife very carefully whittle and trim the weapon into the desired shape. GO SLOW AND BE CAREFUL! If you slip you'll cut your figure- or worse your hand! It is better to trim off little slivers as you have better control of the blade.
Using a file GENTLY shape the weapon if needed. If you file too aggressively you will chew the skin of the green stuff up and it will get fuzzy- not good! If you have done a good job with the hobby knife you wont need to file much at all- if any. Use fine sand papers as needed to give the weapons a nice smooth 'metal' look. I find that wetting the green with water or better yet spit (eeeeeew) makes the green sand smoother- this is called wet sanding.
Add any extra details to the weapon at this time- much like you layer a figure most weapons have a somewhat layered look.
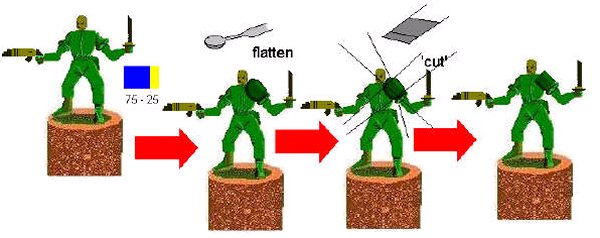
Part III The last thing to show you is how to add armor the 'green stuff' way. We will be using the subtractive method we learned in Part one. Using a dark mix of green stuff add a small blob of putty- flatten and smooth it. Let it sit for about ten minutes or until it becomes a little firmer- NOT HARD! Using a thin blade cut the excess putty away leaving the shape of a bit of your armor. Make sure it is in the desired shape then LET IT DRY.
If needed you can trim, file or sand the armor to get a sharper edge. Then add the next layer of armor by repeating the process one bit at a time. Add some straps using what you learned in Part I. This is all sculpting is- take a little nude figure and dress it step by step. The hard part is doing it even though your first few figures may not look so nice.
Jason sculpted the leet bosses in my leet herd which are available to buy in the shop.
|
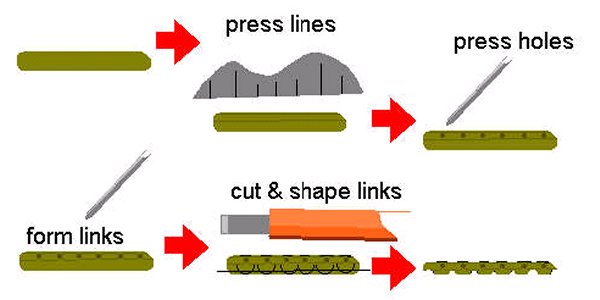
Take a long thin blob of putty and press it into place. Next push two tracks along the thin blob of putty- if it needs to be straight use a metal ruler or hobby knife. Decide how thick you want your links to be, push a hole in for where each 'top' link ends and another begins. After the holes have been punched in form the top ridge (the one made between the two tracks) into separate links.
Using the subtractive sculpting method learned in Lesson Four cut the shape of the 'lower' links out and shape them. To make an inlaid gem on a surface take a small ball of putty. Cut it into the right sized lump.
Gently shape the edges of the gem over so they meet the surface. Form the shape of the gem. Once the gem has dried you can cut facets into it if needed. Armour is perhaps one of the hardest things to make look right as it is usually highly detailed. The following are some simple suggestions for making good armour effects.
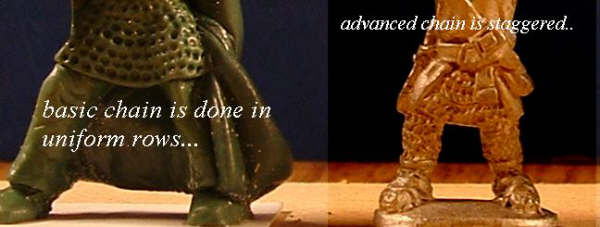
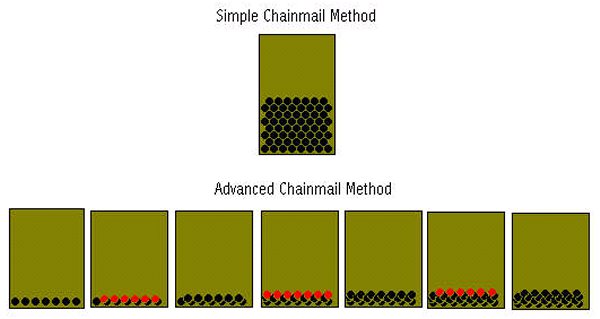
Simple chain
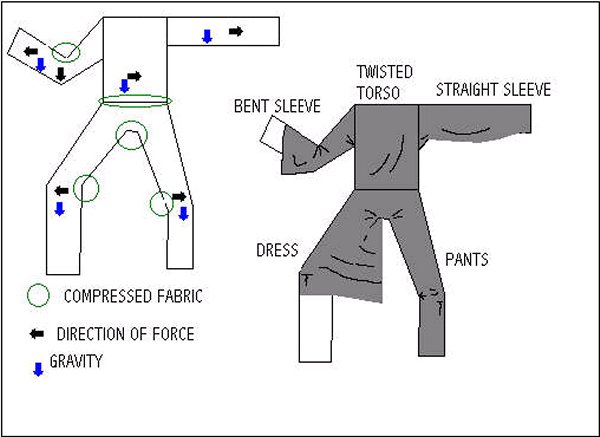
The quick way to make good chain armour is to make uniform dots in neat rows or patterns because chainmail is orderly and not haphazard you really need to focus on a nice uniform pattern. Advanced chain The more advanced way is similar to the simple way but as you add each layer of 'links' alternate pushing the links below slightly, one row to the right, the next to the left. This will create a zig-zag or ‘s’ pattern that more closely resembles linked chain. Well it all comes down to force- fabric is under force from gravity of course, but the body makes force as it pushes the fabric or collects it (compressing). Look at your figures pose and identify where the body 'pokes' out of the fabric such as elbows and knees. Here the fabric is almost stretched looking so make straight short marks. Sometimes shoulders count as points as in the case of a sash, but most tailored clothing forms around the shoulder so there is no 'point'.
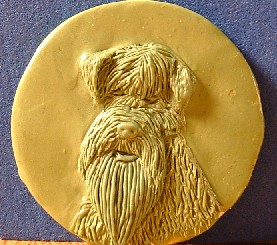
Usually where the body pokes it creates a collection point on the other side- again knees and elbows are good collection points as is the groin and armpit. For these I make slightly deeper indents. Gravity only comes into play if the fabric is loose enough. When loose enough horizontal sections of cloth tend to sag at the middle- slightly if only a little loose, but sagging greatly when very loose (such as a skirt or robe). I read a good many books about folds and drapery but to be honest it didnt tell me anything I didn’t already know from simply observing the world around me- so go put on some baggy clothes and see how it bunches and hangs! :D General Rules: 1. More folds mean loose cloth 2. Sharp edged folds mean thick fabric, soft edged folds are a lighter fabric Hair Hair is done in a similar fashion as folds in cloth except hair tends to be in vertical waves. Place a blob of putty on the finished head and smooth it around into a rough approximation of the desired shape. Gently push little waves and swirls down the length of the hair- try and create natural flowing lines as hair is rarely sharp or jagged. Do this across the whole of the head or until you complete the section of hair. By section I mean that sometimes I find that layering the hair with successive bits of putty also creates depth. My advice is to go and buy a fashion magazine and look at some of the hairstyles found within- most women have layered hairstyles.
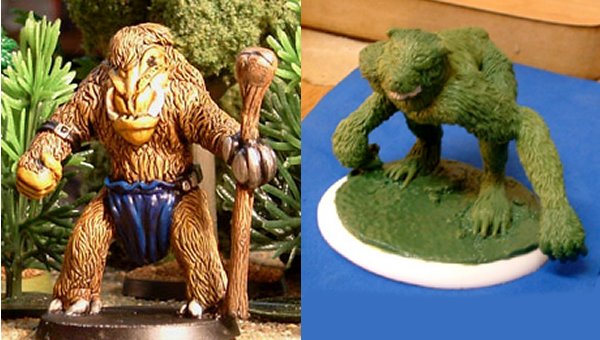
For my folds I use clay shapers. I gently push the putty straight down or push it to one side when gathering folds. Because the rubber tip bends and applies pressure to the putty evenly the curves look natural. In the example of the wolf I started by pushing the putting gently downwards to create a layered look. I repeated this a few times to create a loose flowing look. Then I use one of my flat sharp edged tools to add the hairs texture.
Maybe I'm the only one but for the longest time it never occurred to me that I should cut mistakes off my greens. I could say that I was trying to learn from my mistakes but really it was a fear to cut away any detail that I had worked an hour or more on.
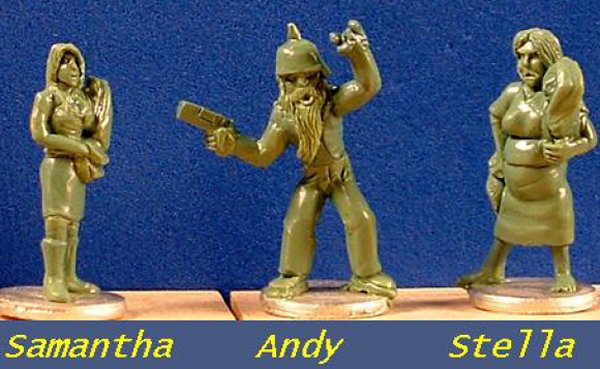
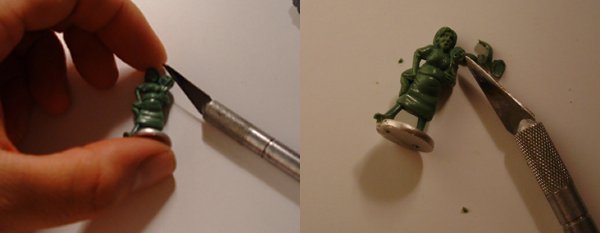
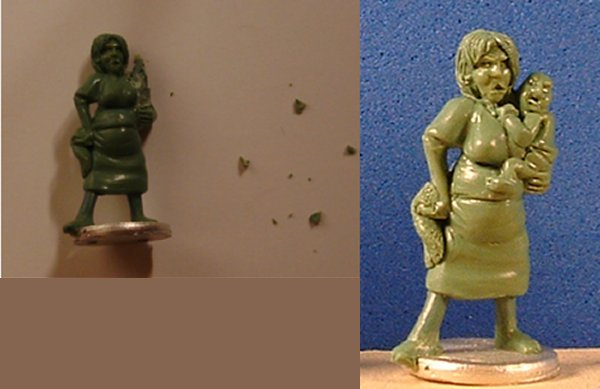
Psychologists would tell you all about Cognitive Dissonance and Effort Justification but what it amounts to is that no one likes to feel that all their hard work and effort is wasted; worse, no one wants to feel like a fool. (Yay! I actually just used one of my University Degrees.) Truth be told I have found that sometimes it is best to restart a section or in some cases cut away some work and have another go at it. I'm not the only one, even the pros recommend it. When I showed off some of my recent work on Yahoo, Bob Lippman recommended taking a knife to one of my figures (ok, he didn't put it like THAT lol). Here is some of the advice that other sculptors had on this subject: "When you don't like a piece you have done take the knife to it" -Tony "Sometimes you sculpt a part that individually looks great, but for any reason it doesn't fit well with the rest of the work so cut it away may be a bit painful. I'd say "If you did once, you can do it again". The bottom line is, don't be scared of cutting off stuff you did, even if it took long. If you think it can be done better, then do it" -Javi "Knowing when to cut is a very hard lesson for any artist to learn. I think there are two parts to that though. The first part is being able to see the mistake, and the second is being able overcome your objections or fears and actually make the cut. Wane "The Dane" Hansen said it best. He said don't fall in love with your sculpture. If you do, you won't be able to look at it objectively. If you can't see the piece objectively, then you can't correct the mistakes that have been made. Stay objective. If you find yourself at a point where you see a mistake that's been made and you are afraid or unwilling to fix it, you've lost your objectivity. Put the piece aside for a couple days and work on something else. Come back to it after a while and see how you feel about changing it then. Usually, the mistake that was only a minor little thing a couple of days ago will be so extremely obvious after you've let it sit a while, you won't hesitate in chopping it off and starting over. If you're STILL afraid to hack off a chunk after all that, I've found a trick to beat the fear of cutting. Just keep these facts in mind: #1 I'm a sculptor #2 I created the piece in the first place #3 I can do it again and again if I have to... #4 Chances are the second, third, or tenth time, it's GOT to be better than it was before! Pretty soon you get calloused to the whole *chopping bits off* thing and it becomes second nature when you're sculpting. Practice makes perfect, and that includes cutting. Speaking of which... I wonder how they practice for a Briss??" -Gene Van Horne In the end the changes I made to these figures were the ones the client wished, after all, they are his figs and he had wanted a certain look to them. Here are the 'final' shots. These are the ones the client is presented with. He may suggest changes as needed. In this case he wanted the baby in the mother's arms to be in just pampers and no blanket. So, after a deep breath, I sat down with my X-acto blade. After some careful cutting and peeling (layered greenstuff comes off as such- layers) I had the baby trimmed. Then I trimmed them extra for good measure- I can always add putty but I would hate to have to cut again!
You can see how it peels off nicely.
I left enough of the original to provide a 'dolly' for the new baby. |


