|
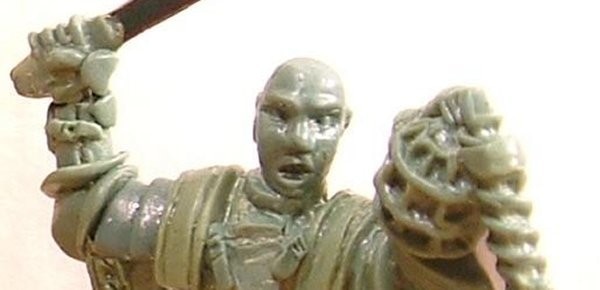
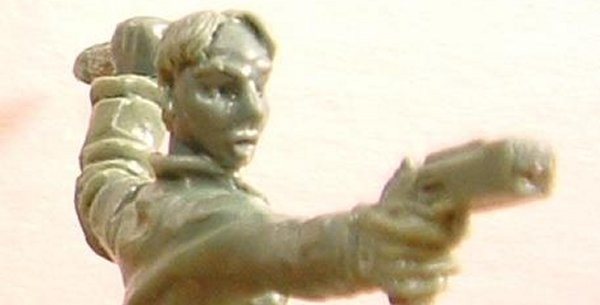
This is perhaps one of the hardest things to sculpt as people readily identify with human faces, after all it’s how we recognize our family and friends. The face conveys a lot about a miniature and as such you want to get it right. I spent several hours making notes and drawings of faces and peering creepily at people when they weren't looking. Then I studied my best miniatures to see how accomplished artists successfully made realistic faces. Then I searched online. The person who gets the credit for showing me the most is a fellow named Sylvain and his sketch online.
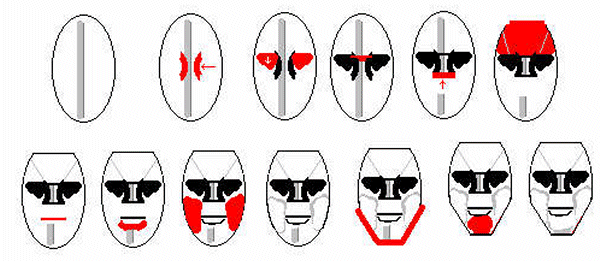
Most of this tutorial is a copy of his sketches with some of my tips thrown in. Please forgive the clownish look to my illustrations, I have over-emphasized the shapes to make them clear and as a result they look a little cartoony. I recommend using a picture as reference while sculpting. First make a roughly oval shape (I apply it directly to the little head on my model blank as this gives it a solid base to work on). I make a ridge going down the centre as this will be the nose. Then I make two little indentations on either side of the ridge about halfway to 3/4ths down the ridge. Noses are below the halfway mark on the face traditionally but I make mine a little higher as I like a strong jaw line in my faces. On either side of the ridge hollow out SLIGHT indentations tapering towards the sides of the head. I brush downwards gently to form the cheek bones. The putty will push into a slight hump Next make a slight bridge across the nose that joins the eye hollows... Then decide how big a nose you want and scoop the putty upwards gently into the bridge. You'll have to play with the putty on either side of the nose and the bridge to get it to look natural; check out the face in profile to get a good slope on the nose. After the eyes and nose I usually pat the forehead down into less of and egg shape and create 3 slight planes across the forehead. Make sure the head has a nice round shape; if you notice that there is not much forehead or that there is too much DON'T panic, you can add a little blob more of putty or you can gently pinch the excess off and smooth the head back down.
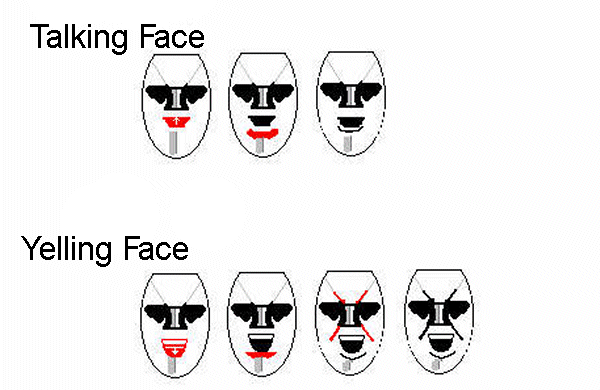
The top half of the head should be done with the nose slightly below the halfway mark. In the area that you scooped the nose from there should be a flattish space. Place a small thin 'gash' here for the mouth, don’t push it up into an upper lip as I find this creates a wax lip look and is best avoided. A small bit below the mouth gash push the putty slowly upwards so that it gathers and bunches into a lower lip. For men the lower lip is slightly smaller than the gash above it. If you make it too long you may wind up with Mr. Fish-mouth so smooth the edges down. Next make the cheeks into flat planes. Men have angular faces so starting just below the cheek bone make a hard line and smooth the face downwards- around the mouth leave the area slightly raised this will create your upper lip look without having the wax lips problem. Now that the cheeks are done just the jaw and chin should be left. Gently flatten the jaw line so that it is not curved. Men usually have hard jaw lines and a curved one is feminine looking. Avoid a pointed chin as it is also associated with female faces. Smooth down gently around the chin IF the ridge still exists. Now the part people have trouble with; go back and GENTLY tease and tug and push and pull the face- smoothing the flat areas lightly. The best advice for sculpting is to take time fiddling until you get the look you like 100%. Don’t be satisfied with a job that makes you cringe. To create a more dynamic look to the face play with the angles and the mouth, HAVE FUN!
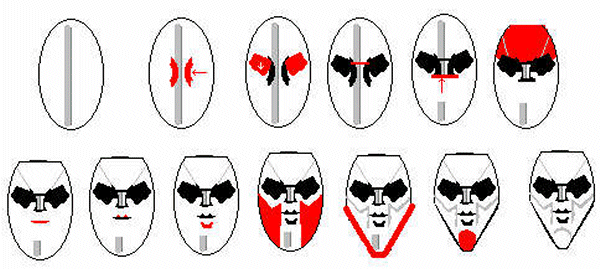
Female Faces are a tad different but the principles are the same: First make a roughly oval shape (I apply it directly to the little head on my model blank as this gives it a solid base to work on). I make a ridge going down the centre as this will be the nose. Then I make two little indentations on either side of the ridge about halfway to 3/4ths down the ridge. Females generally look best with small pert noses so they might be higher than a male nose. They should also be narrower as a rule so make the indentations closer together.
On either side of the ridge hollow out SLIGHT indentations tapering towards the sides of the head. These should angle upwards gently with a slight point forming in the middle where the nose will be. I brush downwards gently to form the cheek bones- the putty will push into a slight hump. Next make a slight bridge across the nose that joins the eye hollows... Then decide how big a nose you want and scoop the putty upwards gently into the bridge. You'll have to play with the putty on either side of the nose and the bridge to get it to look natural- check out the face in profile to get a good slope on the nose. After the eyes and nose I usually pat the forehead down into less of and egg shape and create 3 slight planes across the forehead. Make sure the head has a nice round shape- if you notice that there is not much forehead or that there is too much DON'T panic. You can add a little blob more of putty or you can gently pinch the excess off and smooth the head back down. Some people add very slight curved eyebrows here to accent the female look. The top half of the head should be done with the nose slightly below the halfway mark. In the area that you scooped the nose from there should be a flattish space; place a small thin 'gash' here for the mouth. Don’t push it up into an upper lip as I find this creates a wax lip look and is best avoided. The gash is WAY smaller than that on a male face, I usually try to make it just a wee bit wider than the nose. With a sharp pointed probe gently lift two small bumps into the upper lip to suggest the curve of a woman's upper lip. A small bit below the mouth gash push the putty slowly upwards so that it gathers and bunches into a lower lip- for women the lower lip is a lot smaller than the gash above it. Ideally it should be not very long but pretty full or thick. Next make the cheeks into curved planes. Women have less angular faces so starting just below the cheek bone make a soft line and smooth the face downwards. Around the mouth leave the area slightly raised, this will create your upper lip look without having the wax lips problem. Now that the cheeks are done just the jaw and chin should be left- gently curve the jaw line if it is not curved. Women usually have tapered jaw lines and a hard one is masculine looking. A pointed chin is almost always a must though this can be more or less severe as you wish. Smooth down gently around the chin IF the ridge still exists. Again play with the face till you are happy. |
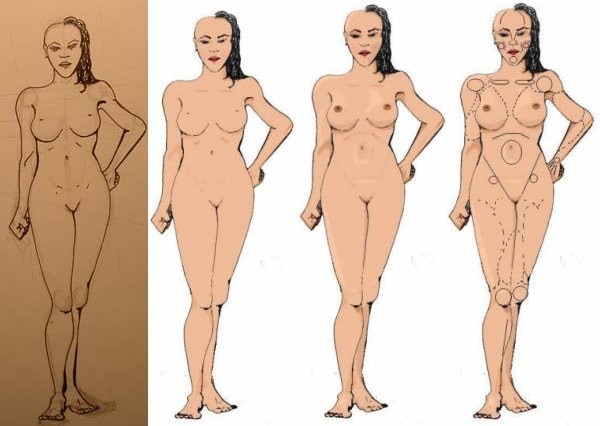
I always start my sculpts with a picture. It is pretty much like a "practice run" at sculpting the figure as it allows me to concentrate on where the bones and muscles should be. Here are some tips on how to make your little stick man look like a woman...
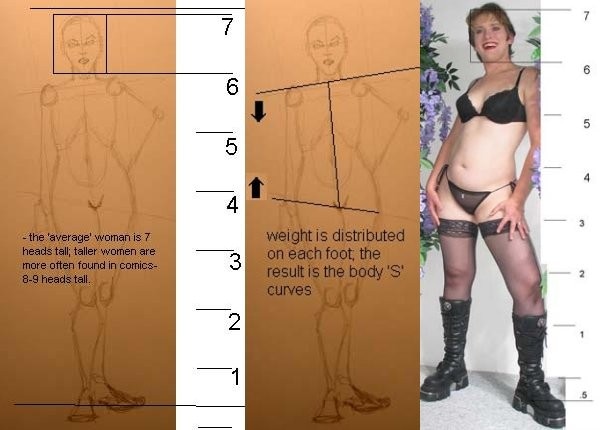
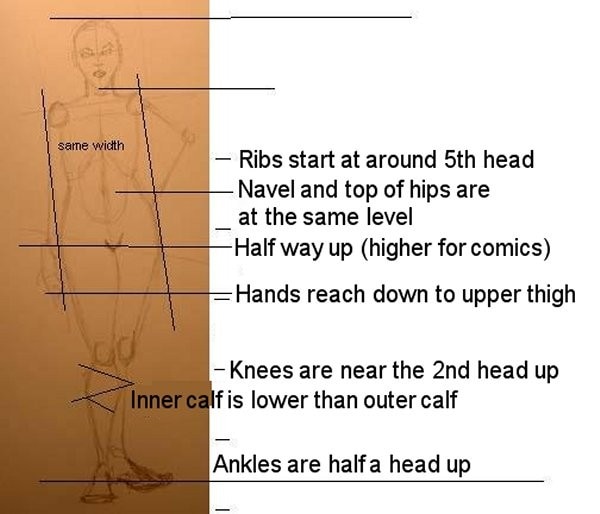
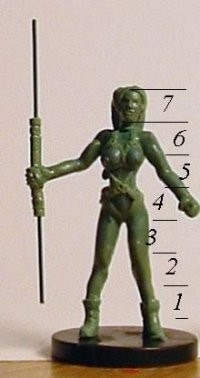
How tall? The average female is considered to be roughly 7-8 heads tall in true scale. But this can vary according to the artist and the character you are drawing really. I have heard people who say it is anywhere between 6 and 8 and certain comic books use 9 heads tall. When "extra" heads of height are added they tend to be added to the legs as most artists seem to prefer giving longer legs on their females. Body Proportions
The average true scale female body follows rough "rules" of proportion. The ones listed above are the ones that I try to keep in mind when sculpting a female. It is also important to note that average is just that, average. It does not mean normal as 'normal' human beings can have body proportions that vary slightly due to genetics and environmental conditions. This attractive young woman is still 7 heads tall, but unlike the 'average' woman her pelvis is lower or put another way she has a long torso with shorter legs. If you are sculpting a figure you need not stick to the 'averages', they are guidelines. Once you have the basic body mapped out you need to add the muscles.
I have highlighted some of the muscles/curves/bones that tend to show on a female. Many 28mm figures are sculpted closer to 5-6 heads tall Here you can see a figure close to 'true scale'. 1. My green stuff sticks more to me than it does to my sculpt.
Not surprising really as Green Stuff is an adhesive- that is, it was designed to stick to things and the highly textured surface of your fingers give it a lot to grab to. High texture means high friction so you need to either sand off your fingerprints or make your fingers 'less sticky' by rubbing them lightly across chapstick, vaseline, or even better a greasy nose or forehead. 2. How to keep small dollies secure.
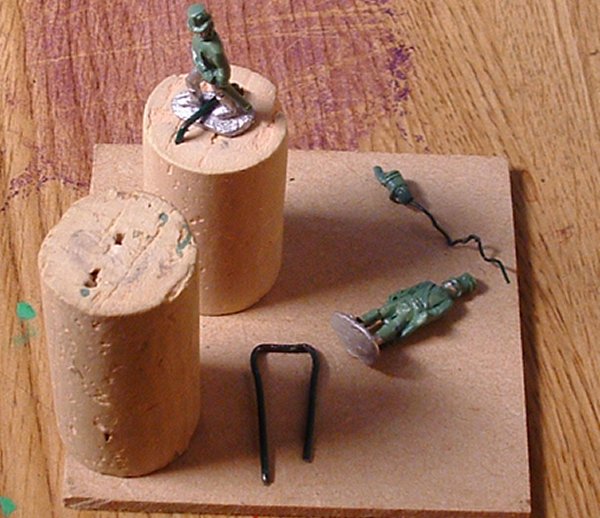
When using premade dollies I use a wire 'staple' (or two) When doing single wire sculpts (heads etc) I put jagged bends in the wire to stop spin. 3. I looked through your tutorials but I could not seem to find how long to bake the clay. I was also wondering if you could recommend a paint that will last on a figure after being played with a lot, I'm trying to sculpt an action figure out of clay. What materials are you using to sculpt with? If you are using 'green stuff' it will harden on its own in a few hours. If you want to speed the hardening (called 'cure' time) then just use a light bulb oven with very LOW temp. If you are using a Sculpey type clay they usually need about 30 mins for a 1" thick bit, so a thin figure may only need 5-10 minutes. I'm not sure using a cork would be safe though so you may want to gently remove the figure from the cork- use some tinfoil to support the figure when it is in the oven. Any paint will work. Most paints dont last well when handled though so what I would recommend is a really good sealant- varethane spray paints are good because it is literally a plastic coat. If you are making an action figure you want to play with I would not recommend the Sculpey instead I would use Green Stuff and maybe even some Tamiya Epoxy putty mixed in- this will make the figure VERY durable. 4. Any recommendations for a certain kind of wire to use as a skeleton? Well if you are just starting out you will want a thicker wire as it is less likely to bend. I use a lot of 16ga and 18ga floral wire, it is super cheap, found in most (womens) hobby stores, and comes straight (coiled wire is hard to straighten out I find). Walmart has it as well as many dollar stores. For really small scale stuff 6mm-15mm I use a thinner wire- 20-22ga floral wire. (for wire the higher the number the thinner/weaker the wire on average). |


