|
Painting Somalis
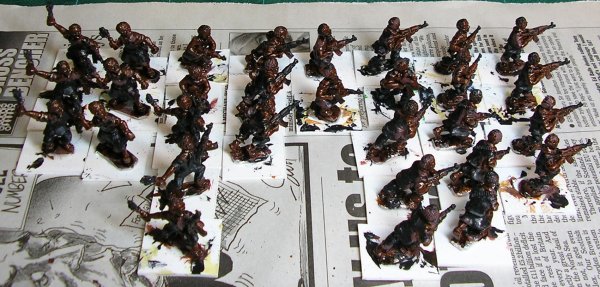
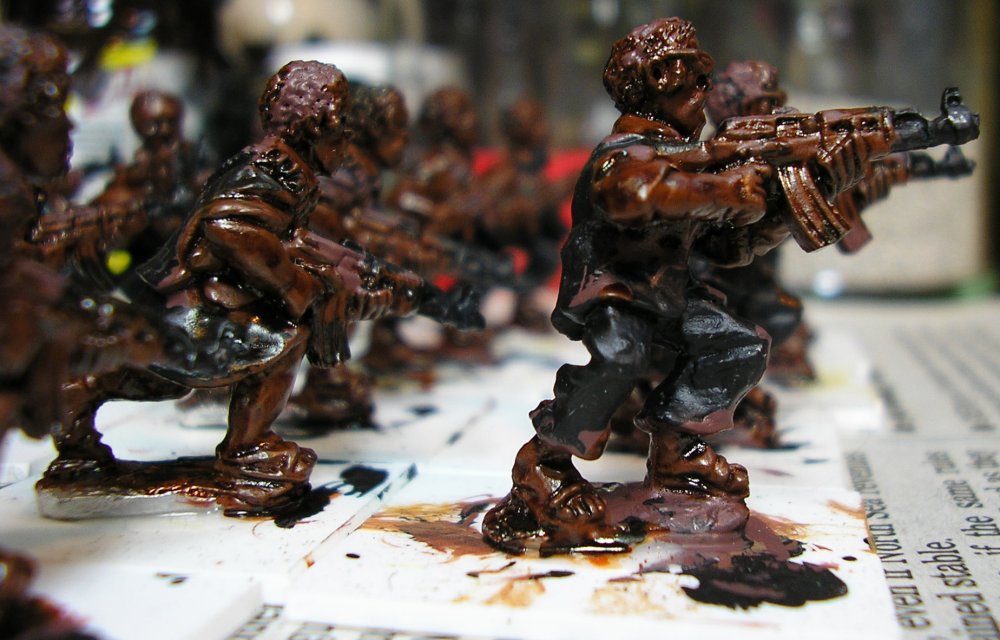
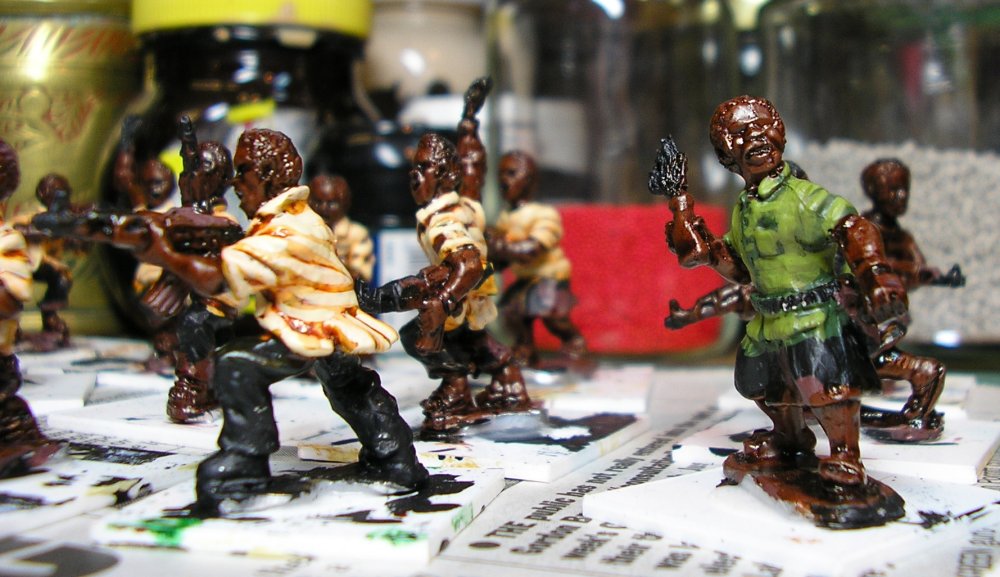
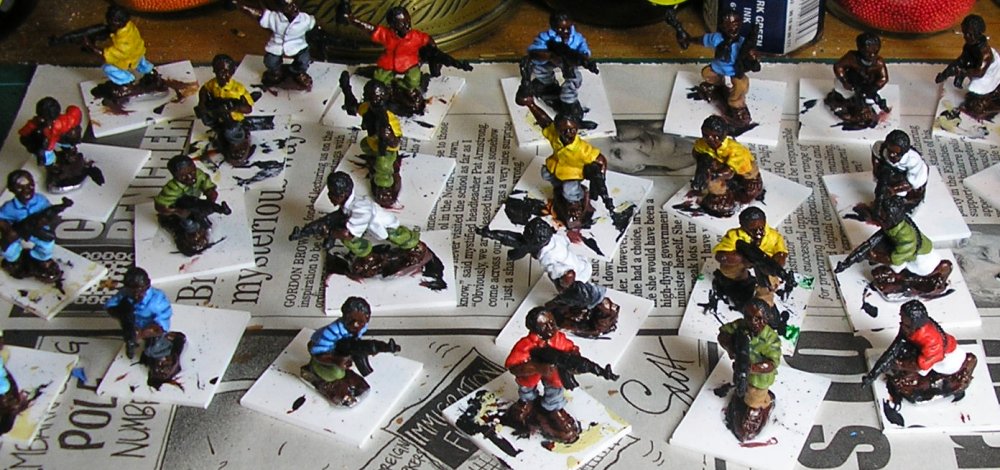
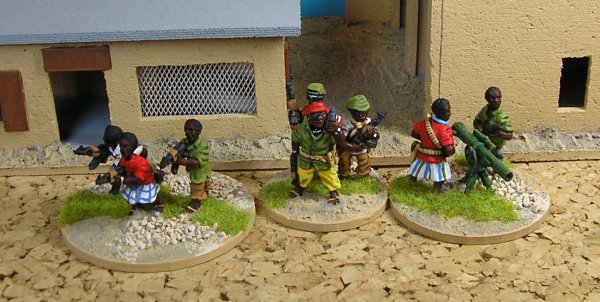
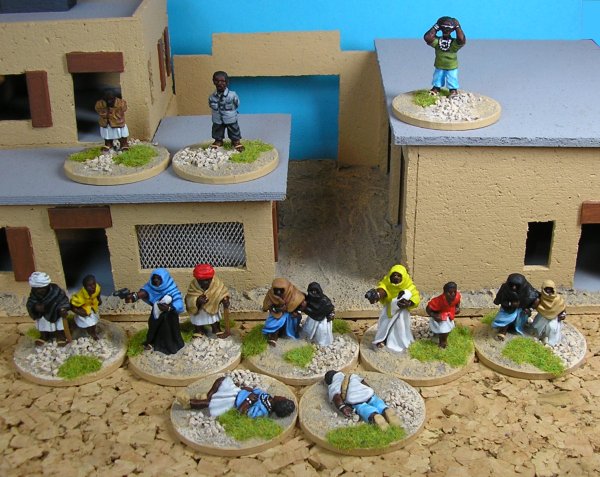
For my Mogadishu project I've decided to paint the bulk of the Somali forces first. This is because I already have some British done so I can have a game sooner should my enthusiasm wane. I'm going to paint the 30 basic infantry to begin with. Although these only comprise half the Somali figures it will feel like I've completed most of the army when these are done. It's little psychological things like this that can keep a project going if it's in danger of stagnating. Preparatory steps. The first step was to clean the figures up and remove some moulding lugs and flash before fixing them to individual plasticard painting bases. Although this only took a couple of hours it counts as the first evening's work because the glue needs time to dry. Later on in the project I will do this kind of preparation work whilst painting other figures to save time; but, at the start, I like to take things slowly to ensure I get the processes needed to complete a new set of figures sorted out. Step two was to paint them black using Winsor and Newton Galeria Mars Black. I use this because it's good quality paint and can be thinned down considerably without losing its pigment and it's cheap. I left this to dry overnight too. Step three was painting all the flesh areas with Foundry Dusky Flesh 6A. I painted a test figure with Games Workshop Dark Flesh 61-18 because I wanted to have some variation in flesh tones but, when I added the Games Workshop Chestnut Ink 61-69 which is the next step, the two colours looked identical on the figures so I stuck with the Foundry Dusky Flesh 6A because I'm more familiar with it. The ink wash needs to be left overnight to dry too so that was the end of day three. Painting the figures.
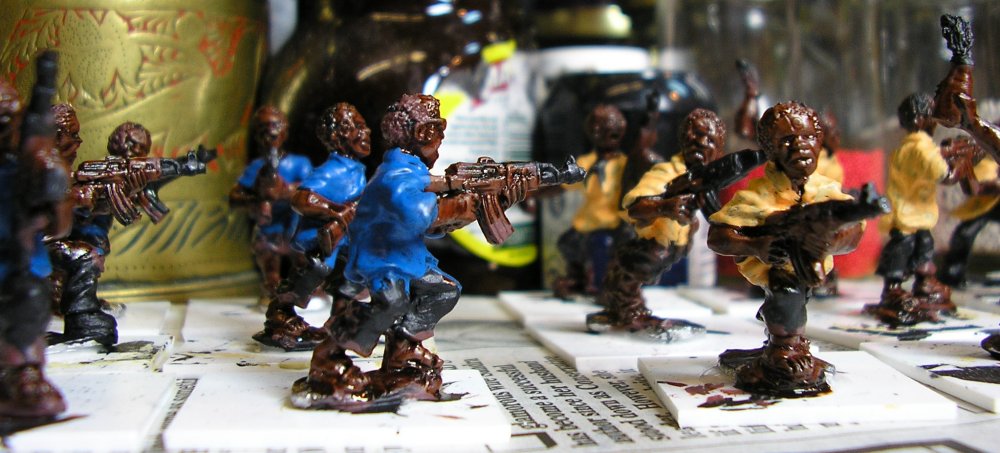
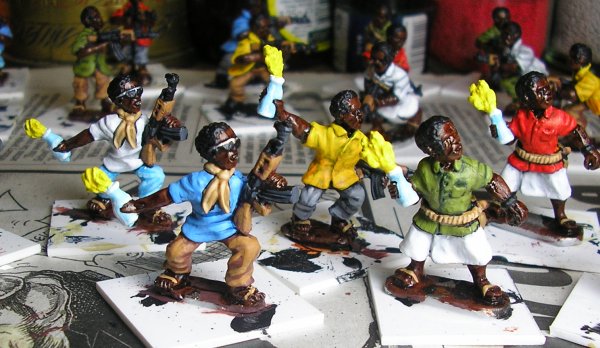
Normally I'd go round the figures and tidy up the edges of the flesh with more black but the brown ink is dark enough to provide a decent dark line between areas as it is so this isn't necessary. Also, the flesh won't be highlighted further so it's finished by this step as well which cuts out two flesh highlighting stages, making painting these even quicker. The next step is to paint the shirts. These Somalis are an irregular force and don't have a uniform; therefore it's necessary to paint them in coloured batches and then mix them up at the end to give a random colour mix throughout each base of figures and each unit. The shirts are the biggest area of colour on the figures so the colour of the shirts gets decided first and will then govern the final colour scheme of the whole figure. I have decided to have five colours in my mix: White, red, yellow, blue and green. I chose predominantly bright colours because many of the photographs of Somali fighters show them wearing these and brighter hues add to the African look I want the final figures to have. Some Somalis wear camouflaged clothing bit I've avoided this to keep them distinct from any regular African troops I may do in the future. 30 figures and five colours means six figures of each. I picked a random selection to be in each group avoiding duplicate poses. Two figures had no shirts and they became part of the green group so that there are only four green shirts at the end. I chose green to be the small group since it's the most military colour of the range and, as I mentioned, I want to keep the military influence to a minimum. I painted all the figures with their shirt base colours. White: Foundry Arctic Grey 33A. Blue: Foundry Sky Blue 21A. Green: Foundry Phlegm Green 28A. The red and yellow ones were given a coat of Cote d'armes Tanned Flesh 115 because they're going to be underpainted before the red and yellow are put on. After this I added the mid tones.
White: Foundry Arctic Grey 33B. Blue: Foundry Sky Blue 21B. Green: Foundry Phlegm Green 28B. The red and yellow figures were given a wash of Games Workshop Flesh Wash. This brings day four to a close. The final highlights are:
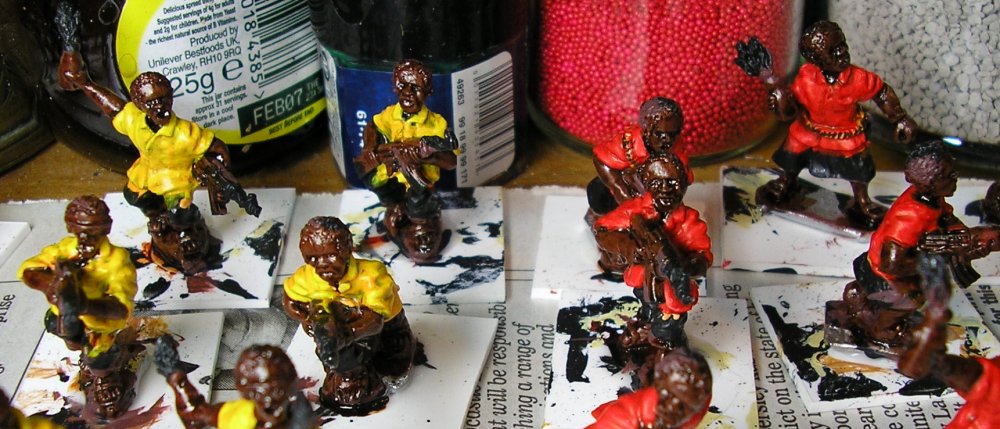
White: Foundry White 33C. Blue: Foundry Sky Blue 21C. Green: Foundry Phlegm Green 28C. The red and yellow figures were given a mid tone of Cote d'armes Tanned Flesh 115 and a highlight of Cote d'armes Flesh 213 to complete their underpainting. Now everybody is at the same stage it only remains to add the red and yellow as flat coats to the respective figures and all the shirts will be done except for any patterning that will be added at the end of the painting in the detailing phase.
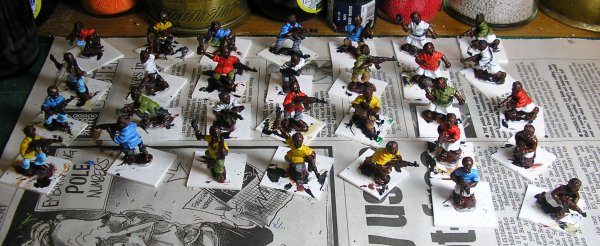
I painted the yellow with Foundry Yellow 2B and the red with Games Workshop Blood red 61-06. Normally I would thin the red with some red ink to add to its transparency but this was a new pot and there wasn't room to add the ink to it. It looks ok without it. I chose a mid tone yellow so that I have the option to add a highlight if I think it's necessary later. That's enough for day five. It's time to muddle them up again. I want to have five trouser colours, blue, black, grey, green and brown. There are 20 figures wearing trousers so I put them into new groups of four, choosing miniatures with different shirt colours for each new group. There are ten figures wearing ma'awees, the skirts that Somali men wear, and I put them in a sixth group all together because I'm going to do all the ma'awees with a white base before I add patterns at the end.
Once everyone's regrouped I paint black along the tops and bottoms of the trousers and ma'awees to tidy the joins with the shirts. Now for the trouser base colours.
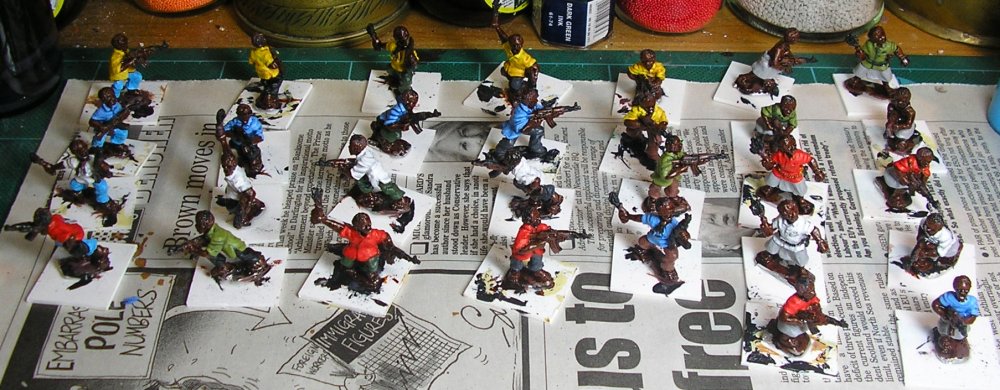
The ma'awees are painted with Foundry Arctic Grey 33A. Blue: Foundry Vivid Blue 22A. Black: Winsor and Newton Galeria Mars Black. Grey: Foundry Slate Grey 32A. Brown: Foundry Spearshaft 13A. This brings us to the end of day six. This is the tedious step and normally I would spread it out a bit because I hate it. However, it's Thursday today and I don't normally paint on Friday, so if I don't get this done I won't be able to spend the weekend finishing the figures off and painting interesting things like their shirt patterns. Time to grit my teeth and push on manfully...
Everything that hasn't already been painted with colour needs to be painted black. That's guns, belts, Molotov cocktails, jewelry and hair. I'm leaving the sunglasses and shoes for the moment because i want to do them later. It takes over three hours which is ten minutes a figure of just painting black and then cursing when you paint the wrong bit and have to correct with the previous colour. It's not pleasant and my family stay well away. By 00:30 it's all done and now the figures are almost finished. Day eight is done. The next step is to tidy the flesh where paint has strayed. This involves a quick dab of Foundry Dusky Flesh 6A followed by another dab of Games Workshop Chestnut Ink 61-69. (This doesn't warrant a photograph).
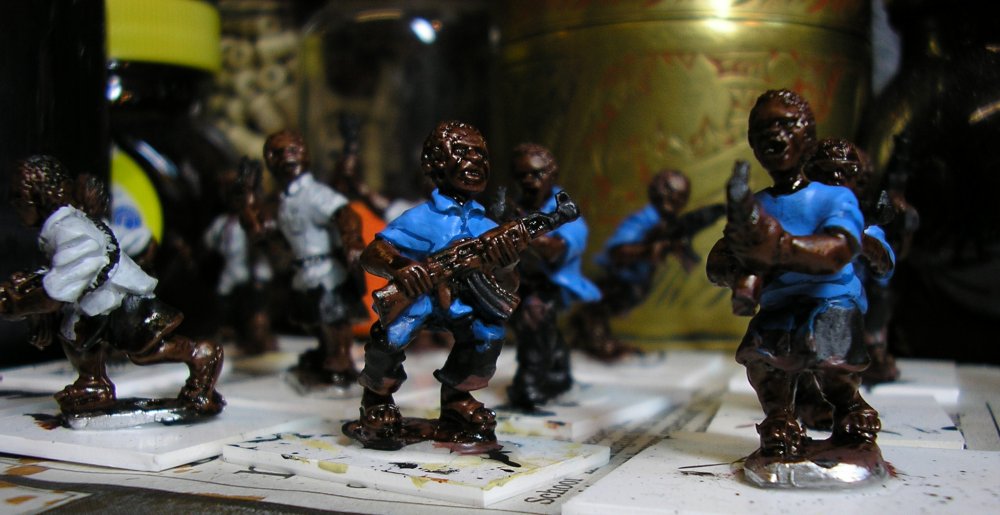
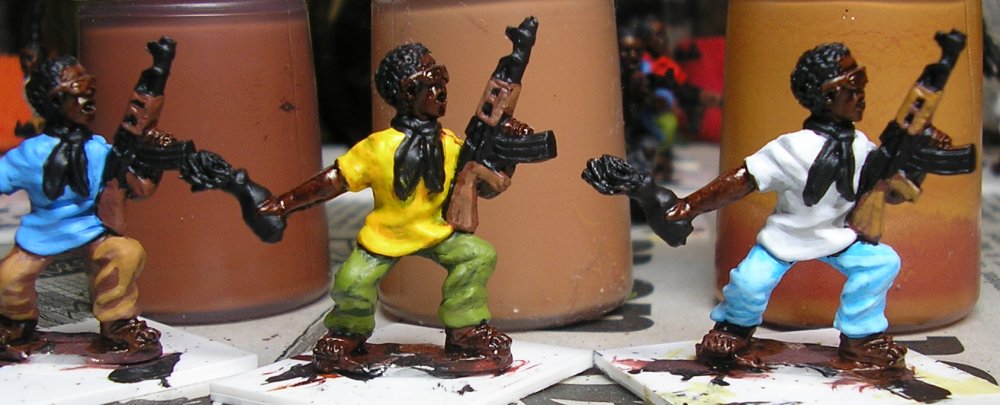
Now for the details. I'm going to start with the guns because all but three of the figures have them. I start by painting the wooden parts with Foundry Spearshaft 13. The photo below shows the three shades, A, B and C with the paint pots behind. All the wood is painted with A and then B and C are applied as successive highlights. The guns are finished by highlighting the black metal with Foundry Charcoal Black 34B. I try to paint this along the ridges of the guns rather than drybrushing it on because it's kinder on the brush but drybrudhing works well for this if you prefer it as a technique. The effect improves once matt varnish is applied at the end of the painting process and the painted highlights are no longer competing with the reflective highlights from the black paint but here's a picture anyway.
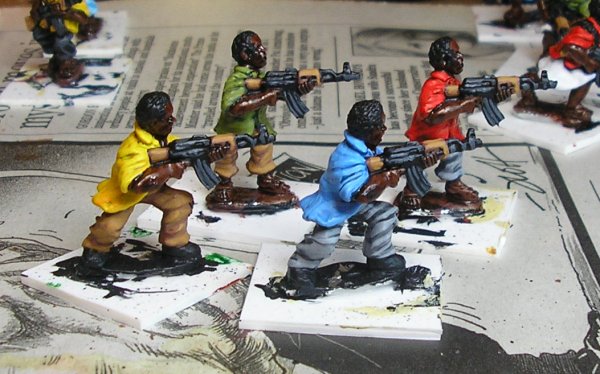
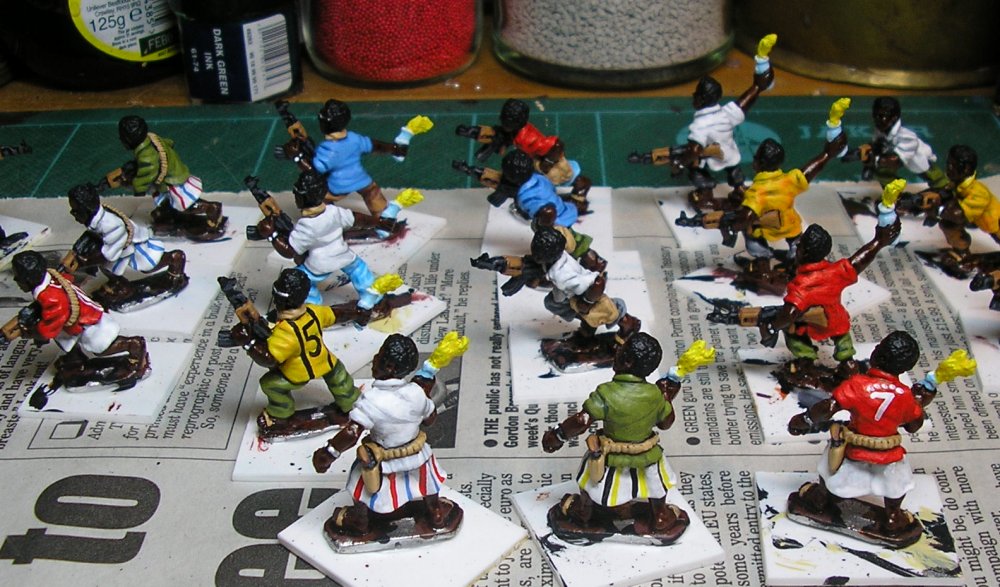
After the guns comes the leather. Some of the figures have cartridge belts and one pose is carrying a small pack. I chose to paint these all the same colour, Foundry Buff Leather 7. I used the mid tone Foundry Buff Leather 7B to do the sandal straps that everyone (except the two figures in the foreground of the photo above) are wearing. I didn't bother painting the soles of the sandals because they will end up being covered by the Basetex later and won't be visible. However, two of the running poses are showing a large amount of sandal, so these I did paint with Foundry Buff Leather 7B and highlighted with Foundry Buff Leather 7C.
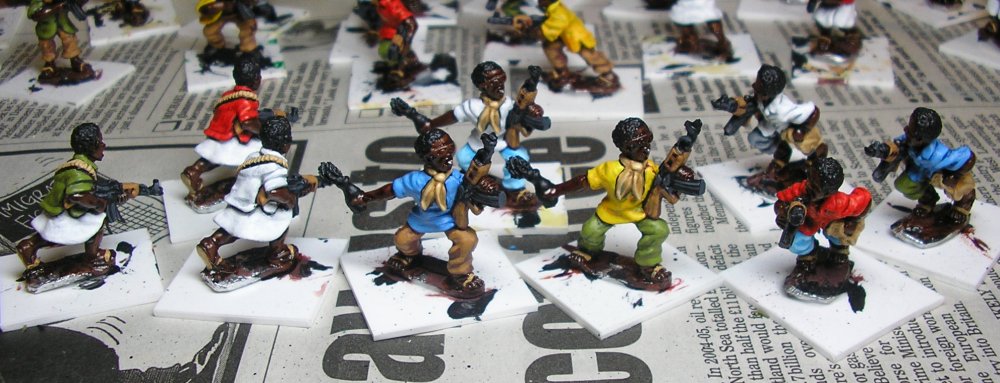
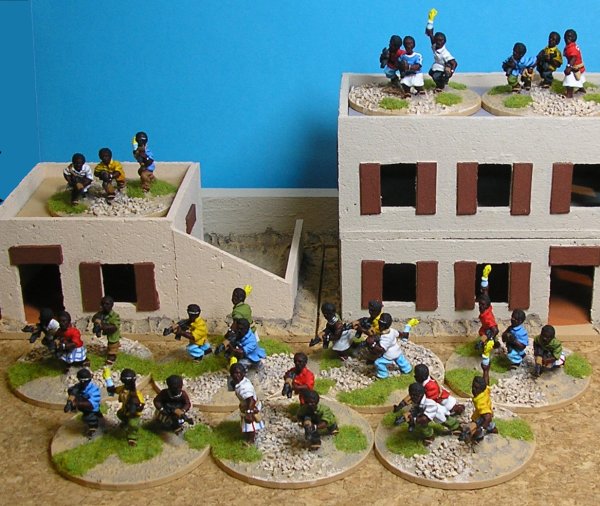
As an after thought I painted the scarf/neckerchief that one figure sports in the leather colour too. I have nine Molotov cocktail throwers in my Somali forces. I've given quite a bit of thought to how I was going to paint the cocktails and I've settled on a 'representative' look (as I normally do) rather than trying to get a realistic flame and glass effect. These are, as I keep reminding myself, wargames figures that are going to be group based not individual works of art for the display cabinet.
With this in mind I painted the bottles Foundry Vivid Blue 22C, the lightest blue I have, and added simple white highlights with Foundry White 33C. I painted the flames white as an undercoat and then covered them in Foundry Yellow 2B. The lightest shade of the yellow, 2C, was too much of a pastel colour to look like flames. Now there's just the details to do. About half the figures have wrist watches so I painted them Games Workshop Mithril Silver 61-55 with white faces. I used silver for the sun glasses and any other jewelery too.
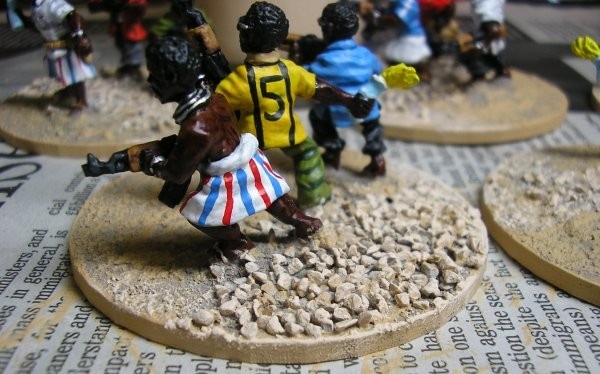
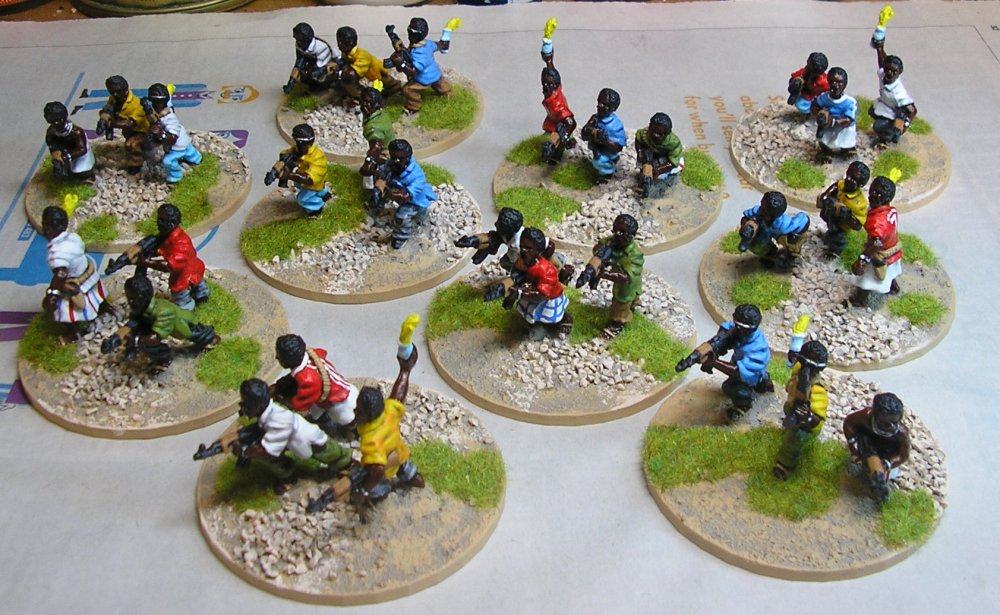
I added stripes to most of the ma'awees, just simple lines of red, blue, black etc. If they're kept thin they don't need a highlight so this is fairly quick. I painted some of the shirts to resemble sports tops and that was it, all done! Time to pop them off their painting bases and glue them to their game bases. Nine days from start to finish and another couple of days to base them starting tomorrow. While the basing's going on I can start to prepare the next batch. |
Basing Somalis
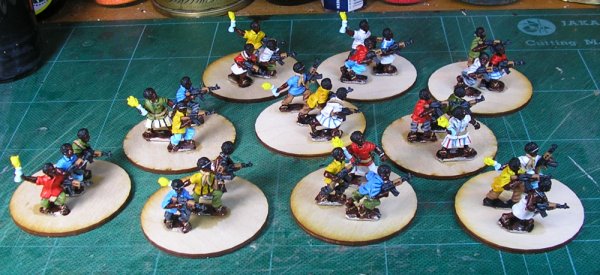
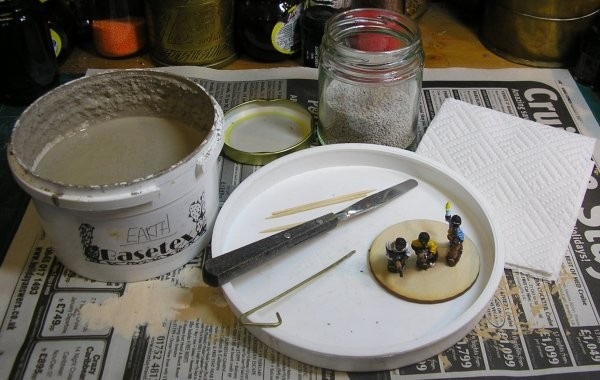
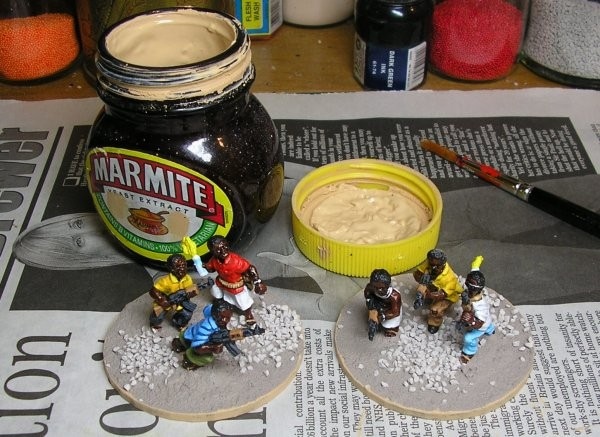
Here are the recently painted Britannia Somali figures. I have superglued them to 60mm round plywood bases from Litko Aerosystems. Once they're securely fixed to their group bases it's time to start the messy stuff. Here's what I use for the first stages of figure basing. The main ingredient is Basetex which is an acrylic basing medium made by Colour Party that combines paint, glue and texture into one easy-to-apply paste. I buy mine from Irregular Miniatures. Basetex comes in a variety of colours and sizes. I mainly use BT27 Dried Earth which is the one pictured above. BT19 Green Basetex is very useful as well. I buy my Basetex in 500ml tubs for £9.00 but if you want to experiment first it's available in 200ml pots for £2.00. I find the small pots dry out though so I avoid them these days. Basetex is very heavy so the postage is expensive at 50%. Try to get some at a show if you can.
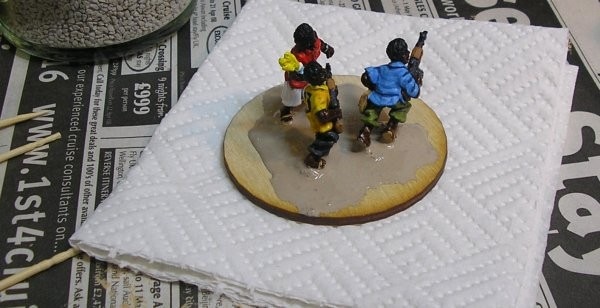
Edit: Nowadays i make my own basing compound using a 60/40 mix of household emulsion paint and PVA with fine sand added to taste. I get my paint colour matched to the Basetex colour at a local shop so all my miniatures are based the same. It's much. much cheaper than Basetex. I use a small palette knife to apply the Basetex and a piece of brass wire to push it into small spaces. The cocktail sticks are in case of very small spaces. It's a good idea to have some kitchen roll handy to wipe your tools clean and fix mistakes. Should you get some Basetex where you don't want it, a liberal application of clean water with an old paintbrush will flush it away. This batch of Basetex is very runny, usually it's thicker, but this doesn't affect the application process. I work from the centre out so that I can keep a good, firm hold of the base whilst poking the Basetex into the complicated areas between the figures and still keep my fingers clean. Once this difficult part is done I can hold the group by a figure and finish adding the Basetex to the outside.
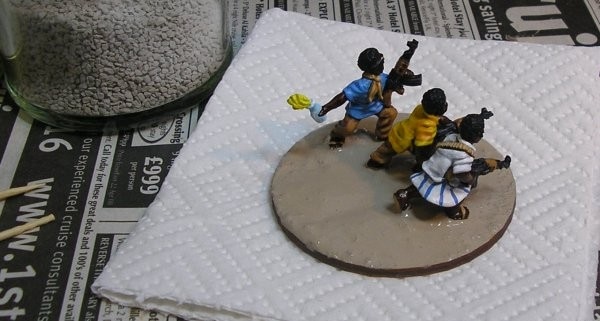
Here's a completed base, now for the grit.
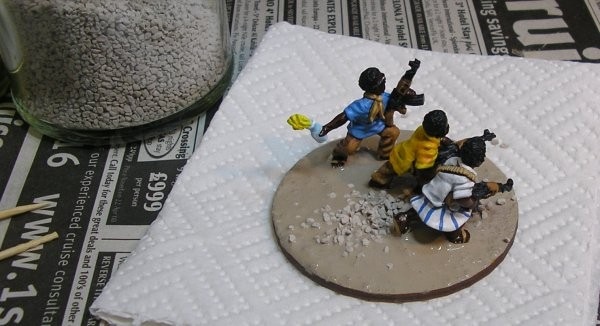
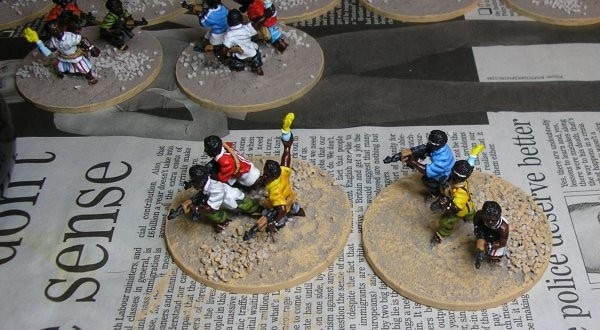
The grit is railway scatter from Woodland Scenics which is available from Model/hobby shops everywhere. I sprinkle a little on the base for added texture (Apply it in pinches like you would add salt to your cooking). I try to get a line crossing the base so that it adds to the illusion that the base is a segment of a larger area around it; I like having my basing materials extend to the edges, others don't, it's your choice. I'll do the occasional base with grit just on one half and a couple with just small patches to add variety and try to keep a 'natural' look.
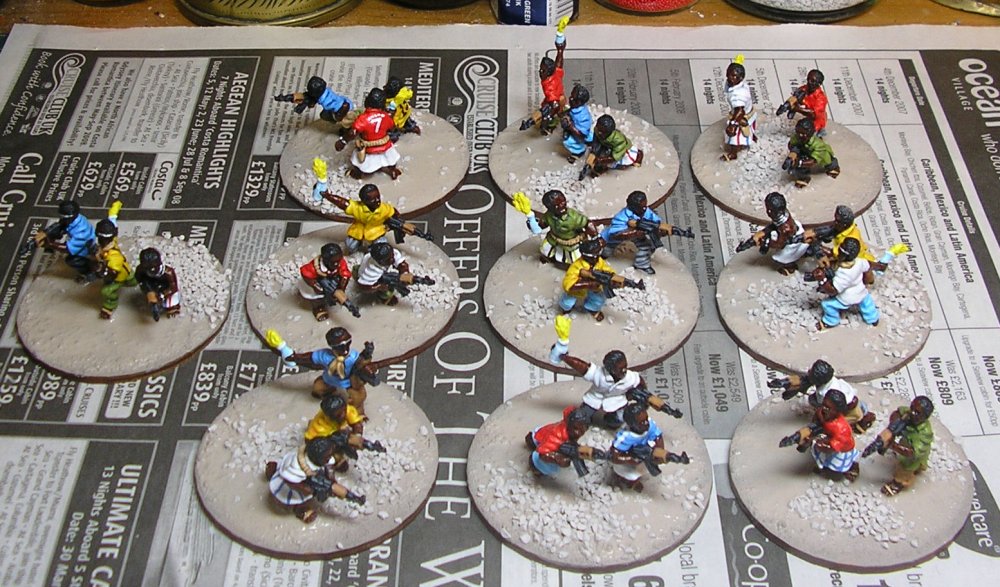
The Basetex will hold the grit securely when it's dried, no glue required. Here's everyone with their grit in place. Now I need to wait for the Basetex to dry before continuing. This will take about 4-5 hours but I leave it overnight to be sure.
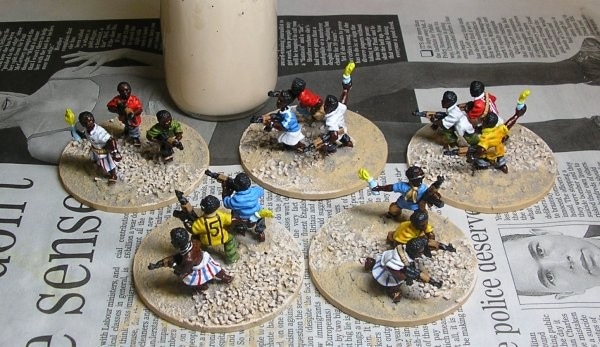
Once everything is dry I shake off the excess grit and it's time to paint. I use Foundry Base Sand 10A as my standard basing colour. Now, using the actual Foundry paint would prove very, very expensive so I took a sample to my local paint shop and they mixed a litre of household emulsion to match the colour for under £10.00. Every so often I decant some from the big pot into a small jar for ease of use.
I begin by painting the edges of the base as this needs a solid colour and usually takes two coats. Once the edges are done I apply a heavy drybrush to the surface of the base.
Finally I add another heavy drybrush of Foundry Base Sand 10C to the gritted areas and a little way around them. This isn't actual Foundry Base Sand 10C, like the Foundry Base Sand 10A, it's from another colour matched pot of household paint.
The finished painting.
The last step is to add some static grass. I use whichever static grass I happen to find when I need to buy some, the new batch gets added to the old batch. This current lot is mainly Games Workshop grass.
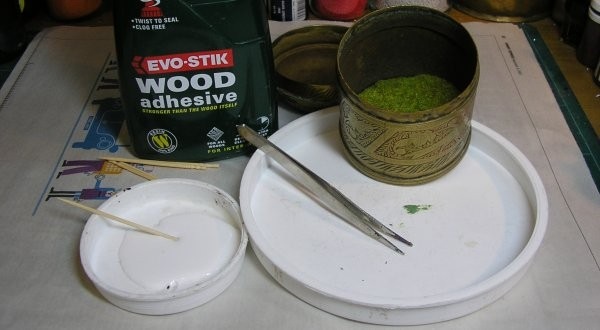
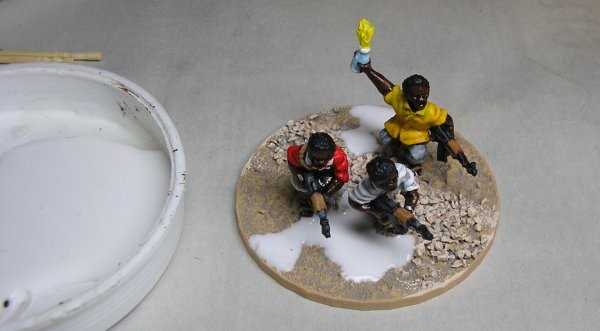
I apply wood glue from a palette with a cocktail stick to the areas of the base that I want to put the grass on. I try to get in amongst the figures' feet and have a general 'line' of grass running across the base, the same as for the grit earlier.
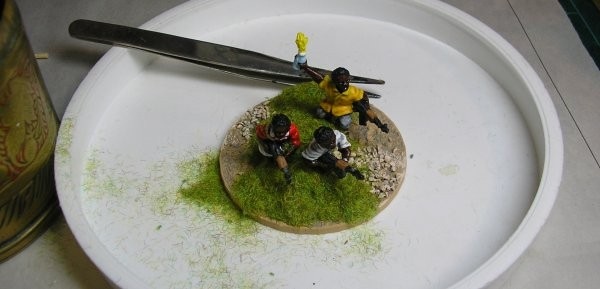
I transfer the static grass from the pot to the base with some old tweezers. I pick up a sizable amount and dump it on the figure base. I repeat this until all the glue is covered. It's best to do this over a collecting receptacle of some kind to avoid mess and waste.
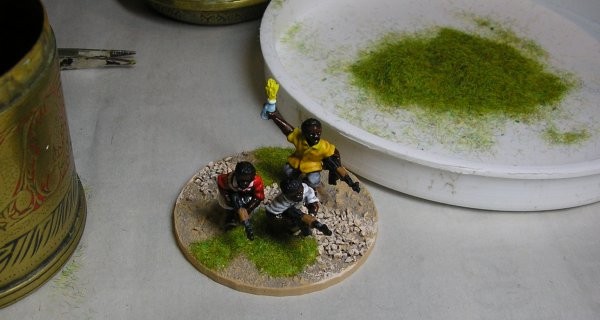
Once the glue is all thickly covered with static grass I tamp it down with the flat of the tweezers and then tip the excess grass off into my collection plate. The base is now finished.
Here's everything completed. Once the glue has dried (tomorrow) these chaps will get their covering of Testors Dullcote to remove their shine and be ready for the table.
|

