

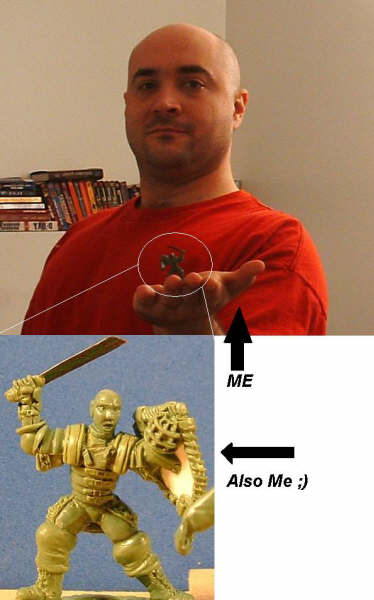
By Jason Miller
I wrote with the hopes of helping other 'new' individuals who may require a little more guidance than that already available online- still my advice is to spend hours reading and searching the net for any little nuggets of information you can find ;) The following is a rather long post I made about how to really get started- I've re-posted it here as people have asked me to repeat it on occasion: Expect your first, oh say 50, miniatures to 'look like shit'. For every person who starts to sculpt and gets it right off there must be fifty who actually need to practice to get good. There are a variety of tutorials online but here are my tips for what it is worth. If you can draw it you can learn to sculpt it. So practice drawing- LOTS. But to do this you need to start with the basics- how to draw a human form. I recommend polykarbon of course as excellent as this is it still doesn’t afford you lots of practice by itself. I'm sure we can all find numerous examples of the 'human form' online but if you want a PG site go to page3.com It has great females in good 'sexy' poses. I haven’t found a great one for the male form yet- (edit- Muscle fitness). Anyway just focus on drawing the outline of the pose- don’t do the detail at all just the form. I spend 2-3 hours a day with sheets of scrap paper beside me- I search for good things to draw and whenever I see a cool mini I try to capture the pose to transfer into my sketchbook. 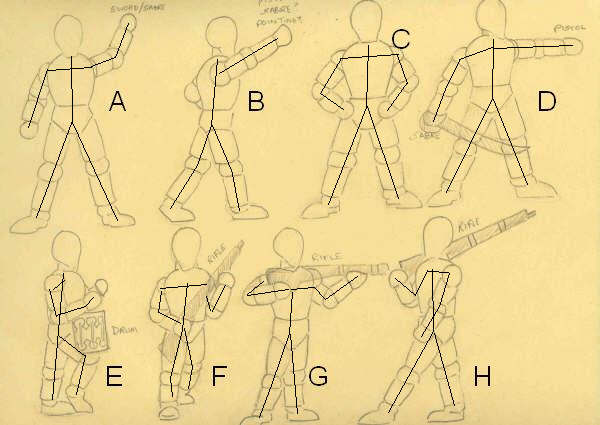
Ok so you have practiced tons of 'dummy' drawings of just poses- now what? Well get the wire skeleton out and make a super thin version of the pose you want. First bend the wire into the pose then add the TINIEST blobs of putty to build an emaciated version of the dummy you sketched. Why tiny? Well cause if you need to add more you can- but if you add too much it will just blob about and be trouble- you'll eventually wind up with a fatty looking figure. Great if you are doing fat Albert- not so good if you are doing the average Joe.

Ok so make up 3-4 of these dummies- they should look like a series of European fashion models when you are done- I mean these things should be little more than stickmen really- what’s the point? Well you want to get the body's proportions right and this is the first step- arms the right length? How about legs? Is the pose even possible for a human or have you started sculpting a contortionist? I usually find that I need to over exaggerate the pose at this stage to really convey what I want the figure to be doing. Think of a comic book- to convey any dynamics you need to have 'force' in the pose.
Anyway at this point you have a sketch of a dummy and a little wire version of the dummy. Now I go back to the sketch and add muscle to the drawing of the dummy. If you still have the original pose handy use it as a reference. Focus on the large muscle groups more so than the small ones (unless you are doing a ripped barbarian type). For example great abs are a waste of time to draw or sculpt unless you are doing a figure with an exposed (and muscled) midriff. However leg muscles really define a figure as do the arms I find. The chest can vary a little more though a larger chest should usually accompany larger arm and leg muscles (in general- I know there are exceptions to the rule). So now you have a little nude figure draw on your paper (try to avoid leaving these around where family members can snoop- North American society seems to view nudity as porn and not 'art'.) I leave the head as a blank face with no hair. 
Self-portrait figures done at various times.
Now go back to your puttied dummy and add TINY little blobs of putty in each of the major muscle groups. Again unless you are making a nude muscled figure you should make the dummy just a little thinner and less bulky than your drawing- certainly not bigger than your drawing. I leave the head as a little nub usually but you could round it at this stage- just dont go and try and add any detail just yet.
This is also the stage that I spend smoothing my green most- I like clean surface areas for the following stages so I use a small, flat, rounded tool (GW sells it I'm ashamed to say lol) and VERY gently rub in small circles all over the figure- shaping ever so slightly as I go. This usually takes anywhere from 5-15 minutes depending on how much of the figure I am working on (sometimes I do the whole figure- other times I work from the legs upwards). You should have a little nude version of your drawing now- smooth and somewhat shiny- if you can get this far in sculpting you have won half the battle and the rest is all (mostly) downhill. Back to the drawing stage- I take the little nude picture and get some idea of what clothes I want to dress it in. Add the clothes and pay attention to where it will bunch- where it will hang- where one thing overlaps another thing- I usually add the figure's face and hair in at this point too- its not really clothing but it overlaps the clothing in some cases. When you are done you should have a drawn picture of what you want the figure to be- concept art if you will. The tricky part is how to sculpt it. First step is to find the deepest clothing- the visible clothes nearest to the skin as it is. Don’t bother to sculpt stuff you can’t see such as underwear or some such- focus on what you CAN see on the drawing. Look at those and try and break them down into simple shapes you can fashion out of TINY blobs, sausages, and wraps of putty. As you sculpt 'work outwards' adding each layer of clothing over top of the next. This is the stage that if you get something perfectly right put the mini down and walk away from it for a good half hour or more. Don’t go onto something else on the figure and then put a big 'ol thumb in your perfection seconds later! Oh- and personally I don’t worry about adding little fiddly bits such as buttons on a coat- at my skill level it is enough for me to make sure I get the actual coat and its folds to look right. I usually look to Mark Copplestone's work as he has nice strong figures without lots of little detailing. 
My last stage is the head- I do the face then the hair (no fast method here- just practice, practice, practice- the human face is perhaps one of the hardest things to sculpt). Things I have noticed from my drawings is that too many lines makes for an older face- smoother makes for a younger/woman's face. Pointed chins make a face more feminine as do high cheekbones and v-shaped brows. Conversely flat chins, flat cheeks and straight brows are more masculine. Look at comic book art as it is a great reference on how to make some great faces. Also look at your favourite miniatures and see how they were captured. Lastly I put on the hair.
In all of these stages the real key is to work the putty till you are happy- if it doesn’t look right then keep toying, fiddling, swearing and pleading with it until you are 100% happy. Oh- if at any point you get discouraged and want to throw in the towel and start over DONT. Finish darn near every sculpt to the best of your ability. Practice makes perfect and you'll never get good at a whole figure if you never practice a whole figure. So what if you mess up the body- practice the clothes, the face, the hair etc. Now you may wonder who the heck I am- what have I had produced? Not a damn thing. In fact I only seriously started to sculpt in December 2003- so I have a grand total of 3 months real experience. So who am I to talk? Well I used to fancy myself as a budding writer. I wrote several short sci-fi stories that were much enjoyed by my friends. Then one day I watched an excellent show about Robert J. Sawyer and he gave some excellent tips on how to be a successful writer- Heinlein's Tips. The biggest and most important one was this- 'A writer writes'. Everyday a writer must practice his trade to hone his skills. Even a day in which he churns out crap is a day that he can learn what didn’t work and what did. (The second most important rule is finish what you start) Sadly I found that I had no urge to write every day lol. So much for that dream. But the ideas (found at sf writer) are the same- a sculptor sculpts. So every chance you get sit down with some putty and have a go at it- if you are on a tight budget I recommend Sculpey as a great practice medium as it only hardens when heated- if you churn out garbage that day roll it back into a ball- if you make a great work then heat it up and save it to refer to later when you are working with other putty. And if the figure you were working on looks like crap when you are finished... move on to the next. 
Materials List:
3-4 corks (as large as you can get them #9 is common, #28 is best) sculpting tools (in the LEAST get the GW one- I swear by it- its that good) 20 ga floral wire 30 ga floral wire epoxy putty of choice (I recommend Green Stuff to start) or A&B two sets of small pliers pencil & paper concept art if needed Part I The first step is to decide what you wish to sculpt- I recommend working on 3 sculpts at a time: one human, one small animal, and one alien or other race humanoid. Working on 3 different sculpts at a time will allow you to move onto your next sculpt while one or more dry. For inspiration check out online sites, magazines, and popular art- if you can imagine it you can sculpt it. Once you have selected 3 subjects sit down with a pen and paper (and any concept art) and practice doing some sketches of your subject's body shapes. Start by drawing a stick man- just a simple figure made from lines. Important as you need to get the angles just right! Now that you have the skeleton add some meat to them bones... Dont worry if you "can't draw" or "suck"- all you need draw are circles and rectangles like in the examples below: 
The secret is to draw a ball on any point that 'bends' or articulates- a rectangle joins each ball. I find it best to draw out a few different poses and see which you like best... Don't worry about drawing clothes right now- focus on the shape of the body.
Part II The next step is to take one of your little stick man shapes and recreate it out of wire this is called an armature or skeleton/skelly. Pre-made armatures are called a 'Dolly'. The advantage of a dolly is that all of the proportions are usually correct so you needn't worry about how long the arms and legs need to be. This can be extremely helpful when you are sculpting a whole line of figures as you would like them to be a consistent size (usually). 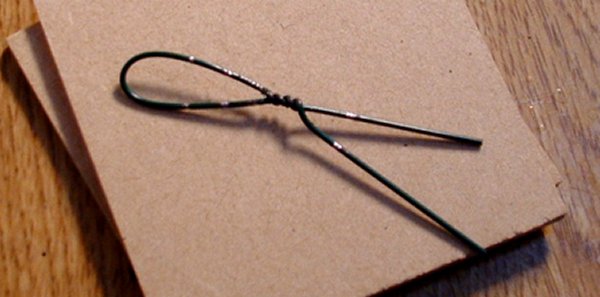
I lightly filed some shiny marks on the wire so you can see each joint (knees, elbows etc). Some people solder there armatures together but I find it much easier to just twist the wires over themselves a few times or to wrap a thin length of 30 ga wire around the 20 to hold it tight. Either way you do it be sure to leave a long 30ga wire around the shoulder area to make a little 'head' loop.
Be sure to poke some holes in a cork and then feed the wire in- if you just push the wire in without pre-punched holes you'll bend and twist your dolly out of shape. Slide your dolly into the cork- be sure to measure at this stage or have a sample size figure to compare to- you don't want short legs! (Recently I have found it better to do only the bottom half of my dolly to start with. Much of miniature sculpting is like this- break it down into smaller and smaller steps and focus on one small area at a time.) I sometimes put a small plug of GS on the twist to keep it from untwisting while posing... 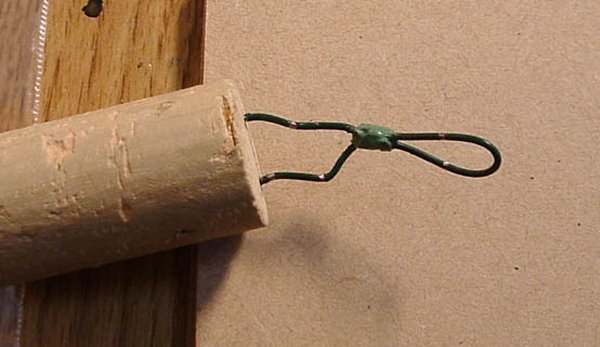
See the secret here is to leave the arms as a longish loop- this offers several advantages:
1. holds the wires even- this makes it easier to get well proportioned legs 2. allows for swords and other long items to be built right into the figure later Personally I just use one length of wire and bend it into a loop then make a twist with some pliers, adding the little loop for the head at a later date. 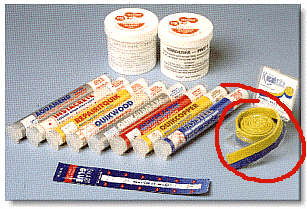
Part III
The final step is to add a little putty to your wire. Take a knife or similar tool and cut off some 'Green Stuff'. Before you do you should know a little about green stuff. It used to be sold entirely in 50-50 strips- in fact this is how Games Workshop sells it. However when the blue (hardener) is beside the yellow they start to mix and harden. Older putty will therefore have lumps on occasion as the two sides have already mixed. The only recourse was to cut the centre out of the old strips. More recently it has been offered in tubes- with the yellow and the blue as separate slugs. In any case you don’t always want a 50-50 mix so however you buy your putty you'llwant to cut it into new portions. 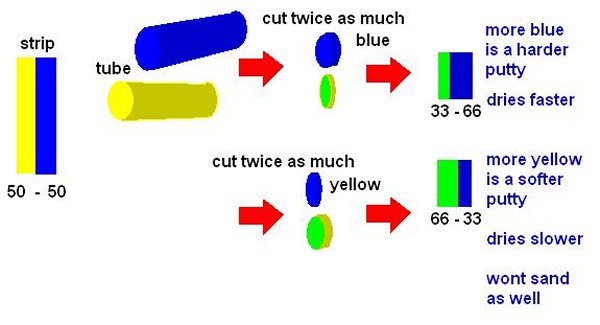
The first time you add putty to the dolly will be more difficult- see the wire is very smooth and doesn't have much substance so the putty will naturally slip and twist around the wire- you cant work well with it! So the very first time you add putty to the
dolly will be a THIN slightly rough skin to bulk it up ever so slightly. 
Basically you want to roll 2 little wee sausages- they should be just slightly thicker than the wire itself ideally. Slowly press each sausage on one at a time and wrap them around the legs and torso of the dolly. If you want to add an integral base then be sure to lift your dolly slightly as if you just add to the putty you will take height off your figure and give him short shins! For the legs don’t worry if they are not exactly smooth- in fact it is better if it is slightly rough I find as it gives further layers of putty
better grip. For the base focus on pushing the putty into the desired shape FIRST. If there is too much putty in one area slowly tease it towards areas that are lacking in putty. If you find you have added too much putty then gently cut the excess away with your tool- don’t worry! You can always add more later if you want but cutting andsanding is more of a hassle. Now repeat this with your other two subjects and make dollies for them. After you finish each go back to the previous dolly and re-smooth the base- this is how to get a nice smooth base. If you want a textured base you would do it last of all- most textured bases are little more than a small round tool pushed into the putty repeatedly. 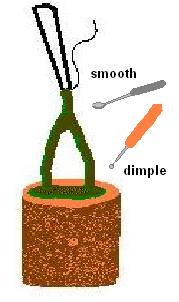
|

Tools of the trade
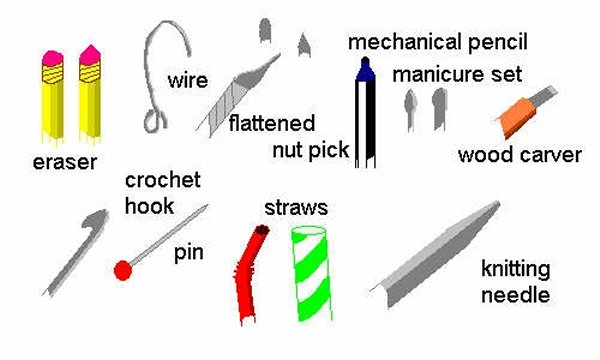
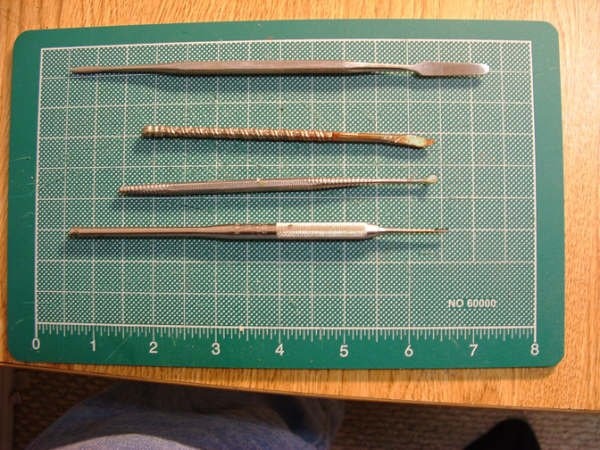

1. The most common sculpting tools seem to be 'putty pushers'. That is they are hard metal tools with tips set at a low thin angle so you can scoop, smooth, push, pull. I use a variety of sizes-as you can see top to bottom the flat thin part of each tool gets smaller and smaller- in fact I had to tweak the contrast to even see the smaller ones clearly. Of particular interest is the one second from the top. It started life as a 'nut pick' as seen in the next pic below. Simply smash the end flat on a small blue anvil or other strong hard flat surface. I then cut and filed the surface to get it as smooth as possible. (I also do my swords this way for my minis- after all flat metal is pretty easy to turn into a sculpt of flat metal lol.) Cost: Most metal tools range from $5-20 USD although I have found that well stocked Gem Stores have them for around $9 USD. The nut picks are 4 for $1. In addition I have made some tools out of thicker wire (coat hanger even).
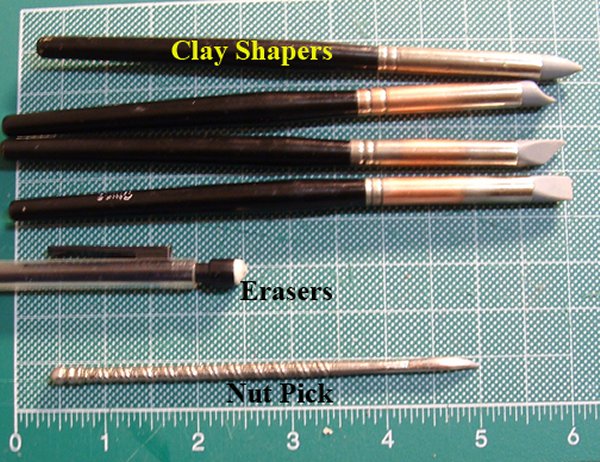
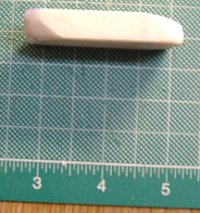
2. This section of sculpting tools is best used for smoothing... in a large part this is due to the soft naturally curvy nature of the clay shapers and the eraser. See when you push with a hard tool the force is unevenly distributed across the tip unless you apply the pressure evenly. With a soft clay shaper the pressure across the surface of the tool seems to more evenly distribute itself- making the putty smooth and fairly easy to 'tease' into shape. Usually I use the first section of tools to push the putty into place then I use this section of tools to actually shape the putty. Then I go back to the first set to really put 'crisp' edges on the shapes. The only exception is the nut pick- I use this little fellow to seal along the line between two different applications of putty- the 'seam' if you will. Then I use one of the softer smoothers to make it level. Cost: I get my Clay Shapers for around $6 USD at a local art store. Color Shapers (used for painting) are a softer substitute for Clay Shapers. Erasers are slightly stiffer clay shapers but the principle is similar.
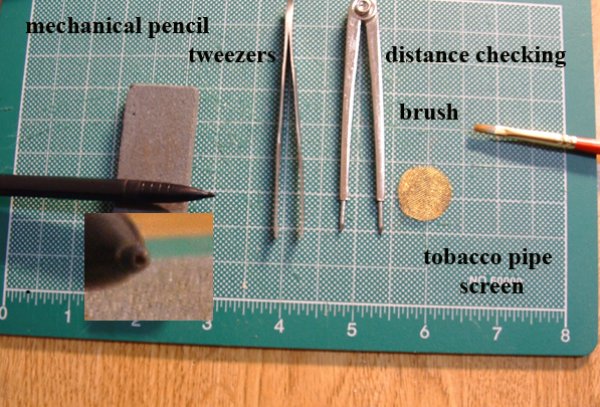
3. These tools are ones that I think of as 'texture' tools. You typically push them directly into the putty or drag them across the putty to give it a texture. Really any tool can be used for this purpose- so long as you understand you will be making a 'female' impression of the texture. The one I have mislabeled as 'distance checking' is because I also use this to check that the points between limbs are the same- ie elbow to wrist ect. Holding a ruler up doesnt always work but the distance between two points is all you need verify in some cases. I recommend Dollar Stores for most of these 'non standard' sculpting tools.
4. I use this section of tools for a variety of uses- they work great for 'poking' small details into figures- as well as getting into the minis tight zones. I seem to use the tiniest ball for doing the eyes/ nose pushing lol. Cost: The nice double ended one was $6USD at Michaels the other two were $1 each at a dollar store.
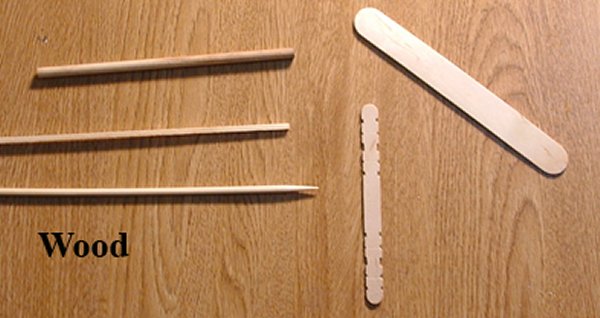
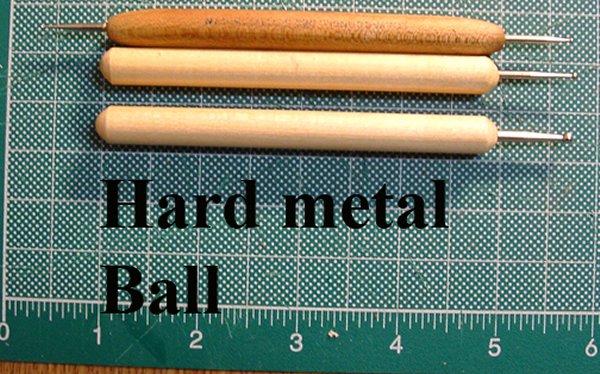
5. Wooden tools can be used for a variety of things- I personally have moved away from them as the wood grain texture always seems to get my putty stuck to it unless I heavily lube it. We typically use all of our wood for terrain projects now.
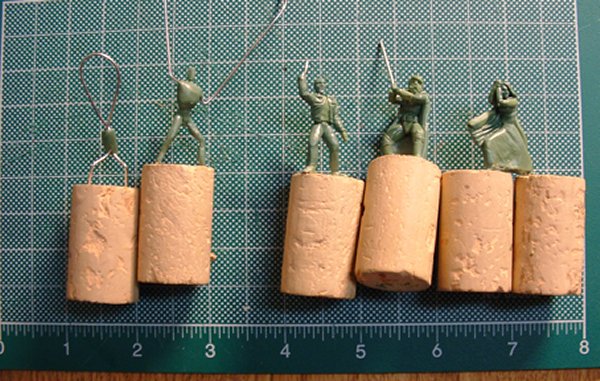
Skellies, Dollys, Greens Skellies and Dollys are sometimes mentioned- basically it is just a way of refering to how 'bulked out' a sculpt or 'green' is. A 'Green' is usually a finished sculpt although sometimes people will call them WIP (Work In Progress) Cork Although a variety of methods can be used to hold a green I much prefer cork as I usually work with wire Skellies. Cost: I get 90 corks for $7USD at the Wine making store.
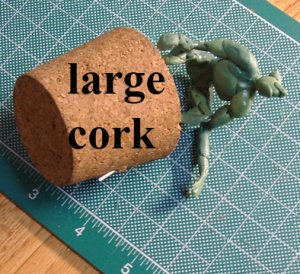
Putty Pit/ Monster It never fails- I'll mix up some green stuff and the phone rings or I have to leave. Although some people have had limited success with freezing mixed green stuff I much prefer to have a bunch of wires, or a Skelly already handy to add putty to. I call it a pit or monster because I usually only add putty to it when I have no time to use it or when I come back and it has lost much of its adhesiveness and is starting to get too rubbery. This way within a few short weeks I have slowly made a skelly into a dolly. Large Cork For larger sculpts - same place as the smaller corks but these are 'bungs' for barrels so the clerk may not consider them corks. I've tried rubber bungs (ha ha ha) but they are pretty springy and it was a good bit of effort to make holes in them without launching your skelly across the room Cost: $3 USD. 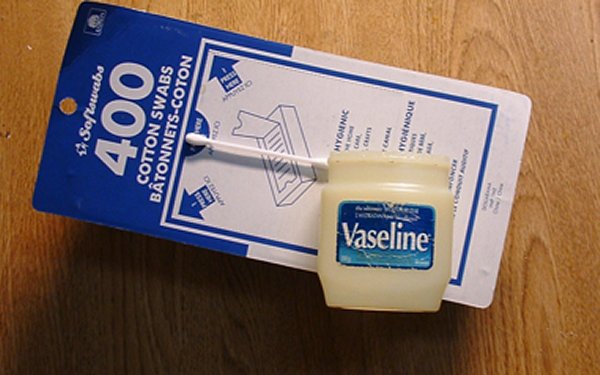
Vaseline/Jelly, Cotton Swabs In some cases I make use of Vaseline as a lube for both the sculpting tools as well as to be sure that two levels of green stuff do not fully adhere. Dollar stores win here again.
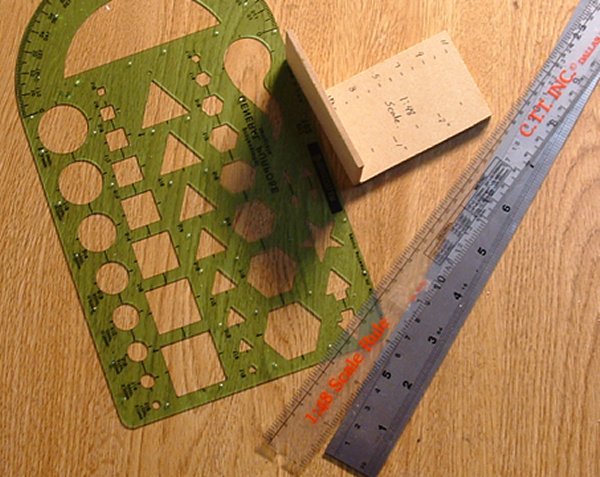
Measurement Devices Good for seeing how long, tall, wide, round, flat whatever. The shapes are great for base sizes for example I also make 'scale rulers' although I have recently found them available commercially. A scale ruler is great because it tells you at a quick glance how tall your model is in that scale. (Scale should not be confused with style) Cost: The fancy-pants shape thing was $7USD at Staples, the Scale Ruler was $9USD at a local hobby store.
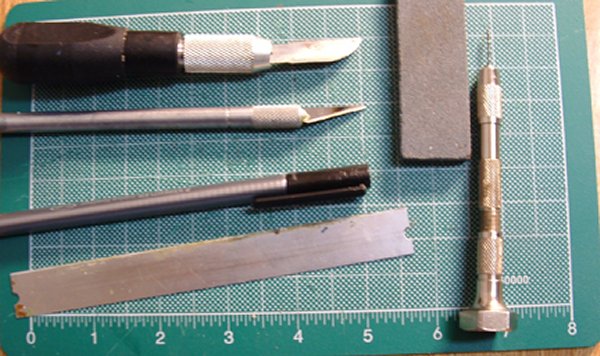
Hobby Knives, felt pen, razor, sharpening stone, pin vise, cutting board.
Used for cutting and stabbing and uh- trimming miniatures. A knife is a must for a sculptor becasue at some point everyone needs to cut a mistake off lol. I got most of these at the dollar store as well-and the sharpening stone keeps those blades nice and sharp for far longer than intended lol. The cutting board I had to get at Staples after spilling paint all over my larger one. A good cutting board can save a table and a marriage but it will cost $12-60 USD depending on the size lol. 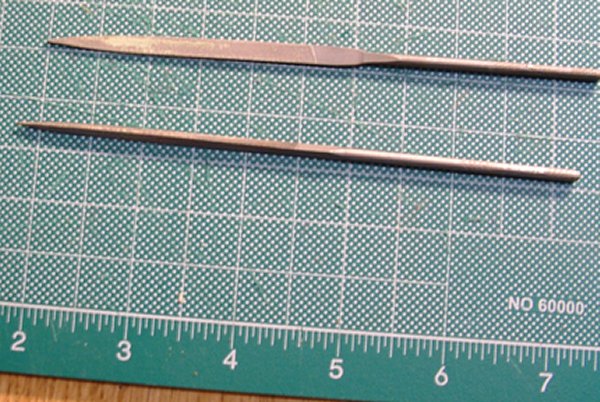
Files: I originally got these from a mechanic but now every dollar store has them too so go there. I use the file to remove wire knubs from the bottom of the green.
Sandpaper: You can get most rough grades at dollar stores but for real fine (smooth) paper go to a hardware store.
Small bits of wire: Stub toe into a bit of wire on carpet- take 1d2 damage and save vs cursing. Seriously ow- if I am ever forced to torture and enemy I'm making him walk my carpet a few times. As a result I started to use a magnet to gather stray bits of wire- and now I have a jar of wire fragments. These come in handy for a variety of smaller sculpts so now I save all my wires.
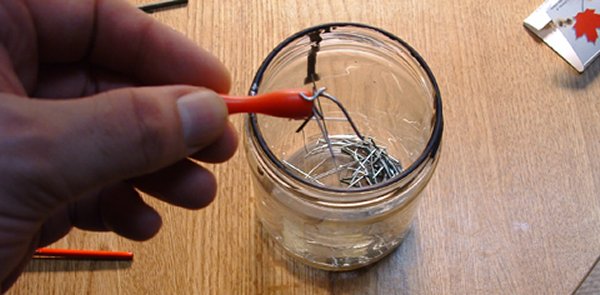
Putty Oven: A metal coffee can with either a low Watt bulb or small candle (never leave a candle unattended). With just a small amount of heat you can speed up the curing process on putty- but remember not to put plastic bits in as some of them have low melting points

Hammers, Small Anvil: For smashing wire flat.
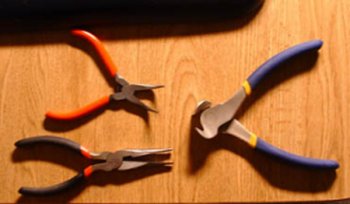
Needle Nose Pliers, Cutter/snip: I use the pliers to bend the wire for the Skellys and twists. The snips are essential for cutting and trimming wire.
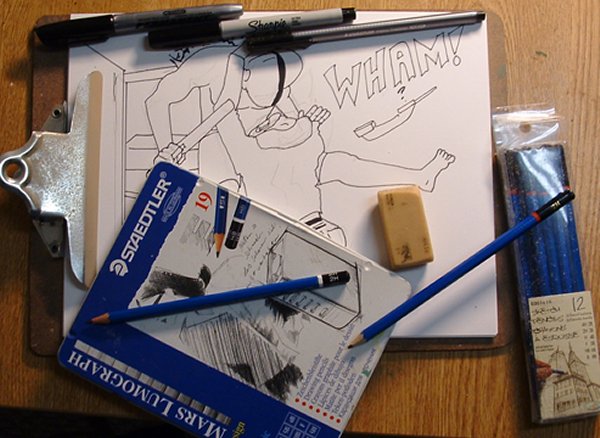
Clipboard, paper, pencils, eraser, pens: I use concept art a lot because it is the 2-d 'sculpture' that my 3-d representation is based on. Although I got my fancy metal tin of pencils from Michaels I got the small set for $1 at the dollar store and they both seem to be pretty similar. Of course I usually only use the 2H pencil so maybe that's why. The 2H allows me to make a nice light sketch that I later go over with my pens. Note I do not use the same eraser that I sculpt with!
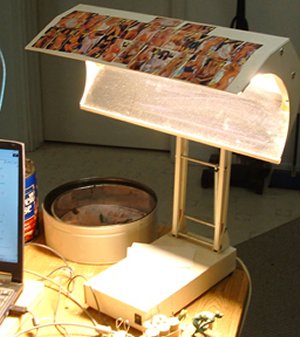
Natural light bulbs: My lamp is a full spectrum one as I find that up here in Canada I dont get enough 'sun' in the winter. It also happens to be one of the best lights to sculpt/ paint/ and draw under. I can not stress enough how important it is to have good lighting when sculpting. 3-d is all about shadows and so it really helps to have your mini heavily lit. Although this lamp cost me $190USD they now have other bulbs on the market that would do just as well. Really any strong light will help- though when painting it is another matter as the color may be off.
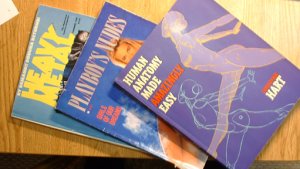
Reference Materials: If you are sculpting humans you would really be advised to look at humans. Seriously. For example did you know that by knowing the size of someones pelvis you can make fairly accurate predictions on their bone structure and size? Trust me - you'll start to walk the mall and see little imaginary lines over people's limbs and pelvis as you check to see if they have proper body proportions. Don't believe me? Well the judge didn't either..... Seriously though I thought I knew what people looked like but until I looked at a human anatomy book I was actually clueless. You know- the picture where the little guy looks like a side of beef with all of his muscles labeled? Well that is a good place to start learning lol.

|