|
Planning
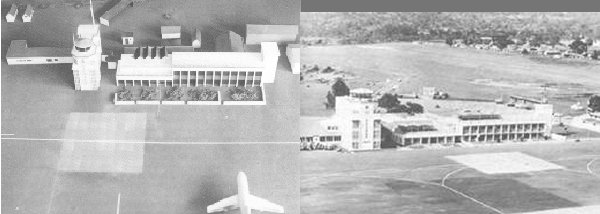
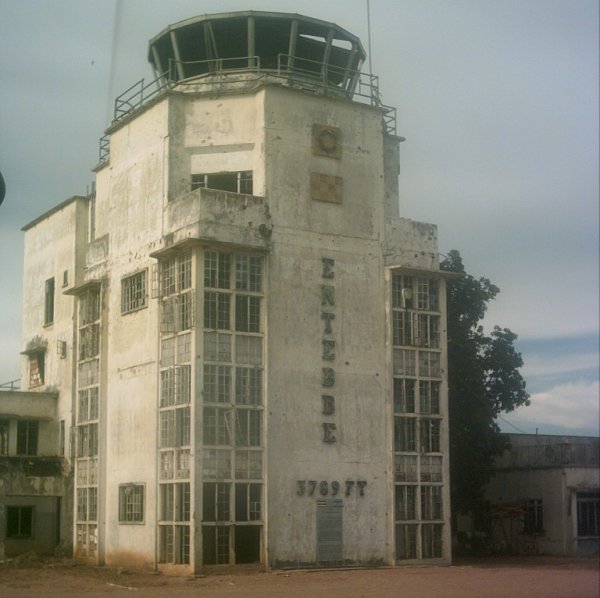
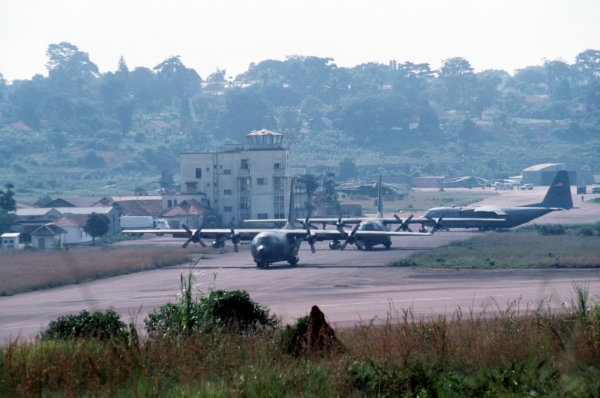
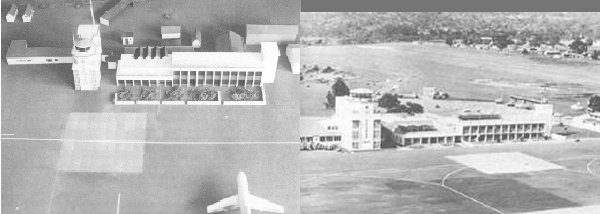
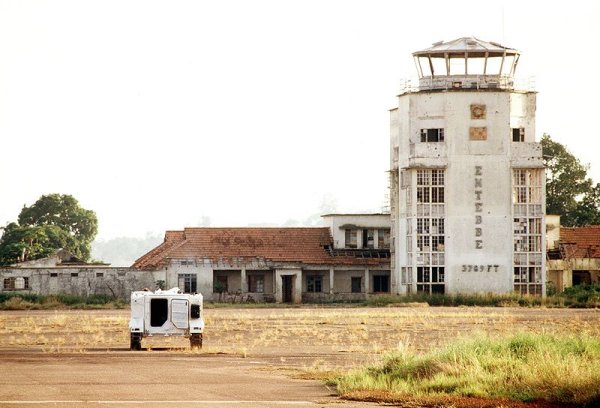
I wanted a centerpiece structure for my Congo mercenaries and my modern games. After some consideration I decided on an airport and after looking around for something suitable I settled on Entebbe, still famous for the heroic actions that took place there thirty-three years ago. Entebbe airport was the focus of Operation Entebbe, also known as the Jonatan Operation, a counter-terrorism hostage-rescue mission carried out by the Israel Defense Forces (IDF) in Uganda on the night of 3 July and early morning of 4 July 1976. In the wake of the hijacking of Air France Flight 139 and the hijackers' threats to kill the hostages if their prisoner release demands were not met, a plan was drawn up to airlift the hostages to safety. These plans took into account the likelihood of armed resistance from Ugandan military troops. The hijackers held the passengers hostage for a week in the transit hall of Entebbe Airport. Some hostages were released, but 105 Israelis and French Jews remained captive. After days of collecting intelligence and planning four Israeli Air Force C-130 Hercules transport aircraft flew secretly to Entebbe Airport, by cover of night, without aid of Entebbe ground control. The Israeli forces landed at Entebbe an hour before midnight, with their cargo bay doors already open. A black Mercedes with accompanying Land Rovers was taken along to give the impression that the Israeli troops driving from the landed aircraft to the terminal building were an escort for a returning Idi Amin or other high-ranking official. The Mercedes and its escort vehicles were quickly driven by the Israeli assault team members to the airport terminal in the same fashion as Amin. However, along the way, two Ugandan sentries, who were aware that Idi Amin had recently purchased a white Mercedes to replace his black one, ordered this procession of vehicles to stop. The commandos shot both of these sentries with silenced pistols. As they pulled away, an Israeli commando in one of the Land Rovers noticed that they had failed to eliminate the sentries and immediately killed them with a burst from his Kalashnikov. Fearing premature alerting of associates to the hijackers, the Israeli assault team was quickly sent into action. The hostages were in the main hall of the airport building, directly adjacent to the runway. The Israelis sprang from their vehicles and burst into the terminal. A quick exchange of gunfire saw all the eight hijackers and three hostages dead. After the raid, the Israeli assault team returned to their aircraft and began loading the hostages on board. Ugandan soldiers shot at them in the process. The Israeli commandos returned fire, killing many Ugandan soldiers. During this brief but intense firefight, a Ugandan sniper in the airport control tower shot and killed Commander Yonatan Netanyahu. He was the only Israeli commando killed in the operation. The Israelis finished the loading, put Netanyahu's body into one of the airplanes, and then left Entebbe Airport. The entire assault lasted less than 30 minutes and all eight hijackers were killed. At least five other Israeli commandos were wounded. Out of the 105 hostages, three were killed and approximately 10 were wounded. A total of 45 Ugandan soldiers were killed during the raid, and about 11 Ugandan Army Air Force MiG-17 fighter planes were destroyed on the ground at Entebbe Airport. The rescued hostages were flown to Israel via Nairobi, Kenya shortly after the fighting. A sad postscript to the raid involved Dora Bloch, a 75-year-old hostage previously taken to Mulago Hospital in Kampala, who was executed by the Ugandan government, as were some of her doctors and nurses for trying to intervene. She was dragged from her hospital bed and murdered by two army officers on Idi Amin's orders. The picture on the left shows the model that the Israelis made as part of their operational planning, the one on the right is a photo of the actual airport at the time. There are plenty more photos available but these two were of poor enough quality to allow me to see the overall look of the place without the distraction of too much detail. I was not planning to make a scale model, just a set of buildings that will evoke the look and feel of the place.
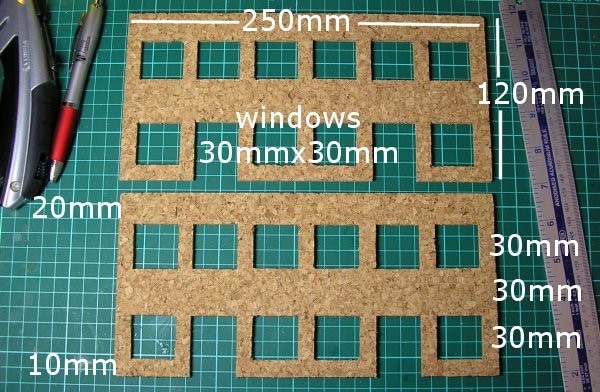
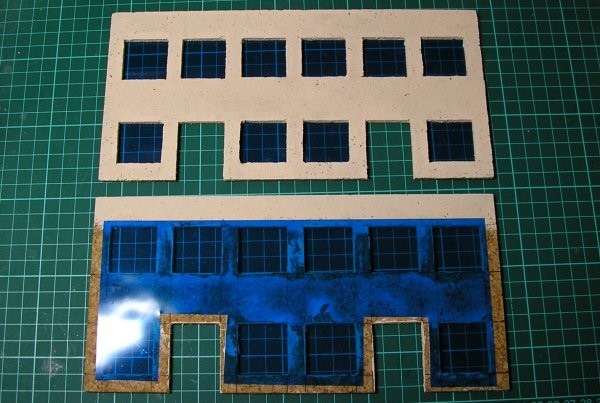
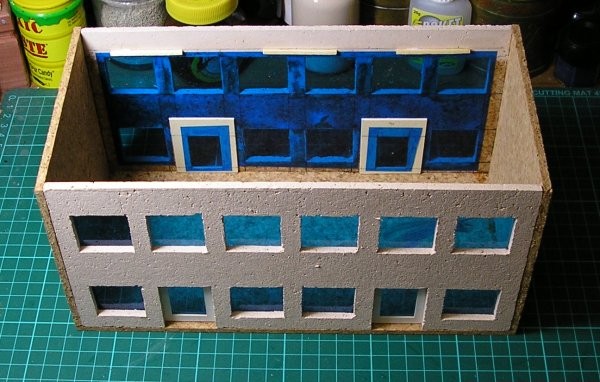
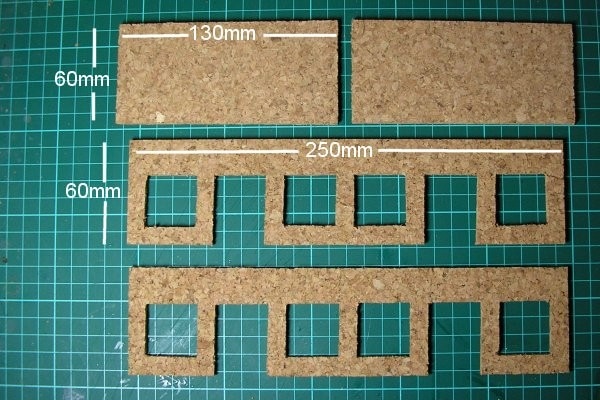
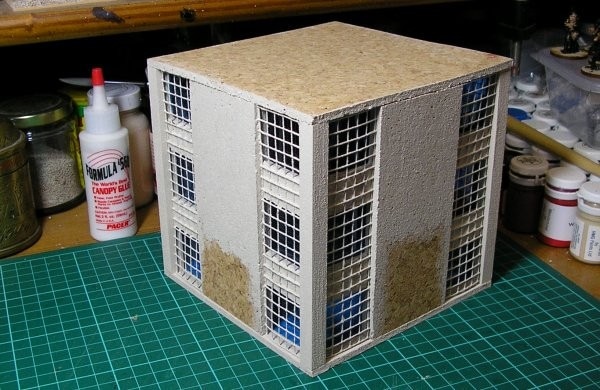
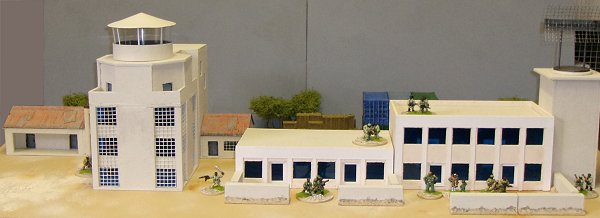
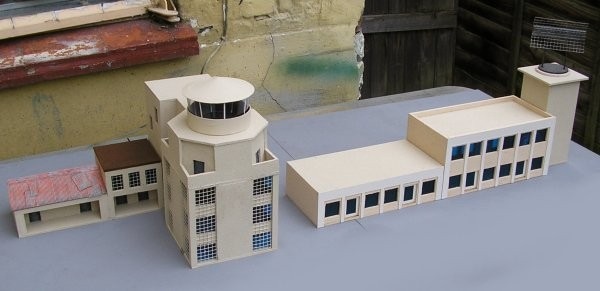
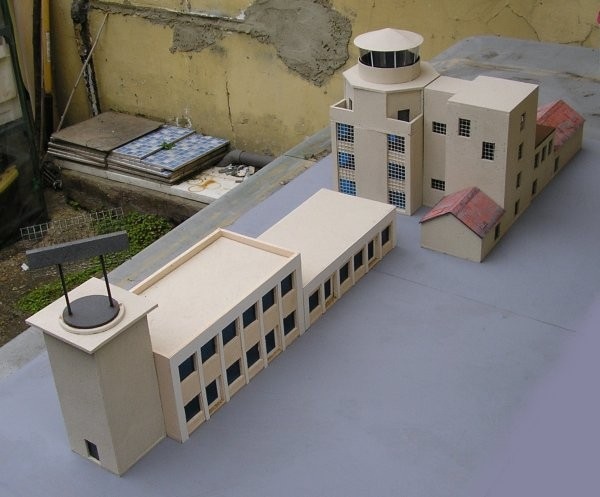
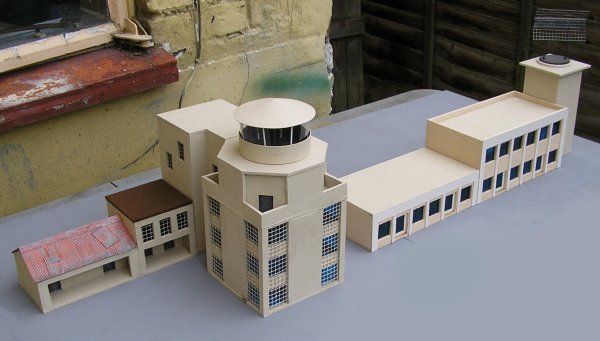
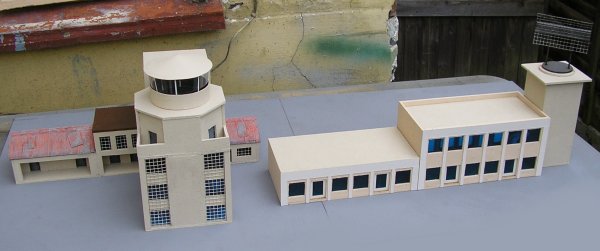
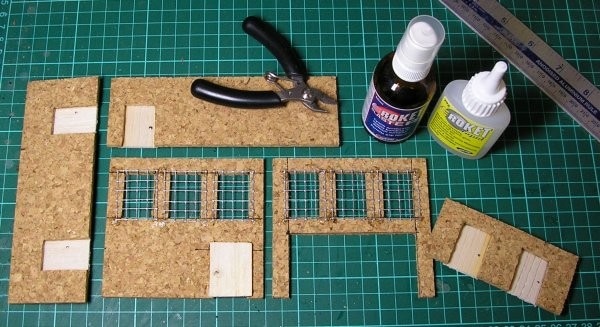
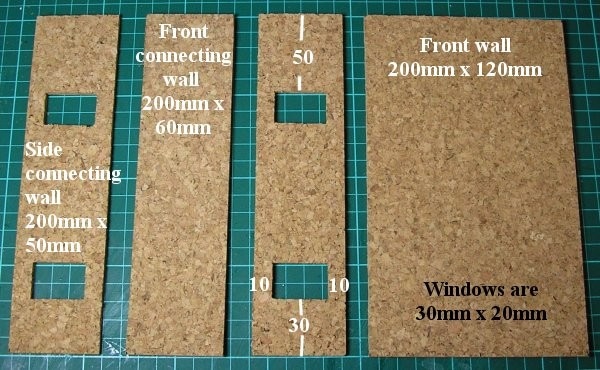
Consequently I needed to make some adjustments and decide what to leave out. The Israeli model, if made with 30mm square windows, is over four feet long which is too big for my needs. I decided to make the two story terminal building and the single story one next to it but as shortened versions, the control tower and the radar tower at the other end and some form of walls and shrubbery along the front. Making Entebbe Airport I started with the main terminal building. Normally I make my buildings in sections so that figures can be placed inside but this time I decided not to for a couple of reasons. Firstly I wanted glazed windows so that the place didn't look like it was wrecked. Unglazed windows are ok if they're small but the terminal buildings have a lot of openings along their long walls and would not give the look I wanted if they were just gaps and secondly there is more than enough room for figures to 'occupy' the buildings by being placed on the roofs. The need for buildings to be occupied by a set number of figure bases is the only reason I ever made them modular. A by-product of this is that the buildings will be more rigid which will counteract the slight fragility added by their unusual length. I began with the two long sides as they were the ones that needed windows and doors.
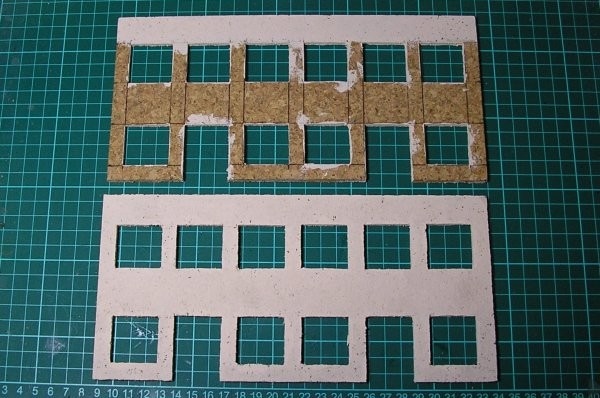
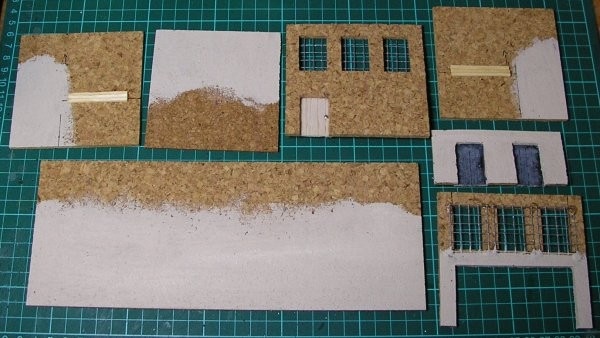
Once all the windows and doors were cut out I didn't want any paint to get near the window acetate later so I painted the outside faces and the inside at the top which would be visible once the inset roof was in place.
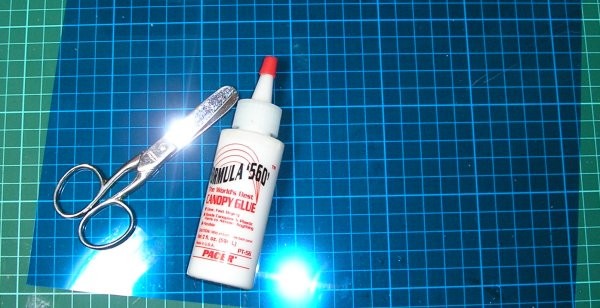
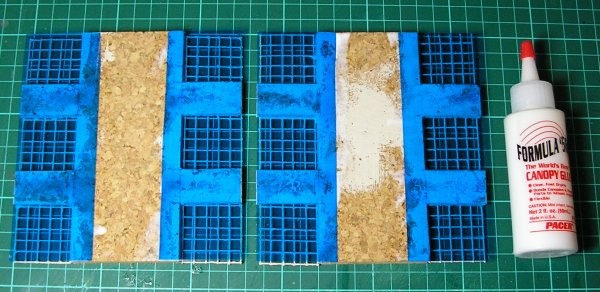
I bought some sheets of green and blue acetate off e-Bay. I tried local stationers first but they didn't have any. I got six A4 sheets of each colour for under £10.00 including postage. This building took less than a sheet for everything so the cost is minimal. if you don't want to use tinted acetate you can cut up old blister packs maybe.
I used canopy glue to stick the acetate to the cork because it's designed not to cause misting. I got mine, as always, from Antenociti's Workshop but you can find it in model shops and elsewhere if you must. I imagine you could just use PVA too but I wasn't sure whether the acetate would stay stuck with white glue so I didn't take any chances.
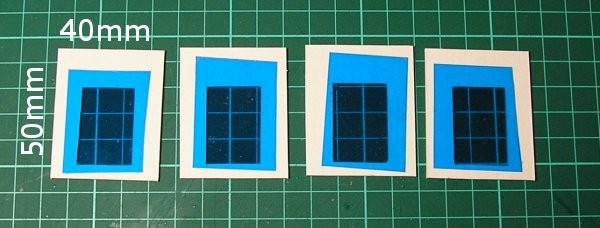
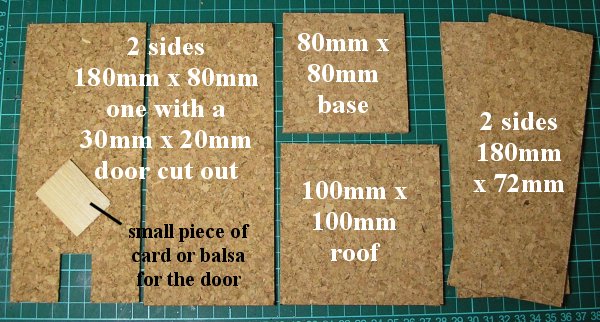
The door inserts were cut from mounting board. The cut-outs are 30mm x 20mm and start 5mm up from the baseline. Scraps of acetate were used to glaze them.
The doors were attached with wood glue.
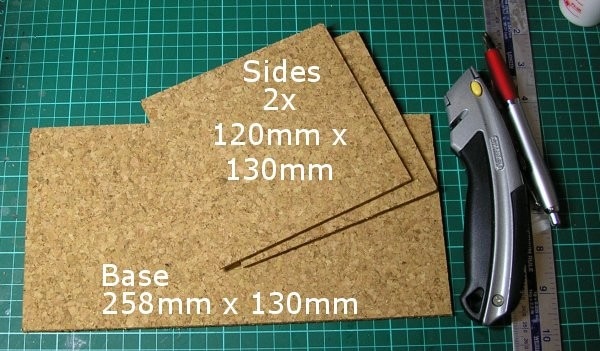
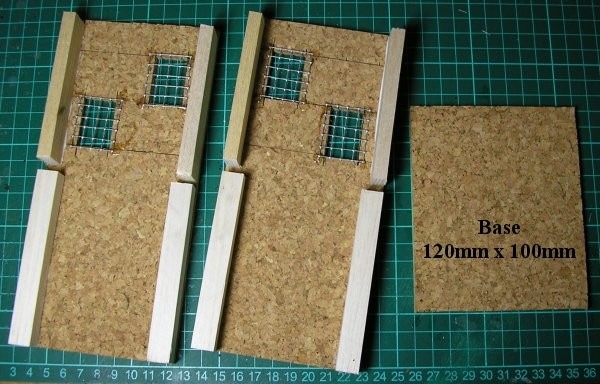
Next I cut out the sides and base. Nothing difficult here.
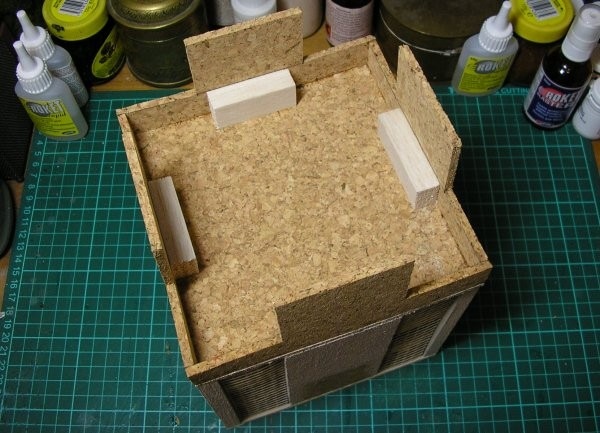
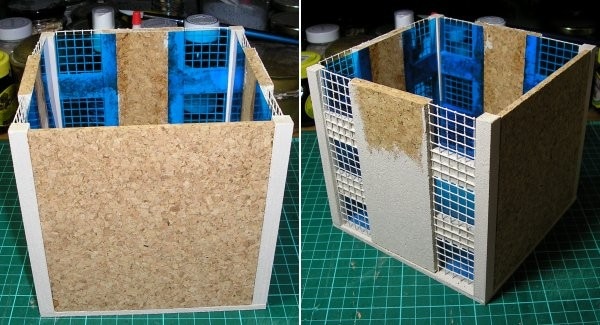
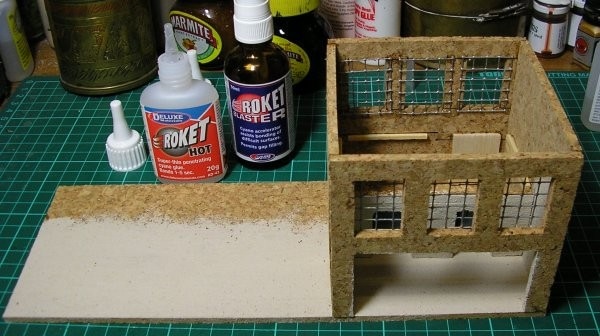
Before the walls went together I glued some matchsticks 14mm down from the top edges of the long walls to support the inset roof that was to be added later. I glued these with wood glue. Then, as usual, I stuck everything together with superglue. I trusted to the open top to allow enough free air movement and prevent any misting which it did. Everything was going swimmingly until a side wall collapsed and smeared superglue across the inside of two windows...
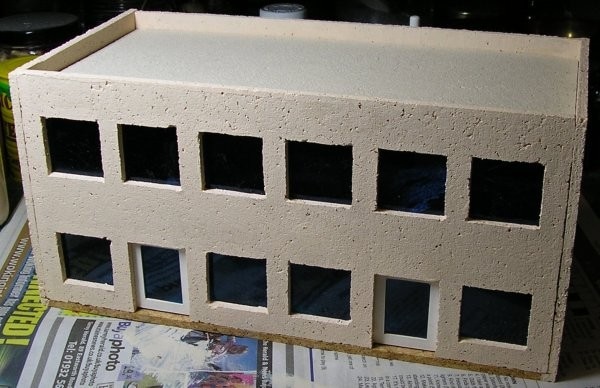
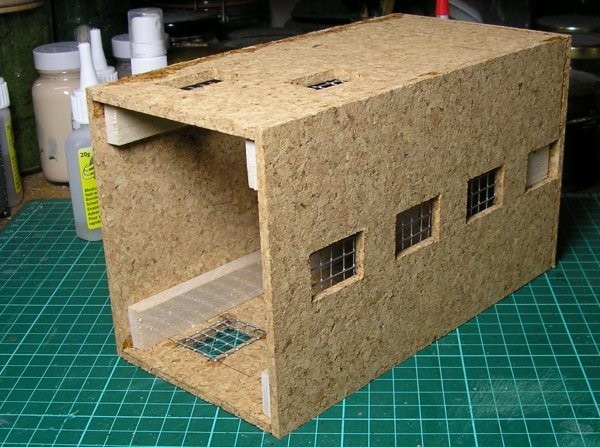
I may have said some things I later regretted. Certainly the cats ran from the room assuming they had somehow incurred my displeasure and my wife disappeared off somewhere for a while. Oh well, nothing's perfect, I carried on regardless once I'd calmed down. The smearing isn't really noticeable on the finished building anyway (except, of course, everyone will be looking for it now). I painted the side walls and while they were drying I cut the roof to fit the gap. The easiest way to do this is to cut it a little larger than you need and offer it up. A small amount of trimming later it will fit snugly. I painted the roof in a textured paint well away from the rest of the building and made sure it was dry before using more wood glue to fix it in place. I had visions of painting it in situ and watching a paint run drip down the inside of a window. I should point out that the roof is a different colour to the walls because it doesn't show up too well in the pictures.
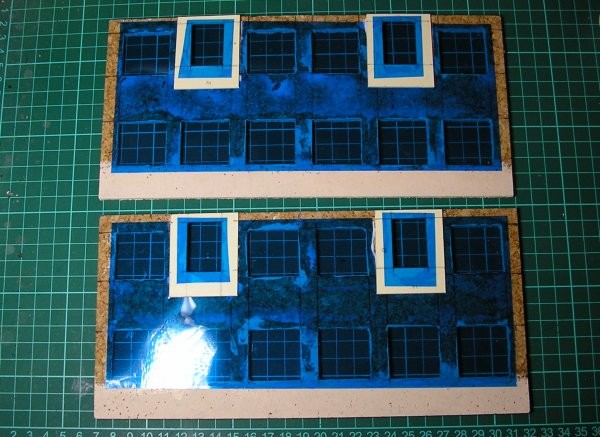
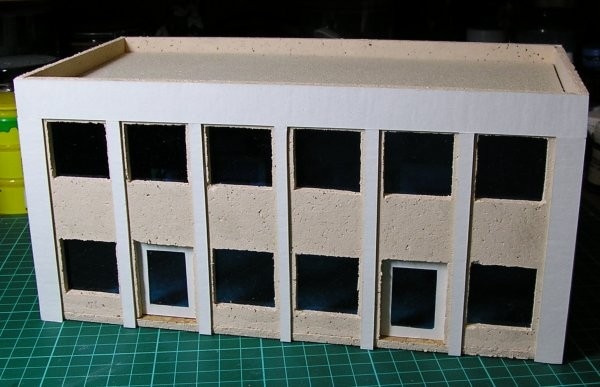
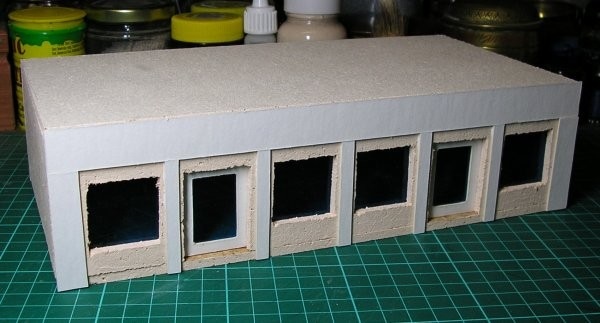
The final stage was the raised panelling surrounding the windows and doors. I cut this from mounting card and used a white card so I didn't have to paint it later, I was after a relatively clean and well-maintained look to the whole set up, it's a national airport after all.
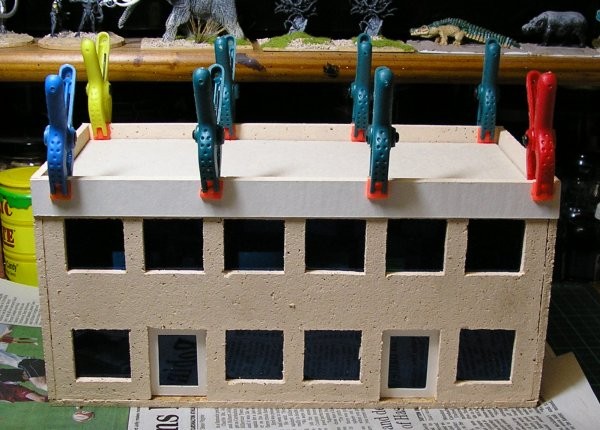
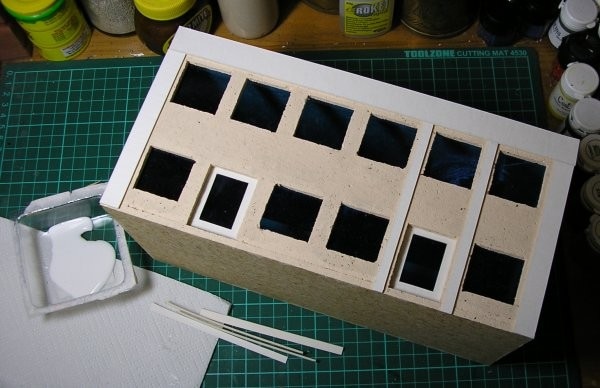
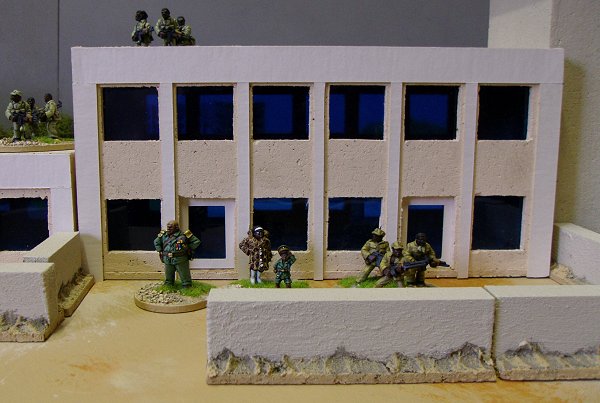
The top strip is 18mm wide and 258mm long. The gap between the top of the wall and the top of the windows is 20mm and originally I was going to cover this whole width and the 10mm vertical gaps between windows in card; but I realised that this would show up any irregularities or errors in the cork cutting (of which there are always many) so I opted to allow a 2mm gap all around for some leeway. As it turned out this gives a better look and and adds some further detail for no more (in fact less) effort. The outer vertical strips are 12mm wide and the other ones are 6mm. They are all 106mm long, this may vary on your building but can be measured exactly once the long top strips are in place Everything was stuck with wood glue.
Only the long top strip required any clamping while it dried (clamps from Antenociti's Workshop), everything else went on easily. All done and pretty much what I was picturing from the start.
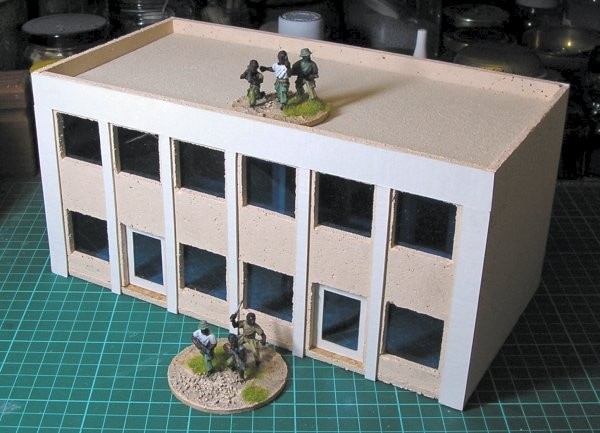
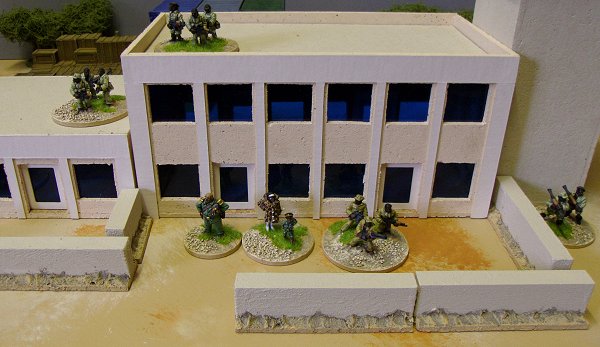
I've messed with the brightness of this photo to get more details to show up. With the roof in place I think the interior is dark enough to not appear as an empty box but the windows allow a pleasing amount of light to show through.
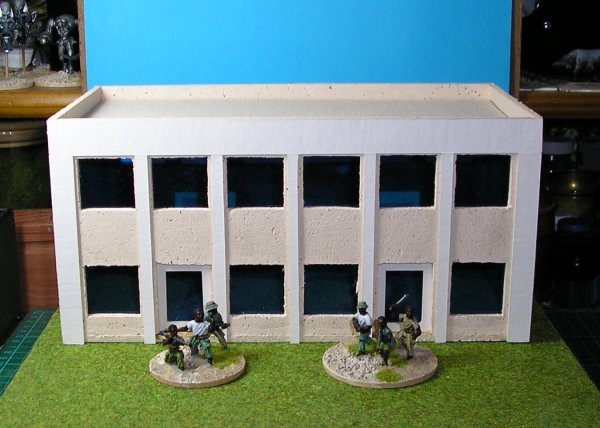
Figures are28mm African militia from The Assault Group. Here's an attempt to add some surrounding colour. I'll add more photos once I've got a few parts done and I can set things up outside, I hope natural light will add to the window effect.
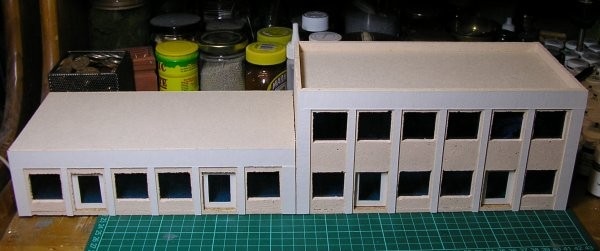
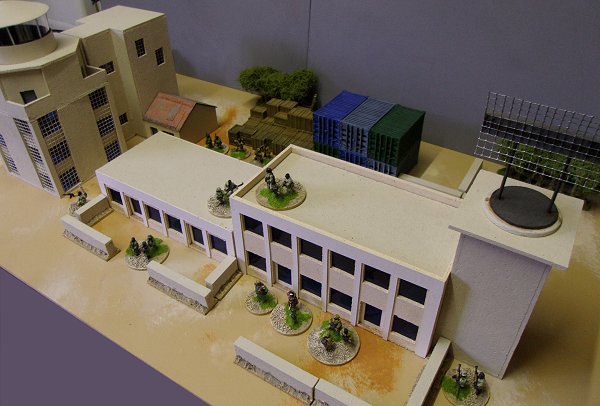
Eventually I plan to make another of these so that they can be placed end-to-end to make a big main terminal building. Next on the list for now is the single story part. I think I can probably get away with using the component terminal buildings as shops, hotels or offices in a town setting so long as nobody looks too closely. The low building is the same as the previous one but not as tall.
Everything was done as before except for the roof which wasn't inset so was just a copy of the 258mm x 130mm base. I made sure to let any superglue that I'd used on the walls dry completely before I glued the roof to avoid misting the acetate windows and I used wood glue to fix the roof in position.
That completes the terminal buildings, now on to the radar tower.
The Radar Tower
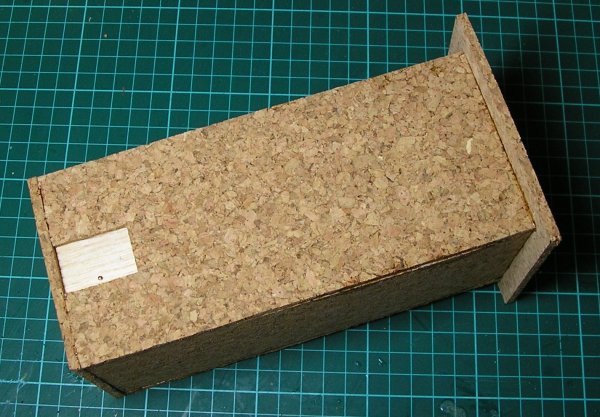
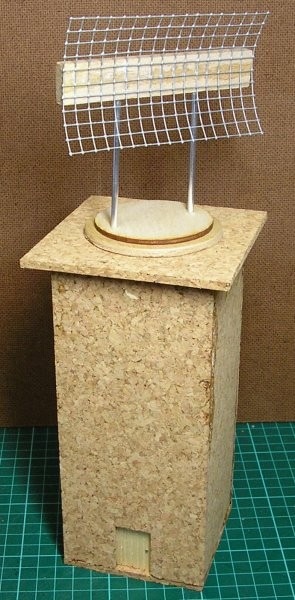
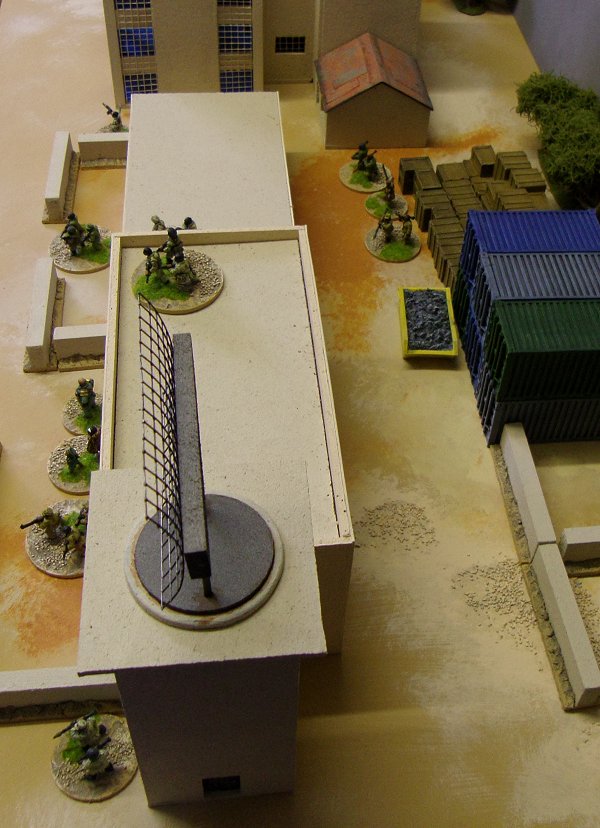
The radar tower is a fairly plain structure that stands at the opposite end of the terminal building to the control tower. It's main feature is the radar array itself. The basic tower is very straight forward to make being a rectangular box with an overhanging roof. Since this is a functional part of the airport not meant for tourists I decided to make the door from balsa rather than card so that I could inscribe a wood pattern into it and make it a little rougher looking.
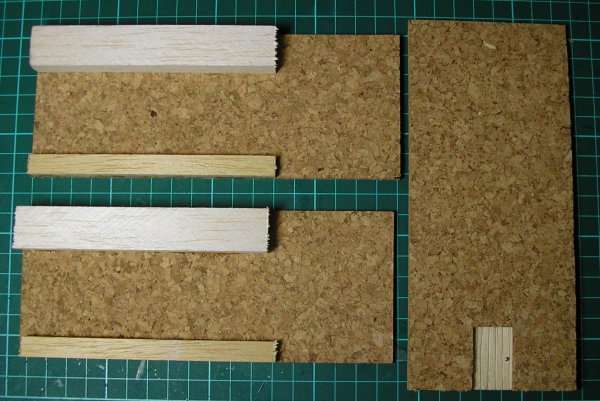
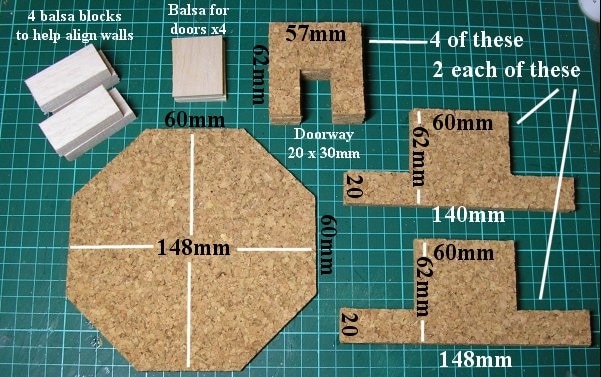
I decided to use some more balsa to strengthen the corners and help with alignment during construction. This isn't necessary, the cork will hold its form quite nicely on its own, but makes the process of assembly much quicker. You can generally only do this with buildings that don't have windows so that the balsa doesn't show.
I scribed the door and added a pin for a handle, everything was stuck wit super glue. A little more super glue and the tower is complete.
The actual radar could be a problem, it is a complicated device and you could spend ages modelling it in finicky detail. I spent a long time deciding how I wanted to do this but, in the end, I only need something that gives the right impression so I went for the simple approach.
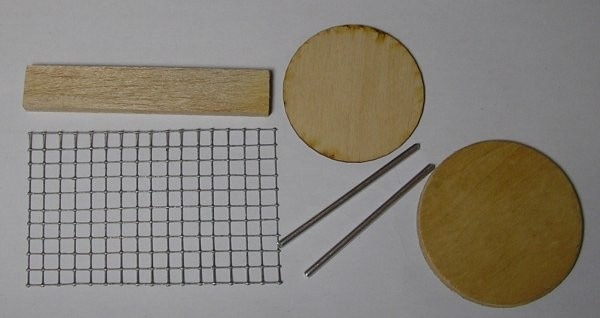
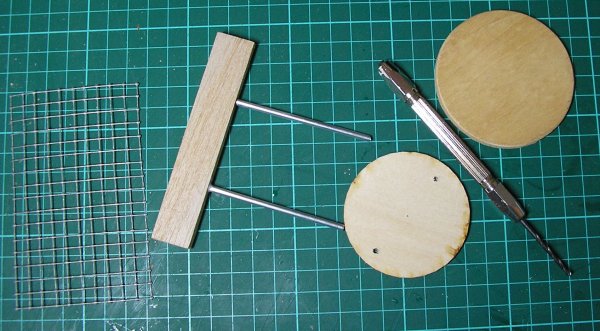
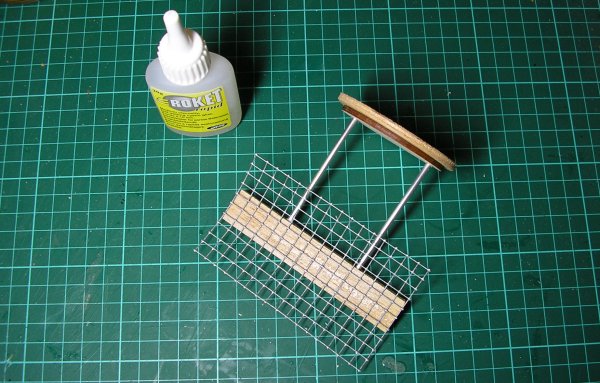
The radar dish itself is made from some wire mesh, I cut a piece 10 squares by 16 because that looked about right, this made the width 103mm. I cut a length of balsa to 103mm to match this and cut some support struts from aluminium rod again by eye so they looked ok. They're about 80mm long. The radar will be mounted on a circular base made from a 60mm Litko base and a larger 80mm plywood disc I had lying around. I chose circular because it gives the impression that the radar turns, which of course it does, and adds to the overall impression of functionality. I drilled pilot holes for the supports 30mm in from each end of the balsa strip and drilled corresponding holes in the 60mm base. Everything was secured with super glue.
I glued the wire mesh in place, again with super glue, and bent it into a curved shape.
And there we are, complete. I'm going to leave the radar dish as a separate piece so it can be moved, rotated, taken off when destroyed etc.
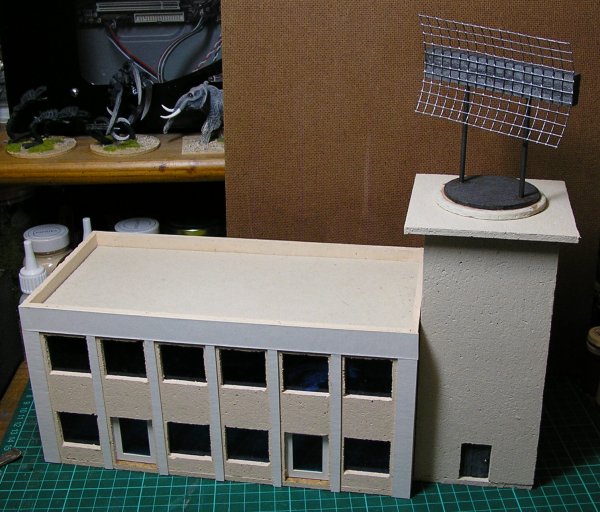
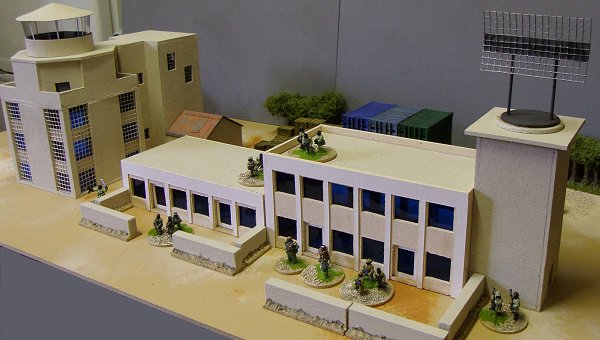
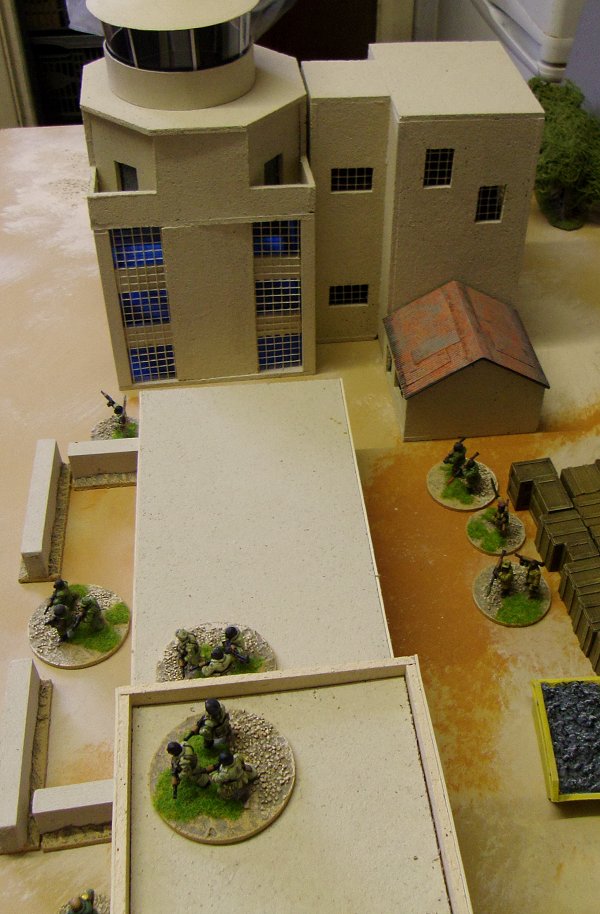
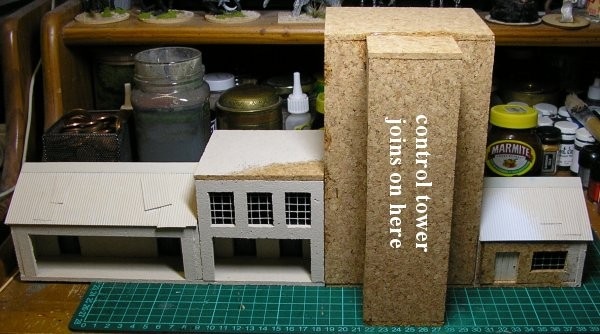
Here it is in position relative to the tall terminal building. The door should face to the right but I've turned the tower for this photo so it can be seen.
Control Tower
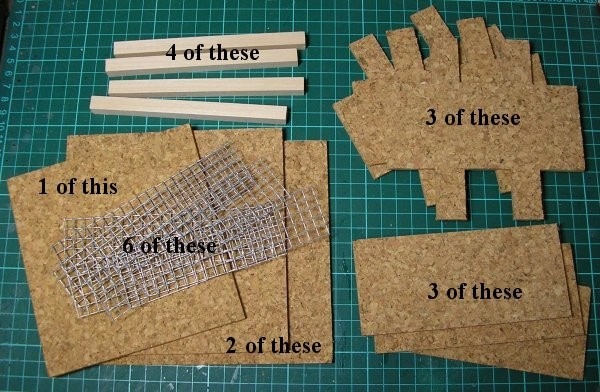
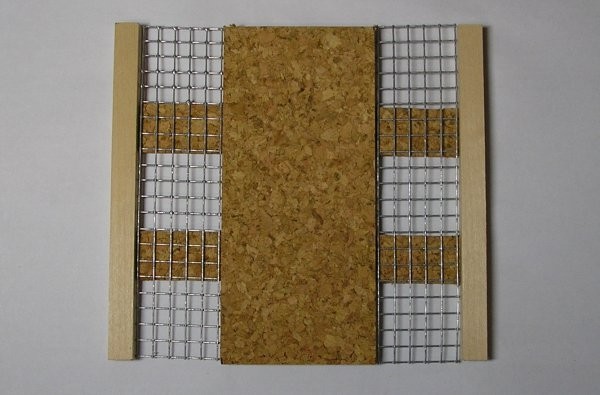
I've left the control tower until last because it's the most complicated part and also the building that gives the whole airport its character. The base of the tower is the first challenge, the windows are very distinctive and initially looked to be a real problem given the materials I choose to work with. I explored several options before settling on this one. Here's what you'll need: That's nineteen components for only half a building, madness! Fear not, everything becomes manageable once it's broken down into stages. Each wall (except the rear one) is made from these bits:
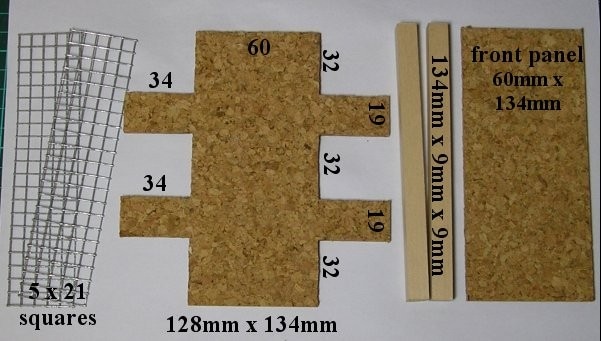
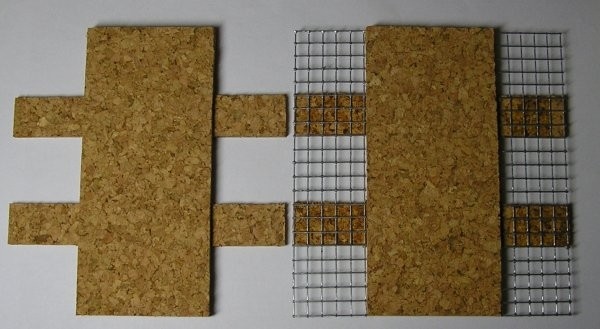
I cut the wire mesh so that it was about 30mm wide, this gave me a 5 square width and I took all the other measurements from this.
Each wall has three square 'open' windows with narrower rectangular 'closed' bits separating them. If the open windows were 5 squares tall then the closed parts needed to be 3 squares tall to look right; that gave me a total height for the mesh of 21 squares. The central part between the two columns of mesh is 60mm to match the joining piece from the rear part of the control tower which is already built. The cut-outs for the windows are 34mm x 32mm dictated by the actual size of the wire mesh. The corners are formed from lengths of bass wood. All this is going to fit together like so: This is what we're aiming for:
Stage two is the octagonal top half of the tower. The pieces for this are quite small and the opportunity for error is correspondingly greater.
Here's everything that's required: Fixing the walls was very straight forward. The longer ones went on the front and back and the shorter ones fitted between them on the sides.
I painted the insides of the parapets at this point to make things easier later. I assembled the doors as before with scoring and clipped pins for handles and painted them too along with their sections of wall. The short diagonal walls slid in behind the long walls and were glued with super glue. The set back wall design of the real building gave a good excuse to not bother with sanding the wall edges to angles so they'd fit flush. Just as well because I wasn't going to anyway.
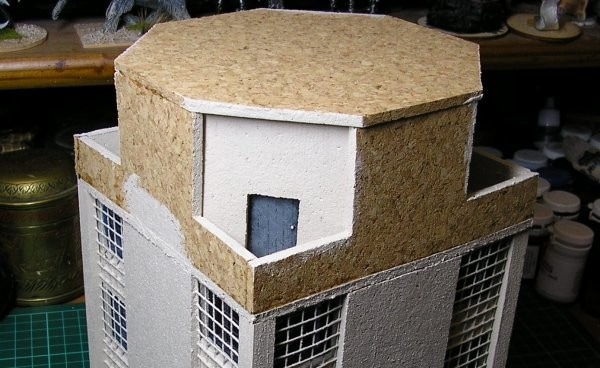
The roof was glued into place last. Despite everything working out on paper and with dry fitting before hand it wasn't a perfect fit (not unexpectedly) but it was good enough, the worst of the mismatches would be evened out later with a generous application of texture paint. The worst join is shown below, all the rest were ok.
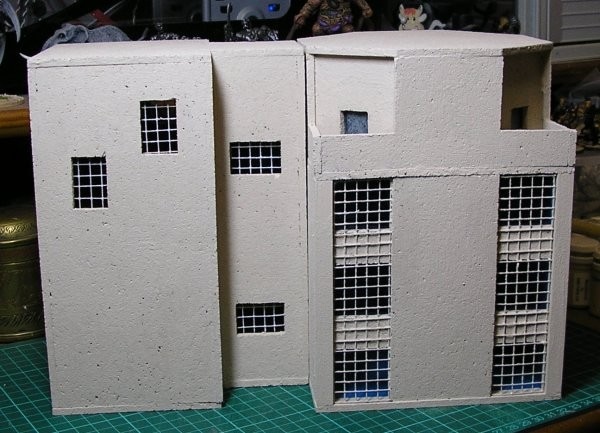
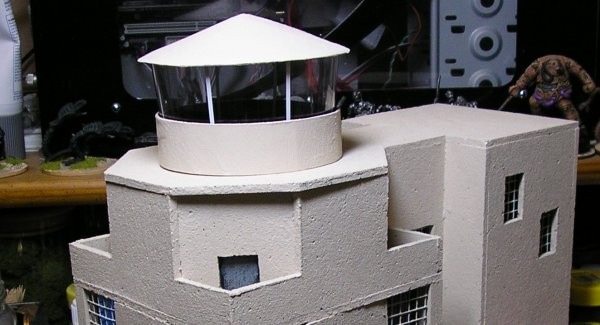
So far, so good, the tower matches up with its neighbour and looks enough like what it's meant to be to keep me happy.
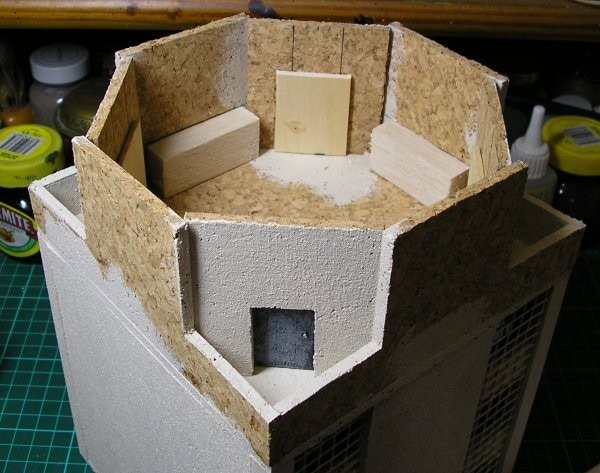
The last stage is the actual observation room. This was another part that was causing me problems. I came up with many ways to make it, most consisting of individual struts and angled wire and all sorts of fragile, difficult to build ideas that probably wouldn't stand up to much gaming. I'd also decided that it was important to be able to place a stand of figures inside which meant I couldn't just make a solid piece to ensure some strength.
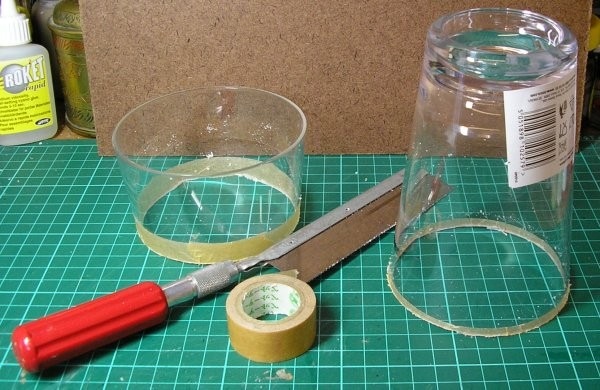
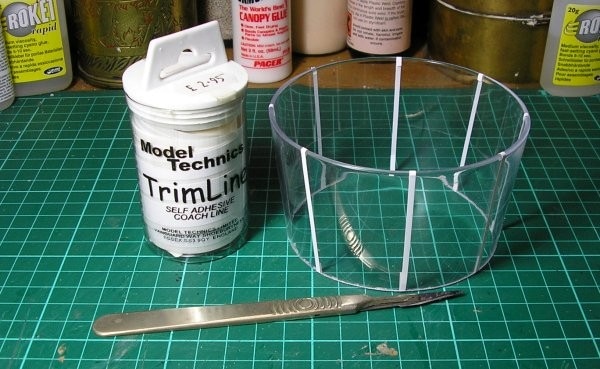
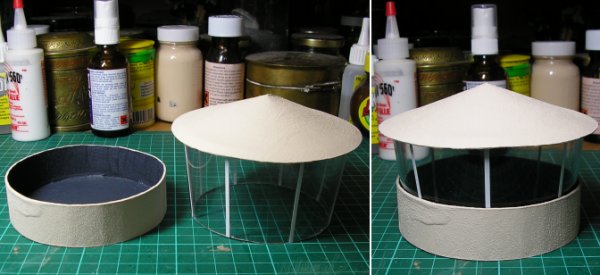
I finally worked out that if the glass itself was the component that gave the structure its shape and strength and not the struts all my problems were solved. I found my solution, as many others have before me, in drink. I trotted off to Tesco and bought a rigid plastic beer tumbler for £1.00. (I bought three to allow for mistakes). I put a ring of masking tape around it at roughly the length I wanted to avoid slips and fracturing, marked this at intervals with guidelines 65mm from the top and cut it with a razor saw. Six months of agonizing fixed in under five minutes! The base of the observation room was cut from mounting board. I used the inside of the plastic tumbler rim as a guide for the circle and cut a strip of board 25mm wide and long enough to fit around the circumference for the side.
I fixed the mounting board parts together with wood glue and made a conical top from a 60mm radius circle of cereal box card. I used masking tape to stick the join.
For the support struts I stuck lengths of Trim Line onto the tumbler. This is a special product designed for adding lines to models which I bought when my local Model Shop closed down. Lengths of card or paper affixed with canopy glue would work just as well so there's no need to rush out and buy some.
Once everything was painted I glued the roof to the tumbler with more canopy glue, this made it rigid and assures it keeps its shape. The tumbler isn't glued to the base, it lifts out with the roof to allow figure placement.
The first stage was to stick the front panel to the main part. Then, using very thin superglue to avoid any lumps, I attached the mesh.
Once the super glue was dry I pre-painted the areas around where I was going to stick the window acetate to avoid problems with paint splashes later.
I glued the strips of blue acetate to the back of the walls using canopy glue from Antenociti's Workshop to avoid any fogging. Once all three walls were complete and dry I used super glue to fix them together. I started with the front wall, then the sides and left the plain rear wall until last so it could be trimmed if necessary to make any adjustments. As it turned out none were needed and everything fitted fine within the tolerances of the materials (which means nothing's perfect but I was very happy with the results).
Lastly the roof, also pre-painted underneath and along the edges, was glued in position to complete stage one.
It just sits in place, I didn't glue it to make storage and transportation easier.
And, err, that's it, all complete (for now).
|
Ancillary Buildings
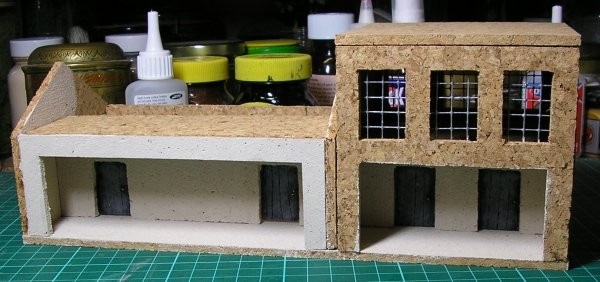
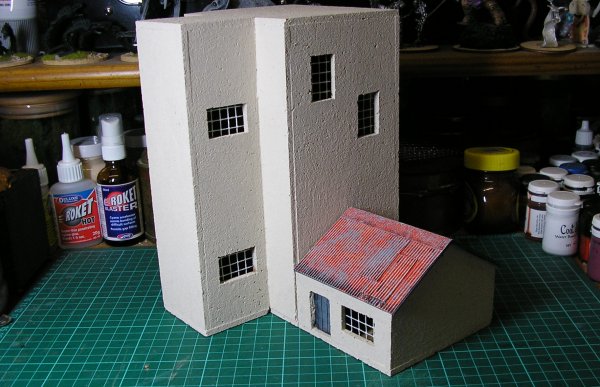
Out of the myriad of other buildings dotted around the Entebbe airfield I am only going to make representations of a few that sit behind the control tower and are joined on to it at the back. I'll start with the buildings to the left of the tower. It has a complicated roof arrangement which will need changing and I'm going to lose some of the windows and doors on the ground floor to simplify it. The low structure on the far left isn't going to be made as it will add too much length to the finished set up which I want to keep under four foot. There is a duplicate of the building behind it which I'm also going to ignore.
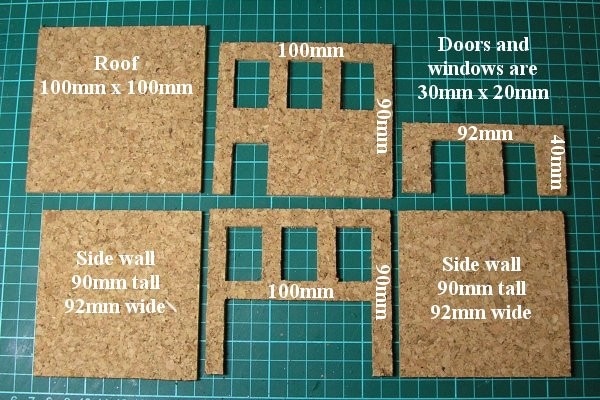
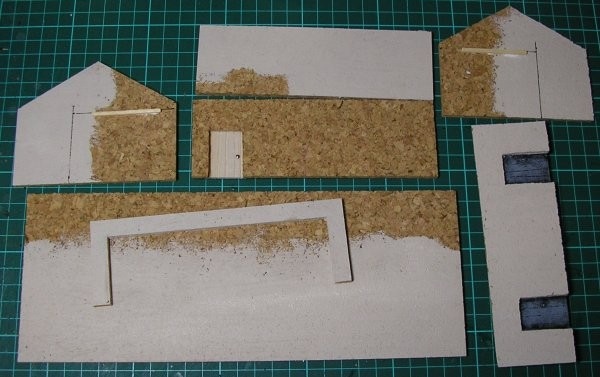
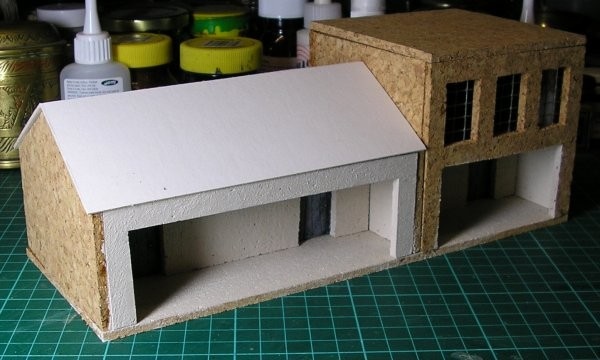
Here are the pieces for the roofed part. Here are the pieces for the taller, flat-roofed part.
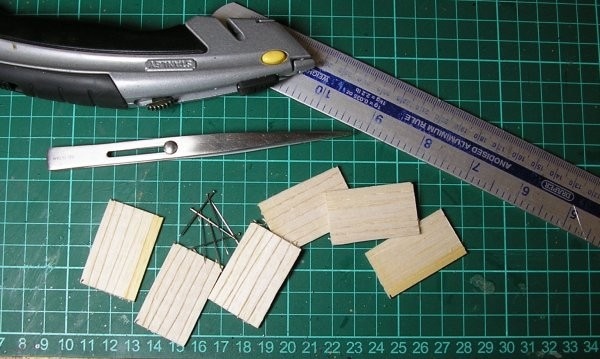
The doors are made from thin balsa scribed with some tweezers to add planks and a trimmed pin head added for a handle.
Windows are cut from 6mm wire mesh. I get my wire mesh from bird feeders, they cost £1.00 - £2.00 each and provide enough mesh for many buildings. The alternative is to buy a 40m roll for £50.00, good luck trying to use all that up in a single life time. Rumour has it that you can buy shorter amounts from pet shops but I've never found one that sells it.
Everything is stuck with super glue and some accelerator, both of which I buy from Antenociti's Workshop. I've learnt from experience to pre-paint areas that are going top be a pain to get to when the building is assembled. Before gluing the parts together I've marked the side walls with the position of the ground floor front wall to avoid any unsightly (and unfixable) leaning or slanting. I've also added some matchstick supports for the interior upper floor which forms the roof of the veranda.
The base is 258mm x 100mm. Exactly the same process for the other part of the building.
With all the preparation properly done assembling the building is very straight forward. Once I reached this stage I could trim the interior floor to fit and just drop it into place.
The flat roof isn't glued, it will remain separate to allow troop placement in the top floor which I wasn't going to do originally but I changed my mind as I was building.
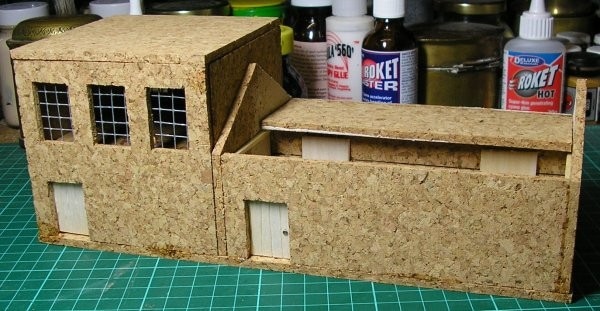
The right hand wall of the low building isn't necessary, I could have just butted the long walls up against the taller building, but it adds a lot of strength to the model and makes fitting the roof much easier. Rear view.
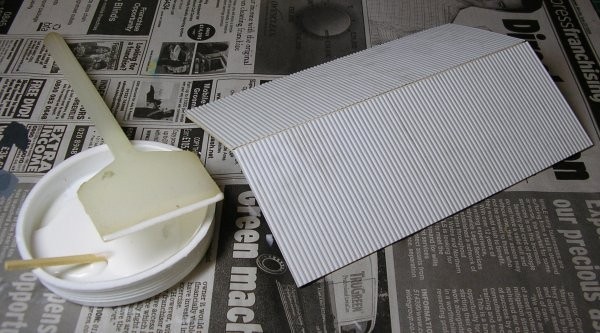
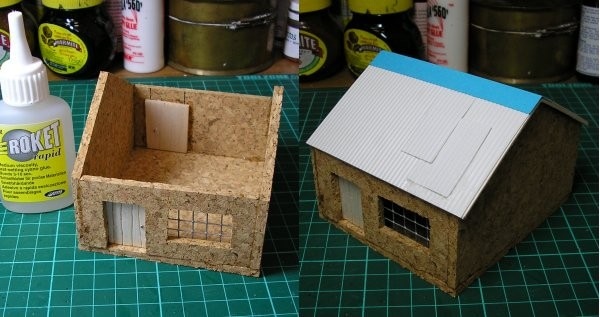
The roof is made from a single piece of card, 160mm x 120mm, scored along the centre and folded.
As you can see from the photo of the real thing the roof is tiled. I decided to change to corrugated iron for several reasons; it's quicker to do than tiles, it matches my other African buildings and, most importantly, it adds to the feel of the place. Most people won't know the original building so why worry about it?
I used sheet styrene, again from Antenociti's Workshop, cut to size and stuck to the card with wood glue. A 20mm x 160mm strip of thin card, scored and folded, makes a nice finishing touch to the apex of the roof and some corrugated sheet styrene off-cuts added as patched repairs finish the job. Once everything is dry the roof can be glued into position as it's not designed to be removable. On the other side of the control tower is a mirror image of the buildings on the left. I don't want to make a second version and, again, it would add too much to the length of the finished airport so I'm just going to make one of the shacks that are also there (albeit set further back) instead.
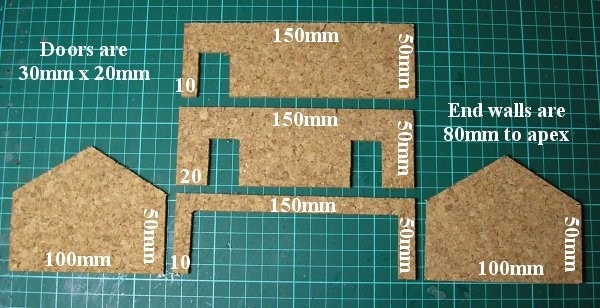
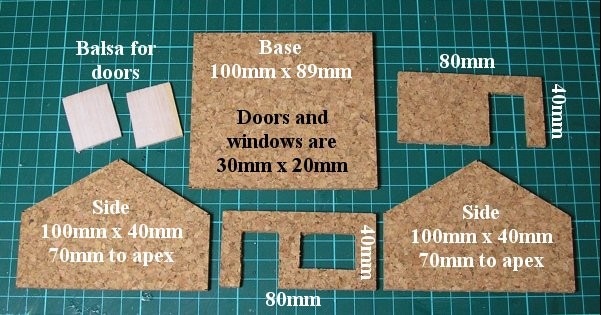
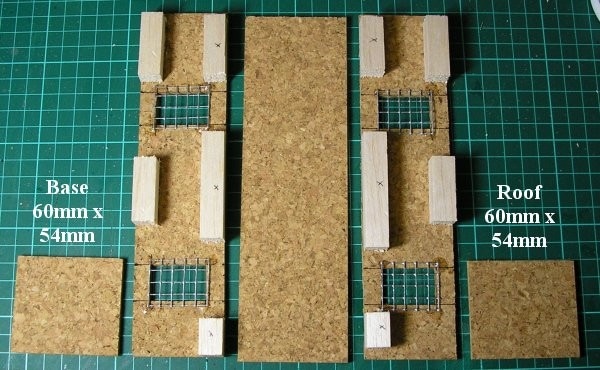
Here's the simple cutting plan. Doors, windows and roof are all made just as before. The roof is 91mm x 120mm and the base is 100mm x 89mm.
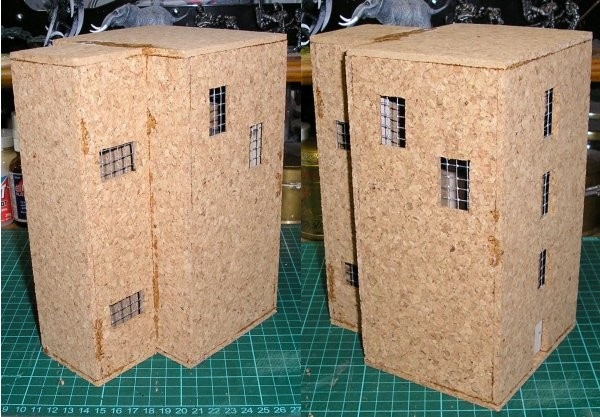
The roof only overhangs on the right and is flush with the wall on the left so the hut can be butted up to the control tower. Now for the rear part of the control tower, the part that ties the previous bits together. This is a large but simple construction. I've dispensed with a lot of the small windows and some fiddly structures around the rear door but added some rear windows for effect.
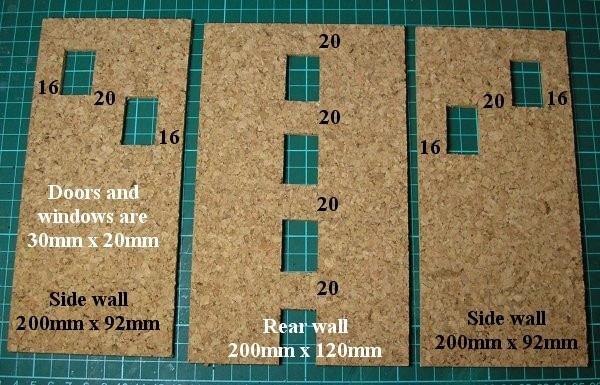
The door and windows follow the standard procedure as before. I've cut strips of balsa to help with the alignment and strength of the finished model, these are positioned using wood glue and then fixed with super glue to speed everything up.
The actual construction couldn't be easier. Once everything is aligned a generous application of super glue accelerator finishes the job. Finally a roof, identical to the base, is added.
The thinner part that connects the rear structure to the actual control tower is prepared exactly the same.
And painted:
And, finally, the two parts are joined.
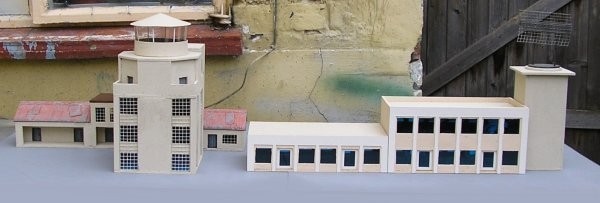
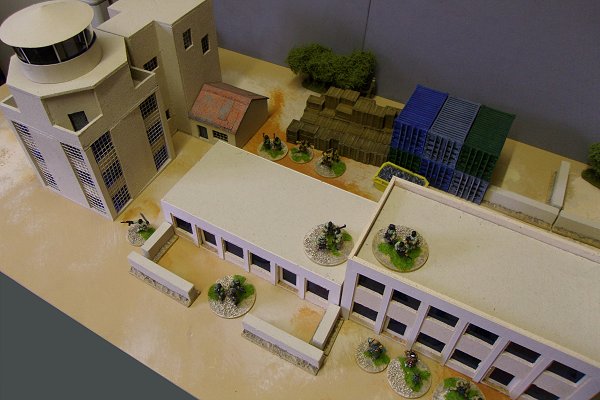
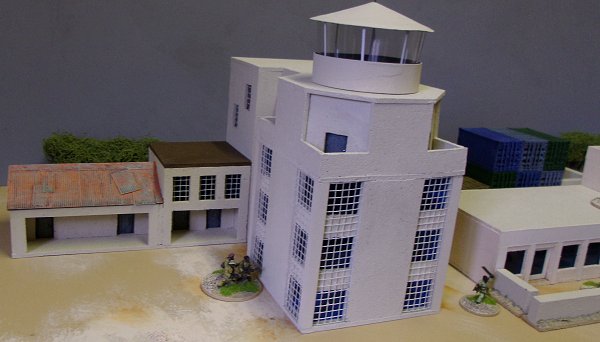
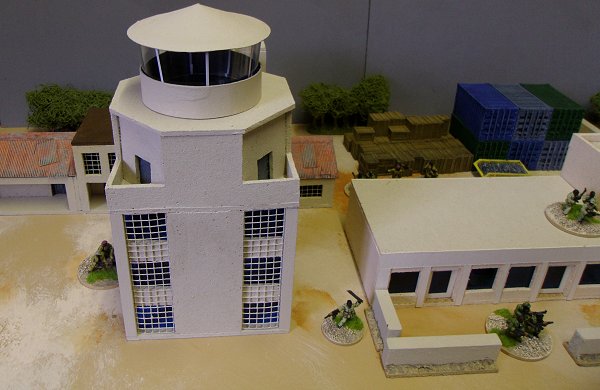
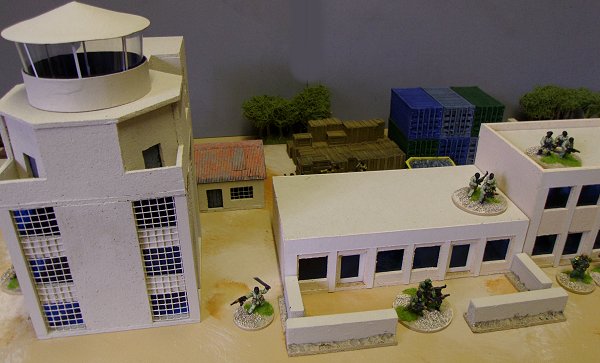
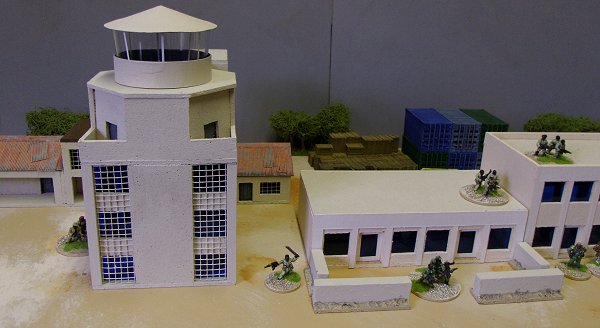
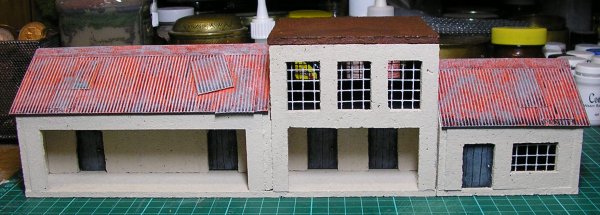
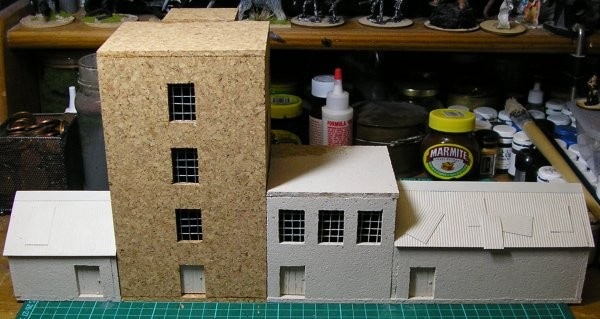
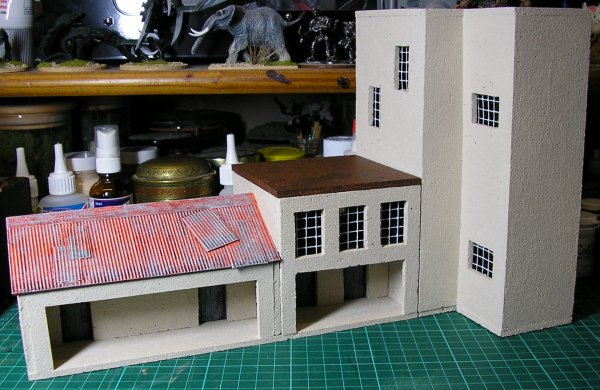
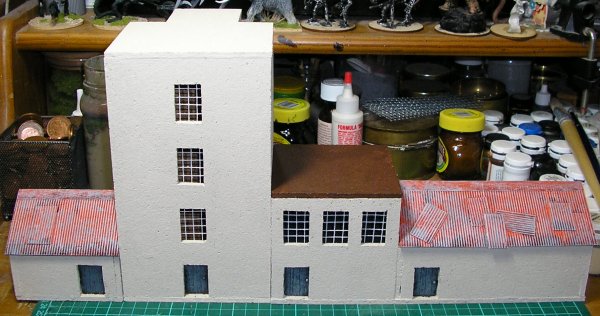
Here's everything together. The back...
...and the front.
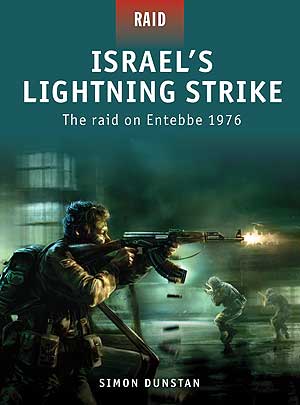
This is the second title in Osprey Publishing’s Raid series.
Having just done some cursory research into the Entebbe raid, or Operation Yonatan as it is now known, I was thrilled to be sent this book from Osprey. I could have really used it when I was building my Entebbe airport as it contains information and photos of the buildings that I didn’t have. There is also a nice looking cutaway drawing of the old terminal and control tower buildings that would have helped me. The text is concisely written and packs quite a bit of subject matter into a low page count. This book follows the standard Osprey remit of being an introduction to a subject with the option given to read up further if you’re interested. As is usual with osprey publications there are many photographs of the people and places involved throughout. From a wargamer’s point of view there is enough meat for this to be a one-stop reference. The bibliography lists eight more publications if you want to read up further. The book opens with an overview of the history of aerial hijacking at the end of which is a two page spread that does a good job of explaining Palestinian paramilitary groups. Although this is a subject with serious ramifications this section reads like the gladiator scene from Life of Brian reeling off a list of the PLO splinter groups, each with ever more ludicrous names and mutually exclusive aims and ideals. Once the background has been established we get to the meat of the book. In the first chapter the hijacking of Air France flight 139 is recounted in detail with a section devoted to each of the first five days. Some of the margins contain hourly timelines for each day showing exactly when significant events happened. Chapter two switches the focus and the details of the next two days at Entebbe are interspersed with a description of the Israeli rescue plans that were being formulated at that time. This chapter contains a single colour plate showing an Israeli paratrooper uniform and a second paratrooper disguised in a Ugandan uniform (luckily the Israelis had lots of these as they’d made them originally). This painting isn’t great but it’s functional, a back view would have been nice but it’s adequate as a painting guide. Chapter three recounts the rescue operation itself. As well as the written description of events there is a good map of the airport, two isometric 3D maps of the operation with added close ups of important parts, the cutaway drawing I mentioned earlier and a map of the area showing the flight to and from that the Hercules transports took. There is also a two page painting showing the assault going in with Lt Col Netanyahu, the Israeli commander, being shot. This isn’t much good from a figure painting point of view as it’s a night scene so the colours are distorted and actually isn’t a very good painting either, It lacks impact and has no focus as it tries to show the whole scene encompassing several groups of attackers doing different things and takes liberties with the timing of events so it can show them all in the same picture. Two separate pictures would have been a better use of the space I feel, one showing the first raiders encountering the terrorists and another showing the fatal wounding of Lt Col Netanyahu. However, this doesn’t detract from the usefulness of the book but nor does it add to it which is a shame. The book ends with an aftermath section that recounts what happened after the raid and updates us on some of the participants followed by a bibliography and an index. Generally it’s a good read and probably worth the money. There are some problems however that prevent this being among Osprey’s best. There are several references to Ma’alot massacre with no explanation as to what it was. It isn’t until several pages after it’s first mentioned that a brief explanation appears in a picture caption, if you’re just reading the text and miss this it becomes very annoying a this mysterious Ma’alot is referred to quite a bit. This niggling annoyance pales into insignificance when compared to the 3D isometric maps. These are the focal point of the book; they each cover a double page spread and show the raid’s progress in detail with arrows and notations etc, a familiar sight to anyone who owns an Osprey campaign title. Well, that is, they should show the raid’s progress in detail with arrows and notations but some bright spark decided that because the raid happened at night they should be painted in night colours. The brightest colour on them is dark blue! This, coupled with the reflections from the glossy paper and the page join running through some of the notations, makes them all but illegible. One map is mislabelled too which adds insult to injury. If these had been done clearly Israel’s Lightning Strike would have been an excellent book that I would happily recommend to anybody even remotely interested in the events at Entebbe. As it is the book loses a lot of its impact and falls short of expectations, a real shame. Israel’s Lightning Strike, The raid on Entebbe 1976: 5/10 President For Life Hasira Kiboko
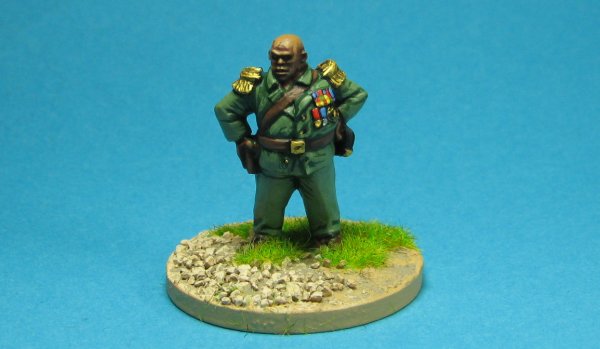
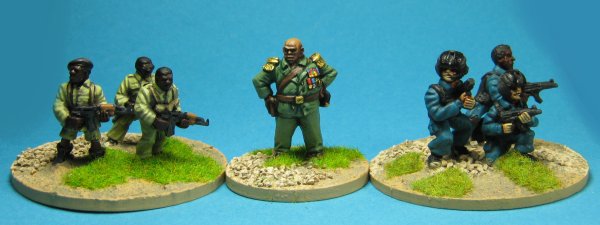
President for Life Hasira Kiboko is the ruler of Babatunde. He uses his imposing height and bulk to bully his subordinates into seeing things his way. His loyal army troops ensure that dissenters are dealt with efficiently. Here is the President next to some TAG and Britannia figures to show his size. He is 35mm tall (32mm to the eye) and fairly thick set (all muscle).
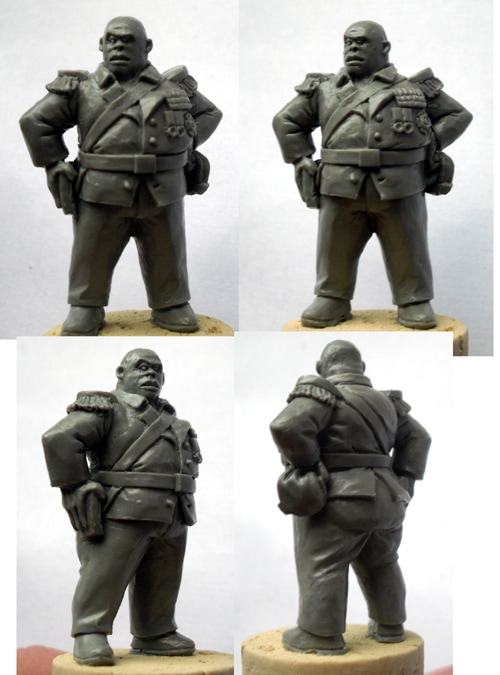
Here is the green, superbly sculpted by Mark Evans.
The President's Family
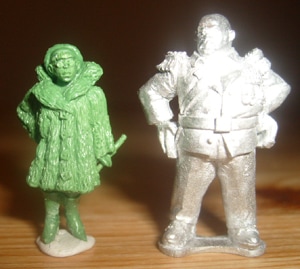
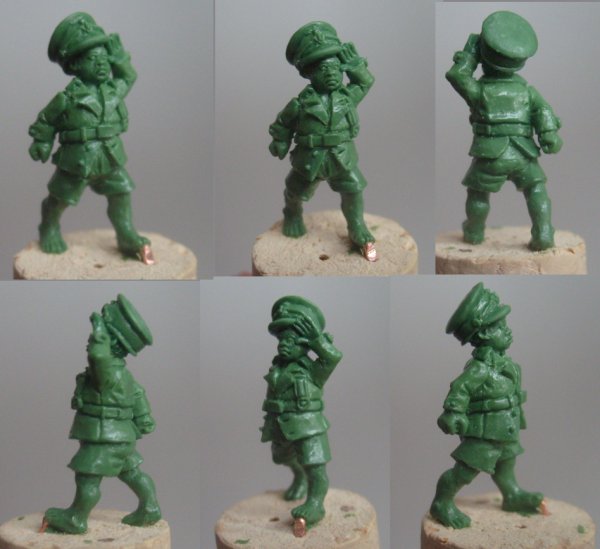
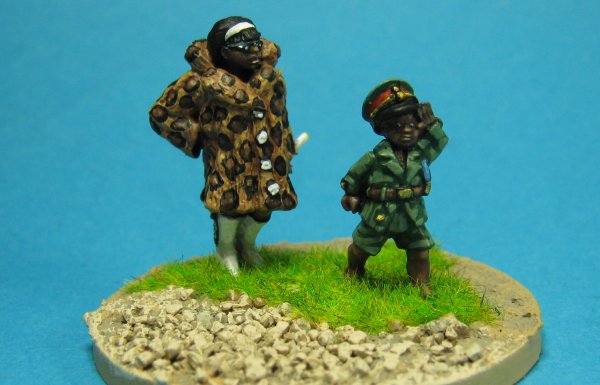
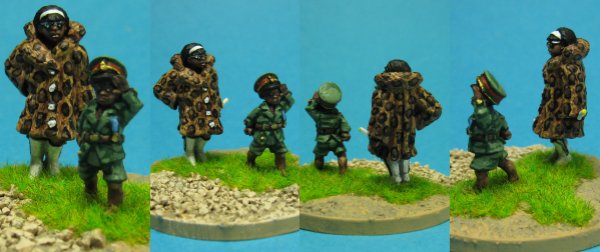
Here is the green for the President's beautiful wife and mother of his young son: And his favourite son Kidogo Baba Wa Watu (Kidogo for short)
Here are Kidogo and his mother Kahawan Bila Maziwa.
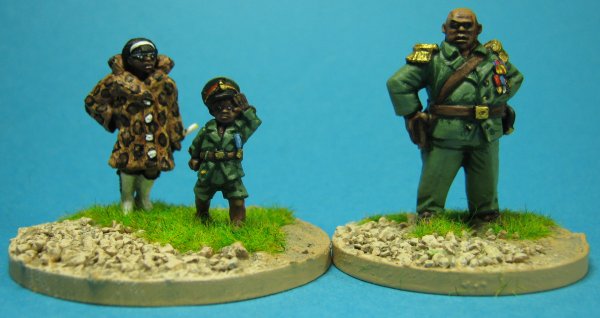
And a family group.
|

